Date
|
Hours
|
Work Log Summary

|
Details
|
10-01-2023
|
2.00
|
Repaired a Leaks in the Leftt Tank 3rd Bay
|
Details
|
")
")
")
|
|
10-01-2023
|
2.00
|
Repaired a Leaks in the Leftt Tank 3rd Bay
|
Details
|
")
")
")
|
|
10-01-2023
|
0.00
|
Repaired a Leaks in the Leftt Tank 3rd Bay
|
Details
|
")
")
")
|
|
02-01-2023
|
1.00
|
Replaced Left Tank Fuel Guardian Sensor
|
Details
|
")
")
|
|
07-19-2022
|
3.00
|
Attached the Rear Spar Inboard Stiffeners
|
Details
|
")
")
")
|
|
07-18-2022
|
4.00
|
Assembled and Drilled W-1007 C/D/E Doublers
|
Details
|
|
|
|
07-17-2022
|
2.00
|
Riveted the Inboard Aileron Hinges together
|
Details
|
|
|
|
07-15-2022
|
2.50
|
Assembled SB 16-03-28 for Inboard Hinge Bracket
|
Details
|
|
|
|
07-09-2022
|
3.50
|
Riveted Ribs to Left Spar
|
Details
|
|
|
|
07-08-2022
|
1.00
|
Inserted Bolt Hardware to the Ribs of the Left Spa
|
Details
|
|
|
|
07-07-2022
|
2.50
|
Clecoed the Ribs to the Left Spar
|
Details
|
|
|
|
07-06-2022
|
2.00
|
Riveted the Flap Hinges to the #3 and #8 Ribs
|
Details
|
|
|
|
07-05-2022
|
10.00
|
Scuffed/Washed/Primed Ribs
|
Details
|
|
|
|
06-24-2022
|
2.50
|
Attached Ribs to Left Spar, Drilled #12 Holes
|
Details
|
|
|
|
06-23-2022
|
1.00
|
Deburred and Smoothed Left Spar Flap Hinge Bracket
|
Details
|
|
|
|
06-21-2022
|
3.00
|
Drilled Torque Tube and Flap Brackets to Ribs
|
Details
|
|
|
|
06-19-2022
|
1.50
|
Dimpled the lower flanges of the right spa ribs
|
Details
|
|
|
|
06-17-2022
|
1.50
|
Dimpled lower flanges of the left spar ribs
|
Details
|
|
|
|
06-16-2022
|
2.50
|
Deburred the edges of the ribs
|
Details
|
|
|
|
06-15-2022
|
4.00
|
Finished Fluting all ribs
|
Details
|
|
|
|
06-14-2022
|
1.00
|
Fluting W-1010 + 1011 + 1012 Ribs
|
Details
|
|
|
|
06-13-2022
|
1.00
|
Separated and Processed W1029 C and W1029D
|
Details
|
|
|
|
06-12-2022
|
0.00
|
Constructed a Wing Tank Cradle
|
Details
|
|
|
|
06-10-2022
|
0.00
|
Removed the RV-8A Left Fuel Tank
|
Details
|
|
|
|
06-09-2022
|
10.00
|
Started/Completed Right Spar Preparation
|
Details
|
|
|
|
06-06-2022
|
2.50
|
Countersunk Holes on Left Spar Flanges
|
Details
|
|
|
|
06-04-2022
|
4.00
|
Riveted the nutplates to the left spar flanges
|
Details
|
|
|
|
06-02-2022
|
3.00
|
Drilled and Countersunk the Left Spar
|
Details
|
|
|
|
06-01-2022
|
2.00
|
Fabricated the J-Channels for the Left Spar
|
Details
|
|
|
|
05-31-2022
|
1.00
|
Reviewed Spar Plans
|
Details
|
|
|
|
05-30-2022
|
1.00
|
Strart of the RV-14A Project
|
Details
|
|
|
|
05-29-2015
|
1.00
|
Mid Cabin Fuselage Flooding
|
Details
|
")
")
")
|
|
01-04-2015
|
0.50
|
Installed Rudder Cable Guides in Aft Fuselage
|
Details
|
")
")
|
|
01-04-2015
|
4.00
|
Aft Fuselage Acccess Pnel Installatin
|
Details
|
")
")
")
|
|
01-02-2015
|
4.00
|
Installed Fuel Pump Access Panel
|
Details
|
")
")
")
|
|
12-22-2014
|
10.00
|
Engine Skipping
|
Details
|
")
")
|
|
09-17-2014
|
1.50
|
Sanded the Awl Fair Around the Oil Door
|
Details
|
|
|
|
09-17-2014
|
1.00
|
Re-Installed the Vertical Power Control Unit
|
Details
|
|
|
|
09-15-2014
|
1.00
|
Filed the Nose Wheel Turn Limiter
|
Details
|
|
|
|
09-13-2014
|
2.00
|
Fitting Oil Door to Cowling
|
Details
|
")
")
|
|
09-12-2014
|
2.00
|
Fit Oil Door to Cowling
|
Details
|
")
")
|
|
09-06-2014
|
1.00
|
Replaced the Left Tank Access Panel Cork Seal
|
Details
|
|
|
|
09-04-2014
|
0.00
|
Engraved Identification Plate Shedding Black Areas
|
Details
|
")
|
|
08-28-2014
|
2.50
|
Autopilot Testing
|
Details
|
|
|
|
08-21-2014
|
2.40
|
Flew Up to Birmingham for Repairman Certificate
|
Details
|
|
|
|
08-14-2014
|
2.00
|
Test Flight With 150# Pax
|
Details
|
|
|
|
08-13-2014
|
1.00
|
Ken Curtis' First Flight
|
Details
|
")
")
|
|
08-12-2014
|
1.00
|
Installed Electrical Terminals Cover
|
Details
|
")
|
|
08-10-2014
|
1.00
|
Karen's Second Flight Over Penacola Beach
|
Details
|
")
")
|
|
08-08-2014
|
1.00
|
Tom's Sunset First Flight Over Pensacola Beach
|
Details
|
")
")
")
|
|
08-06-2014
|
1.00
|
Karen's First Flight in N988RV
|
Details
|
")
|
|
08-03-2014
|
6.00
|
Sanded the Cowling and Squeeged Epoxy Layers
|
Details
|
")
")
|
|
08-01-2014
|
5.50
|
Flew First Long Cross Country Flight
|
Details
|
|
|
|
07-31-2014
|
2.50
|
Installed a Latch In the Oil Door
|
Details
|
|
|
|
07-31-2014
|
1.00
|
First Passenger Flight with Tim
|
Details
|
")
|
|
07-30-2014
|
2.00
|
Creating Cowling Oil Access Door
|
Details
|
")
")
")
|
|
07-30-2014
|
3.50
|
Completed Phase I Flight Test Period
|
Details
|
|
|
|
07-28-2014
|
3.00
|
Landing Peter Prince Airport (2R4)
|
Details
|
|
|
|
07-27-2014
|
2.00
|
Back to Flight Testing After Engine Repair
|
Details
|
|
|
|
07-26-2014
|
2.00
|
Mapped the ECU AFRs According to Instructions
|
Details
|
|
|
|
07-25-2014
|
2.00
|
Attached the Propeller to the Engine
|
Details
|
|
|
|
07-24-2014
|
2.00
|
Calibrated the SDS ECU to the Magnet Position
|
Details
|
|
|
|
07-19-2014
|
3.00
|
PSRU Spline and PSRU Re-installed
|
Details
|
")
")
")
|
|
07-16-2014
|
3.00
|
Re-Built Engine Back on the Aircraft
|
Details
|
")
")
|
|
07-15-2014
|
1.00
|
Working on Main Wheel Fairings Leg Transitions
|
Details
|
")
")
|
|
07-14-2014
|
4.00
|
Replacement Valve Spacers Received
|
Details
|
|
|
|
07-14-2014
|
2.00
|
Installed a Cowl Flap Position Sensor
|
Details
|
")
")
")
|
|
07-09-2014
|
3.00
|
Wet sanded the Cowl Flap and Nose Gear Fairings
|
Details
|
")
|
|
07-08-2014
|
4.00
|
Sanded Cowl Flap and Nose Gear Fairings
|
Details
|
")
|
|
07-07-2014
|
1.00
|
Covered Cowl Flap Exterior with Microballoons
|
Details
|
")
|
|
07-06-2014
|
0.50
|
Sprayed UV Smooth Prime on the Cowling Halves
|
Details
|
")
")
|
|
07-06-2014
|
4.00
|
More Wet Sanding of the Cowling
|
Details
|
|
|
|
07-04-2014
|
4.00
|
Wet Sanded Cowling Epoxy Layers
|
Details
|
")
|
|
07-04-2014
|
2.00
|
Engine Re-assembly Continues
|
Details
|
")
")
|
|
07-03-2014
|
1.00
|
Installed New Valve Spacers and Measured Gaps
|
Details
|
|
|
|
06-27-2014
|
3.00
|
Gears and Timing Chains Installed
|
Details
|
")
|
|
06-27-2014
|
0.25
|
Converted Surface Corrosion on the Flywheel
|
Details
|
")
|
|
06-27-2014
|
3.00
|
Aft Cover in Place
|
Details
|
")
")
")
|
|
06-25-2014
|
2.00
|
Heads on Short Block
|
Details
|
")
")
")
|
|
06-25-2014
|
0.00
|
Got the Heads Back From the Machine Shop
|
Details
|
")
|
|
06-23-2014
|
0.00
|
Received the Replacement Short Block
|
Details
|
")
")
|
|
06-23-2014
|
2.00
|
Brought the Heads In to be Machined
|
Details
|
")
")
|
|
06-22-2014
|
6.00
|
Removed the Heads
|
Details
|
")
")
")
|
|
06-21-2014
|
6.00
|
Disassembled the Engine
|
Details
|
|
|
|
06-20-2014
|
5.00
|
Removed the Engine From the Aircraft
|
Details
|
")
")
")
|
|
06-19-2014
|
2.00
|
Removed the PSRU
|
Details
|
")
")
")
|
|
06-19-2014
|
0.25
|
PSRU Spline Removal From Flywheel Pilot Bearing
|
Details
|
|
|
|
06-18-2014
|
3.00
|
Drained the Coolant and Oil
|
Details
|
|
|
|
06-13-2014
|
1.00
|
Compression Testing of Engine
|
Details
|
")
")
")
|
|
06-12-2014
|
0.00
|
Slow Loss of Oil Pressure
|
Details
|
|
|
|
06-12-2014
|
0.00
|
Fuel Guardian Optical Low Fuel Alert System Test
|
Details
|
|
|
|
06-09-2014
|
1.00
|
Takeoff/Departure Stall Demonstration
|
Details
|
|
|
|
06-09-2014
|
3.00
|
Approach Into Atmore Airport
|
Details
|
|
|
|
06-08-2014
|
2.00
|
Trimmed to Fit and Installed Main Wheel Fairings
|
Details
|
")
")
")
|
|
06-07-2014
|
0.50
|
Replaced the VoiceFlight VAS Switch
|
Details
|
")
|
|
06-05-2014
|
2.00
|
Images of ADS-BTraffic Displayed on EFIS
|
Details
|
|
|
|
06-03-2014
|
0.00
|
Short Flight To Test Fairing Installation
|
Details
|
|
|
|
06-02-2014
|
2.00
|
Installed the Nose Gear/Main Leg Fairings
|
Details
|
")
")
")
|
|
06-01-2014
|
1.00
|
Flight Along Pensacola on a Nice Day
|
Details
|
|
|
|
06-01-2014
|
1.00
|
Clean Stall Sppeed Determination
|
Details
|
|
|
|
06-01-2014
|
2.00
|
Calibrated the Advanced Flight System AoA
|
Details
|
|
|
|
05-30-2014
|
0.00
|
Cowl Flap Operates Well After Reinforcement
|
Details
|
")
")
")
|
|
05-29-2014
|
0.00
|
Wrong Switch for VoiceFlight System
|
Details
|
")
|
|
05-29-2014
|
1.00
|
Reinforced the Engine Cowl Flap
|
Details
|
|
|
|
05-29-2014
|
0.00
|
Fuel Gaurdian PTT/Reset Button Not Working
|
Details
|
|
|
|
05-29-2014
|
0.00
|
Advanced Flight System AoA Has No Audio
|
Details
|
")
|
|
05-23-2014
|
0.00
|
NavWorx ADS-B In/Out GRT Display
|
Details
|
")
|
|
05-22-2014
|
0.00
|
First Flight of N988RV
|
Details
|
|
|
|
05-09-2014
|
1.00
|
Low and Medium Speed Taxi Testing Performed
|
Details
|
|
|
|
05-07-2014
|
0.00
|
Flew 2.3 Hrs in Prep for Transition Training
|
Details
|
|
|
|
05-06-2014
|
1.50
|
Angled the Dual GRT EFISs Upward
|
Details
|
")
")
")
|
|
05-01-2014
|
0.00
|
Complete My BFR and PNFC Checkout
|
Details
|
|
|
|
04-27-2014
|
2.00
|
Secured Interior Panels Post-Inspection
|
Details
|
")
")
")
|
|
04-27-2014
|
1.00
|
Installed Wing Fuselage Gap Channel Seal
|
Details
|
")
")
")
|
|
04-25-2014
|
0.00
|
Flew 1.0 hours in C-172P at PNFC
|
Details
|
|
|
|
04-19-2014
|
2.00
|
Attached Tool Box to Fwd Baggage Comp. Floor
|
Details
|
")
")
")
|
|
04-18-2014
|
2.00
|
Assembled the Van's Practice Toolbox
|
Details
|
")
")
|
|
04-14-2014
|
0.00
|
N988RV Received Its Airworthiness Certificate
|
Details
|
")
|
|
04-12-2014
|
2.00
|
Prepped and Inspected the Aircraft for Inspection
|
Details
|
|
|
|
04-11-2014
|
1.00
|
Made Log Entries Needed for Inspection
|
Details
|
|
|
|
04-11-2014
|
0.00
|
Engine Serial Number
|
Details
|
")
|
|
04-11-2014
|
0.00
|
Documents Notarized for Airworthiness Inspection
|
Details
|
|
|
|
04-11-2014
|
1.00
|
Checked ELT For Expiration Data
|
Details
|
")
")
")
|
|
04-06-2014
|
0.50
|
Installed New Seattle Avionics Maps and Plates
|
Details
|
")
")
")
|
|
04-01-2014
|
0.00
|
Sun 'n Fun through 4/6
|
Details
|
")
")
")
|
|
03-31-2014
|
1.50
|
Installed Tank Brackets on Aft Baggage Lt Sidewall
|
Details
|
")
|
|
03-20-2014
|
2.00
|
Installed Princeton Fuel Senders on Both Tanks
|
Details
|
")
")
")
|
|
03-17-2014
|
2.00
|
Performed Compression and Leak Down Tests
|
Details
|
|
|
|
03-11-2014
|
1.00
|
Taxi Tested Aircraft/Burned In The Brakes
|
Details
|
|
|
|
03-10-2014
|
2.00
|
Completed Weighing the Aircraft
|
Details
|
")
")
")
|
|
03-10-2014
|
0.00
|
Bottom Wing Skin Dent from Jack
|
Details
|
")
")
")
|
|
03-08-2014
|
2.00
|
Fit the Cowl Flap/Adjusted Flap Linkages
|
Details
|
")
")
")
|
|
03-07-2014
|
1.00
|
Installed the Cowl Flap Mechanism on Firewall
|
Details
|
|
|
|
03-06-2014
|
2.00
|
Sanded the Interior Around the Glued NACA Vents
|
Details
|
|
|
|
03-05-2014
|
1.00
|
Need to Change the Fuel Tanks Sender Units
|
Details
|
|
|
|
03-05-2014
|
1.50
|
Glued the NACA Ducts to the Left Cowling Half
|
Details
|
|
|
|
03-04-2014
|
3.00
|
Engine Intake NACA Openings Cut in Lt Cowl Half
|
Details
|
")
")
|
|
03-03-2014
|
2.00
|
Planning Preparation for Engine Intake Inlets
|
Details
|
|
|
|
03-01-2014
|
1.00
|
Glued a Stiffener in the Right Wing Tip
|
Details
|
")
|
|
02-28-2014
|
2.00
|
Started the Pre-Airworthiness Inspection
|
Details
|
|
|
|
02-28-2014
|
1.00
|
Attached the Left Wing Tip Fairing
|
Details
|
")
")
|
|
02-27-2014
|
1.00
|
Installed the Tail Inspection Covers
|
Details
|
|
|
|
02-25-2014
|
2.00
|
Finished Checklists/Setup the G430W & GTX 327
|
Details
|
|
|
|
02-24-2014
|
2.00
|
Entered Checklists into the VP System
|
Details
|
|
|
|
02-23-2014
|
2.00
|
Sanding Cowling/Avionics Setup
|
Details
|
|
|
|
02-22-2014
|
2.00
|
Sanding Cowling/Avionics Setup
|
Details
|
|
|
|
02-20-2014
|
1.50
|
Sanding Cowling/Avionics Setup
|
Details
|
|
|
|
02-18-2014
|
2.00
|
Worked on Setup/Programming of the Avionics
|
Details
|
|
|
|
02-17-2014
|
1.00
|
Secured and Marked Wing to Fuselage Fuel Lines
|
Details
|
|
|
|
02-15-2014
|
3.00
|
Tested Fuel System In Nose Down and Up Positions
|
Details
|
")
")
")
|
|
02-15-2014
|
0.00
|
Tested Fuel System In Nose Down and Up Position
|
Details
|
")
")
|
|
02-14-2014
|
1.00
|
Fabricated Wing Jacking Point Fittings
|
Details
|
")
")
|
|
02-13-2014
|
0.50
|
Awl Fair to Part of Left Cowling
|
Details
|
")
")
|
|
02-13-2014
|
2.00
|
Awl Fair Applied to Right Cowling Half
|
|
")
")
|
|
02-11-2014
|
2.00
|
Tested Fuel Flow in the Level Position
|
Details
|
|
|
|
02-10-2014
|
0.50
|
Registration Number Applied to the Tail
|
Details
|
")
")
|
|
02-10-2014
|
0.25
|
Mounted the Aircraft Data Plate
|
Details
|
")
|
|
02-10-2014
|
0.00
|
Installed Newly Engraved Fuel Caps
|
Details
|
")
|
|
02-10-2014
|
0.25
|
Installed an Extra Data Plate on Last Cabin Bulkhe
|
Details
|
")
")
|
|
02-08-2014
|
0.00
|
Results of Newsgroups Opinions About Gear Chatter
|
Details
|
|
|
|
02-08-2014
|
2.00
|
Had the Propeller Dynamically Balanced
|
Details
|
")
")
")
|
|
02-07-2014
|
2.00
|
Testing the Supply Capability of the Fuel System
|
Details
|
|
|
|
02-07-2014
|
1.00
|
Adjusted the Max and Min Propeller PRM
|
Details
|
")
|
|
01-26-2014
|
1.00
|
Attempted to Adjust the Maximum Propeller Speed
|
Details
|
|
|
|
01-24-2014
|
0.25
|
Mid-Cabin Labels
|
Details
|
")
")
")
|
|
01-24-2014
|
0.10
|
Labelled the Fire Extinguisher Location
|
Details
|
")
")
|
|
01-24-2014
|
0.25
|
Labeled the Throttle
|
Details
|
")
")
|
|
01-24-2014
|
0.50
|
Labeled the Pilot's Control Stick
|
Details
|
")
")
")
|
|
01-24-2014
|
0.25
|
Installed Required Information in the Rear Cockpit
|
Details
|
")
")
|
|
01-23-2014
|
1.00
|
Labeled the Co-Pilot Control Stick
|
Details
|
")
")
")
|
|
01-21-2014
|
1.50
|
Repositioned the Ground Adjustable Rudder Pedals
|
Details
|
")
|
|
01-21-2014
|
1.50
|
Fixed Right Console Switches Problem
|
Details
|
")
")
|
|
01-20-2014
|
1.00
|
Troubleshooting Improper Console Switch Function
|
Details
|
")
")
|
|
01-18-2014
|
1.00
|
Started Engine and Tested Propeller
|
Details
|
")
")
")
|
|
01-16-2014
|
0.50
|
Rewired the Prop Controller Connector
|
Details
|
")
")
|
|
01-15-2014
|
1.00
|
Received the Prop Controller Loaner
|
Details
|
|
|
|
01-13-2014
|
0.00
|
Labeled Center and Left Side of Instrument Panel 3
|
|
")
")
|
|
01-13-2014
|
0.00
|
Labeled Center and Left Side of Instrument Panel 2
|
Details
|
")
")
")
|
|
01-13-2014
|
2.00
|
Labeled Center and Left Side of Instrument Panel
|
Details
|
")
")
")
|
|
01-11-2014
|
2.00
|
Changed the Prop Controller Connector Wiriing
|
Details
|
")
|
|
01-10-2014
|
2.00
|
Tested the Propeller Motor
|
Details
|
")
")
|
|
01-09-2014
|
1.00
|
Labeled the Fuel Guardian and Voice Flight
|
Details
|
")
")
|
|
01-07-2014
|
1.50
|
Installed Tailpipe Hangers
|
Details
|
")
")
|
|
01-06-2014
|
0.00
|
Talked to MT Propeller USA Electric Prop Guru
|
Details
|
|
|
|
01-03-2014
|
2.00
|
Connected Right Wing Tank to Fueage
|
Details
|
")
")
|
|
01-02-2014
|
1.00
|
Installed Wiring Conduit to Cabin Interior Bundles
|
Details
|
")
")
")
|
|
01-02-2014
|
0.50
|
Installed the Halon Fire Extinguisher
|
Details
|
")
")
")
|
|
12-31-2013
|
1.50
|
Replaced Cabin Floor and Pilot Seat Supports
|
Details
|
|
|
|
12-30-2013
|
2.00
|
Installed Lines Between Right Tank and Fuselage
|
Details
|
")
")
|
|
12-29-2013
|
2.00
|
Repaired the Vent Lines at the Fuselage Bulkhead
|
Details
|
")
")
")
|
|
12-26-2013
|
1.00
|
Checked the Propeller Wiring and Voltages
|
Details
|
|
|
|
12-23-2013
|
0.00
|
Called MT Propeller USA
|
Details
|
|
|
|
12-22-2013
|
0.00
|
Installed the MT Propeller 4
|
Details
|
|
|
|
12-22-2013
|
0.00
|
Installed the MT Propeller 3
|
Details
|
")
")
")
|
|
12-22-2013
|
0.00
|
Installed the MT Propeller 2
|
Details
|
")
")
")
|
|
12-22-2013
|
5.00
|
Installed the MT Propeller
|
Details
|
")
")
")
|
|
12-20-2013
|
3.00
|
Tested and Adjusted the Autopilot Roll Servo
|
Details
|
")
")
|
|
12-19-2013
|
0.00
|
Discovered Twisted Fuel Vent Lines Inside Cabin
|
Details
|
|
|
|
12-18-2013
|
1.00
|
Tightened Left Tank Fuel Fittings
|
Details
|
|
|
|
12-17-2013
|
0.25
|
Installed the Fuel Tank Drain Fairings
|
Details
|
")
")
")
|
|
12-17-2013
|
1.00
|
Installed T-Bolt Clamps to the Tailpipe Hangers
|
Details
|
")
")
|
|
12-14-2013
|
0.50
|
Re-Fabricated the Left Tank Supply Line
|
Details
|
")
")
|
|
12-14-2013
|
2.00
|
Attached the Coax Cable to the Bob Archer Antenna
|
Details
|
")
")
|
|
12-11-2013
|
0.50
|
Secured Right Tip Lights Wires Along VOR Antenna
|
Details
|
")
")
|
|
12-11-2013
|
0.50
|
Installed Flaps AN4-11 Bolts and Cotter Pins
|
Details
|
")
")
|
|
12-08-2013
|
0.00
|
Wired the Wing Tip Lights 2
|
Details
|
")
")
")
|
|
12-08-2013
|
2.00
|
Wired the Wing Tip Lights
|
Details
|
")
")
")
|
|
12-07-2013
|
2.00
|
Made Reflective Plates for Nav/Strobe Lights
|
Details
|
")
|
|
12-06-2013
|
4.00
|
Sanded the UV Smooth Prime on the Wing Tips
|
Details
|
|
|
|
12-03-2013
|
1.00
|
Reinstalled Faps and Safety Wired the Hinge Pins
|
Details
|
")
|
|
12-03-2013
|
0.00
|
Checked the Rigging of the Ailerons 2
|
Details
|
")
")
")
|
|
12-03-2013
|
2.00
|
Checked the Rigging of the Ailerons
|
Details
|
")
")
")
|
|
12-02-2013
|
2.50
|
Removed the Mechanical Aileron Stops
|
Details
|
")
|
|
11-30-2013
|
2.00
|
Changed the Flaps' Connecting Rods To Avery's
|
Details
|
")
")
")
|
|
11-28-2013
|
2.00
|
Attached the Wing Tip HID Light Power Supplies
|
Details
|
|
|
|
11-27-2013
|
1.50
|
Installed Terminal Block on End of Each Wing
|
Details
|
")
")
|
|
11-27-2013
|
0.25
|
Found Out the Airbox Sensor Nut Size
|
Details
|
")
")
")
|
|
11-25-2013
|
2.00
|
Installed the Airbox
|
Details
|
")
")
")
|
|
11-25-2013
|
1.00
|
Changed the Taxi Light From Halogen to HID Light
|
Details
|
")
")
")
|
|
11-24-2013
|
3.00
|
Cut and Fit Airbox on the Left Side of Engine
|
Details
|
|
|
|
11-23-2013
|
0.00
|
Installed Tailpipes and Fabricated Muffler Brace 2
|
Details
|
")
|
|
11-23-2013
|
2.50
|
Installed Tailpipes and Fabricated Muffler Brace
|
Details
|
")
")
")
|
|
11-21-2013
|
0.50
|
Installed Rear Spar Bolts
|
Details
|
")
")
")
|
|
11-10-2013
|
2.00
|
Installed Missing Bolts on Each Weldment
|
Details
|
|
|
|
11-09-2013
|
8.00
|
My Plane Got Winged Today!!!
|
Details
|
")
")
")
|
|
11-08-2013
|
8.00
|
Installed Four Close Tolerance Bolts in Each Wing
|
Details
|
|
|
|
10-24-2013
|
2.00
|
The Boys Got the Left Wing Off
|
Details
|
")
|
|
10-22-2013
|
3.00
|
Attempted to Attach the Left Wing
|
Details
|
|
|
|
10-19-2013
|
0.00
|
Rear Stick Boot in Place
|
Details
|
")
")
")
|
|
10-19-2013
|
0.00
|
Moved the Aircraft to the Airport #2
|
Details
|
")
")
")
|
|
10-19-2013
|
0.00
|
Moved Aircraft to the Airport
|
Details
|
")
")
")
|
|
10-17-2013
|
2.00
|
Installed Rudder Fairing & Position Light/Strobe
|
Details
|
")
")
|
|
10-16-2013
|
1.00
|
Installed MT Propeller Brushes and Mount
|
Details
|
")
")
")
|
|
10-15-2013
|
4.00
|
Installed the Cowl Flap Linear Actuator
|
Details
|
")
")
")
|
|
10-14-2013
|
1.00
|
Installed a Replacement VoiceFlight VAS Switch
|
Details
|
")
|
|
10-09-2013
|
3.00
|
Split and Fit Cowling Oil Cooler Duct
|
Details
|
")
")
")
|
|
10-08-2013
|
1.00
|
Attached Oil Cooler Duct Section to Cowling Inlet
|
Details
|
")
")
")
|
|
10-07-2013
|
2.00
|
Update Garmin G430W and the VoiceFlight System
|
Details
|
|
|
|
10-06-2013
|
0.50
|
Tapped One End Of Second cowl Flap Linkage
|
Details
|
|
|
|
10-05-2013
|
2.00
|
Adjusted the length of the Cowl Flap Linkage
|
Details
|
")
")
|
|
10-04-2013
|
2.00
|
Made Cowl Flap Linkage
|
Details
|
")
")
")
|
|
10-03-2013
|
0.00
|
Got Cowl Flap Tube and Arms Back From Welder
|
Details
|
")
")
|
|
10-02-2013
|
1.50
|
Re-attached/Reinforced Coolant Ducts
|
Details
|
")
")
|
|
10-01-2013
|
0.50
|
Took Cowl Flap Tube and Arms to the Welder
|
Details
|
")
|
|
09-30-2013
|
0.50
|
Re-installed the Altenator
|
Details
|
")
")
")
|
|
09-30-2013
|
0.25
|
Re-attached Throttle Cable Support to Throttle Bod
|
Details
|
")
")
|
|
09-30-2013
|
0.50
|
Filled the Engine Oil and Coolant Reservoir
|
Details
|
")
|
|
09-29-2013
|
1.00
|
Re-attached the Fuel Rails and Banjo Connector
|
Details
|
")
")
")
|
|
09-29-2013
|
0.50
|
Re-attached the Coolant Hoses on the Engine Top
|
Details
|
")
")
")
|
|
09-29-2013
|
1.00
|
Adjusted the length of the heater hoses
|
Details
|
")
")
")
|
|
09-28-2013
|
3.00
|
Re-installed the Timing Chain and the Cover
|
Details
|
|
|
|
09-25-2013
|
2.00
|
Installed the Right Cowl Flap Bearing and Doubler
|
Details
|
")
")
")
|
|
09-25-2013
|
1.00
|
Installed Left AVCS Modification on Engine
|
Details
|
")
|
|
09-24-2013
|
1.00
|
Removed Old Sealant From Timing Chain Cover
|
Details
|
")
|
|
09-24-2013
|
1.50
|
Installed the Right Re-worked AVCS Modification
|
Details
|
")
")
")
|
|
09-24-2013
|
2.50
|
Installed Left Cowl Flap Bearing and Doubler
|
Details
|
")
")
")
|
|
09-21-2013
|
2.00
|
Assembled the Cowl Flap Bearings
|
Details
|
")
")
")
|
|
09-19-2013
|
3.00
|
Removed the Timing Chain Cover
|
Details
|
")
")
")
|
|
09-19-2013
|
0.00
|
Removed AVCS from Both Sides of Engine
|
Details
|
")
")
|
|
09-18-2013
|
2.50
|
Started Process to Change the AVCS System Parts
|
Details
|
")
")
|
|
09-17-2013
|
0.50
|
Drilled Hole in Lip Above Oil Cooler Inlet for Nut
|
Details
|
|
|
|
09-16-2013
|
2.00
|
Fine Sanding of the Right Cowling Front Side
|
Details
|
|
|
|
09-15-2013
|
1.00
|
Glass Tacked the Radiator Duct to Glass Box
|
Details
|
|
|
|
09-14-2013
|
1.00
|
Riveted the Cowl Flap Hinge to Cowling
|
Details
|
")
")
")
|
|
09-14-2013
|
1.00
|
Made a Glass Box on the Interior of the Radiators
|
Details
|
")
|
|
09-14-2013
|
1.00
|
Glassed a Lip Across the Cowling Split
|
Details
|
")
|
|
09-14-2013
|
0.50
|
Drilled a Cotter Pin Hole in the Nose Gear
|
Details
|
")
")
|
|
09-14-2013
|
1.00
|
Attached Stiffeners to the Cowl Flap Opening
|
Details
|
")
")
|
|
09-13-2013
|
1.50
|
Glassed the Cooling Duct to the Cowling Opening
|
Details
|
")
")
")
|
|
09-12-2013
|
3.00
|
Applied Glass to Forward End of Cooling Ducts
|
Details
|
")
")
|
|
09-10-2013
|
3.00
|
Applied 9 Oz Glass Layer Over Part of Honeycomb
|
Details
|
")
")
")
|
|
09-09-2013
|
3.00
|
Applied 9 Oz Glass Layer Over Part of Honeycomb
|
Details
|
|
|
|
09-08-2013
|
4.00
|
Applied 9 Oz Glass Layer Over Part of Honeycomb
|
Details
|
")
")
|
|
09-07-2013
|
3.00
|
Installing Honeycomb to the Cowling Interior
|
Details
|
")
")
")
|
|
09-06-2013
|
3.00
|
Applied Nomex Honeycomb to the Cowling Interior
|
Details
|
")
")
|
|
09-04-2013
|
6.00
|
Applied One Layer 9 Oz Glass to Cowling Interior
|
Details
|
")
|
|
09-03-2013
|
3.00
|
Sanded the Interior of the Cowling
|
Details
|
")
")
|
|
09-02-2013
|
3.50
|
Witness Sanded the Cowling and Re-applied Micro
|
Details
|
|
|
|
08-31-2013
|
1.50
|
Sanding the Oil Cooler Inlet Shape
|
Details
|
")
")
|
|
08-31-2013
|
1.50
|
Finished Installation of the Empennage Fairings
|
Details
|
")
")
")
|
|
08-30-2013
|
2.00
|
Sanding Oil Cooler Inlet and Left Bottom of Cowlin
|
Details
|
|
|
|
08-30-2013
|
2.00
|
Installing Empennage Fairings
|
Details
|
")
")
")
|
|
08-30-2013
|
0.00
|
Installed Empennage Fairings
|
Details
|
")
")
")
|
|
08-29-2013
|
2.00
|
Fit the Cowl Flap to the Cowling
|
Details
|
")
")
")
|
|
08-28-2013
|
2.00
|
Washed Fiberglass Dust Off of Aircraft
|
Details
|
")
")
")
|
|
08-27-2013
|
2.00
|
Sanding and Shaping of the Cowling
|
Details
|
|
|
|
08-26-2013
|
2.00
|
Sanding and Shaping of the Cowling
|
Details
|
|
|
|
08-25-2013
|
2.00
|
Sanding and Shaping of the Cowling
|
Details
|
|
|
|
08-24-2013
|
2.00
|
Sanding and Shaping of the Cowling
|
Details
|
|
|
|
08-23-2013
|
2.00
|
Sanding and Shaping of the Cowling
|
Details
|
|
|
|
08-22-2013
|
2.00
|
Sanding and Shaping of the Cowling
|
Details
|
|
|
|
08-21-2013
|
2.00
|
Sanding and Shaping of the Cowling
|
Details
|
|
|
|
08-20-2013
|
2.00
|
Sanding and Shaping of the Cowling
|
Details
|
|
|
|
08-19-2013
|
5.00
|
Sanded the Top, Front Cone and Sides
|
Details
|
")
")
|
|
08-18-2013
|
3.00
|
Installed Three Skybolts on Lower Front of Cowling
|
Details
|
")
")
")
|
|
08-18-2013
|
0.00
|
Cowling Bottom Front Skybolts in Place
|
Details
|
")
")
")
|
|
08-17-2013
|
4.00
|
Drilled the Cowling Holes for the Skybolt Fastener
|
Details
|
")
")
|
|
08-16-2013
|
2.00
|
Sanded the Nose Ring and Re-applied Micro
|
Details
|
")
")
")
|
|
08-15-2013
|
0.50
|
Sanded the Cowling Level with the Firewall
|
Details
|
")
|
|
08-15-2013
|
3.00
|
Installed the Firewall Skybolt Fasteners
|
Details
|
")
")
")
|
|
08-15-2013
|
1.00
|
Applied 2 Layers of Glass to the Cowling Nose Ring
|
Details
|
")
")
")
|
|
08-14-2013
|
2.00
|
Tacked the Cowling Nose Ring to the Cowling
|
Details
|
")
")
")
|
|
08-13-2013
|
3.00
|
Made a Form for Making a New Cowling Nose Ring
|
Details
|
")
")
")
|
|
08-13-2013
|
1.00
|
Layed Some Glass Mat on Cowling Rt Firewall Edge
|
Details
|
")
")
|
|
08-12-2013
|
1.50
|
Reinforced the Cowling Firewall Edge
|
Details
|
|
|
|
08-12-2013
|
1.00
|
Finish Sanded the Empennage Fairing
|
Details
|
|
|
|
08-11-2013
|
2.00
|
Sprayed on UV Smooth Prime to Empennage Fairings
|
Details
|
|
|
|
08-11-2013
|
2.00
|
Applied UV Smooth Prime to Empennage Fairings
|
Details
|
|
|
|
08-10-2013
|
2.50
|
Sanded the Empennage Fqirings
|
Details
|
|
|
|
08-10-2013
|
1.00
|
Sanded and Re-applied Micro to Rt Side of Cowling
|
Details
|
|
|
|
08-09-2013
|
3.00
|
Worked on the Fit on Both Side of the Cowling
|
Details
|
")
")
")
|
|
08-09-2013
|
1.00
|
Applied Awl Fair to the Empennage Fairings
|
Details
|
")
")
|
|
08-08-2013
|
4.00
|
Applied Micro to Cowling Right Aft Lower Corner
|
Details
|
")
")
|
|
08-07-2013
|
3.00
|
Altered the Fit of Cowling Right Lower Aft Corner
|
Details
|
")
|
|
08-06-2013
|
6.00
|
Cut the Cowling Aft Edge To Match the Firewall
|
Details
|
")
")
")
|
|
08-05-2013
|
4.00
|
Drilled & Riveted Skybolt Brackets to the Firewall
|
Details
|
|
|
|
08-04-2013
|
0.50
|
Started to Position the Skybolt Fastener Brackets
|
Details
|
")
|
|
08-04-2013
|
0.50
|
Re-installed the Cleaned and Balanced Injectors
|
Details
|
|
|
|
08-04-2013
|
0.25
|
Re-Attached the Nose Wheel with New Bearings
|
Details
|
|
|
|
08-04-2013
|
3.00
|
Moved the Coolant Tank Medially and Forward
|
Details
|
")
")
")
|
|
08-03-2013
|
0.00
|
Return from Oshkosh
|
Details
|
|
|
|
07-29-2013
|
0.00
|
Oshkosh!
|
Details
|
|
|
|
07-26-2013
|
1.00
|
Pulled the Injectors and Sent for Cleaning
|
Details
|
|
|
|
07-24-2013
|
2.00
|
Fine Sanding of Cowling on the Aircraft.
|
Details
|
|
|
|
07-23-2013
|
2.00
|
Continued Sanding the Cowling Off of the Aircraft
|
Details
|
|
|
|
07-22-2013
|
2.50
|
Sanded the Bottom Front of the Cowling
|
Details
|
|
|
|
07-20-2013
|
2.50
|
Sanding of the Front of the Cowling
|
Details
|
|
|
|
07-19-2013
|
1.00
|
Lightly Sanded the Front Outboard of the Inlets
|
Details
|
|
|
|
07-18-2013
|
3.00
|
Sanded the Front of the Cowling
|
Details
|
|
|
|
07-17-2013
|
3.00
|
More Sanding of the Cowling Top
|
Details
|
|
|
|
07-15-2013
|
4.00
|
Sanded Cowling Top and Front with Fine Sponge
|
Details
|
|
|
|
07-14-2013
|
3.00
|
Rough Sanded Micro on about 2/3 of Cowling
|
Details
|
|
|
|
07-13-2013
|
2.00
|
Applied Micro Over the Entire Cowling Top & Sides
|
Details
|
")
")
")
|
|
07-12-2013
|
3.00
|
Fine Sanded Micro on Entire Cowling Top
|
Details
|
")
|
|
07-11-2013
|
3.00
|
Fine Sanded the Right Forward Corner
|
Details
|
|
|
|
07-10-2013
|
4.00
|
Sanded the Cowling Top, Re-applied Light Micro
|
Details
|
|
|
|
07-09-2013
|
3.00
|
Sanded the Cowling Top and Re-applied Micro
|
Details
|
")
")
")
|
|
07-08-2013
|
2.00
|
Sanded Cowling Top Forward Corner
|
Details
|
")
")
|
|
07-06-2013
|
1.50
|
Shaped and Installed the Canopy Handle
|
Details
|
")
")
")
|
|
07-06-2013
|
1.50
|
Sanded the Top and Sides of the Cowling
|
Details
|
")
")
|
|
07-04-2013
|
2.00
|
Installed the Flanges and Pins for the Skybolts
|
Details
|
")
")
|
|
07-03-2013
|
6.00
|
Sanded Cowling and Installed Skybolt Fasteners
|
Details
|
")
|
|
07-02-2013
|
8.00
|
Sanded the Front and Sides of the Cowling
|
Details
|
")
")
")
|
|
07-01-2013
|
2.00
|
Sanded Left Side and Bottom of the Cowling
|
Details
|
|
|
|
06-30-2013
|
3.00
|
Sanded and Re-Applied Filler
|
Details
|
|
|
|
06-29-2013
|
3.00
|
Sanded and Re-Applied Filler
|
Details
|
|
|
|
06-28-2013
|
2.50
|
Sanded the Contour of the Cowling Forward Bottom
|
Details
|
|
|
|
06-27-2013
|
3.00
|
Sanded Cowling Bottom and Forward Corners
|
Details
|
|
|
|
06-26-2013
|
4.00
|
Sanded the Right Forward Bottom Corner
|
Details
|
")
")
")
|
|
06-25-2013
|
3.00
|
Sanded the Bottom Forward Corners of the Cowling
|
Details
|
|
|
|
06-24-2013
|
3.00
|
Sanded the Bottom Forward Corners of the Cowling
|
Details
|
")
")
")
|
|
06-22-2013
|
3.00
|
Fit the Nose Gear Fairings
|
Details
|
")
")
")
|
|
06-21-2013
|
1.00
|
Sized the Nose Gear Leg Fairing
|
Details
|
|
|
|
06-20-2013
|
3.00
|
Sanded Cowling Bottom and Forward Corners
|
Details
|
|
|
|
06-18-2013
|
3.00
|
Cut and Removed the Forward Half of the Hinge
|
Details
|
")
")
|
|
06-17-2013
|
2.00
|
Installed the Hinge in the Bottom of the Cowling
|
Details
|
")
|
|
06-15-2013
|
3.00
|
Sanded Hinge Edges While on the Aircraft
|
Details
|
")
")
|
|
06-14-2013
|
1.00
|
Applied Micro/Flox/Epoxy to Bottom Hinge Lines
|
Details
|
")
")
|
|
06-13-2013
|
5.00
|
Glassed Cooling Inlet Flanges
|
Details
|
")
")
")
|
|
06-12-2013
|
2.50
|
Cut Opening for the Cowl Flap
|
Details
|
")

")
|
|
06-11-2013
|
2.00
|
Glassed the Bottom Centerline With 3 Plys of Glass
|
Details
|
")
")
|
|
06-10-2013
|
1.00
|
Applied 9 Oz. 8 Harness Glass to Oil Cooler Inlet
|
Details
|
")
")
")
|
|
06-09-2013
|
0.50
|
Tried to Install an Already Modified Rear Boot Cov
|
Details
|
|
|
|
06-09-2013
|
4.00
|
Sanded Micro on Oil Cooler Inlet
|
Details
|
")
")
")
|
|
06-09-2013
|
0.50
|
Re-Installed Modified Pilot Lap Belts
|
Details
|
")
|
|
06-09-2013
|
0.50
|
Installed the Oxygen Outlet for the Passenger
|
Details
|
")
")
|
|
06-08-2013
|
5.00
|
Shaping Oil Cooler Inlet
|
Details
|
")
")
")
|
|
06-07-2013
|
6.00
|
Sanding and Fitting Oil Cooler Inlet Box
|
Details
|
|
|
|
06-06-2013
|
4.00
|
Shaped Oil Cooler Inlet Box Form
|
Details
|
")
")
|
|
06-05-2013
|
5.00
|
Cut, Sanded and Shaped the Oil Cooler Inlet Plug
|
Details
|
")
|
|
06-04-2013
|
2.00
|
Glued Layers of Pink Styrofoam Sheet Together
|
Details
|
|
|
|
06-03-2013
|
1.50
|
Drilled Attachment Holes for the Oil Cooler Duct
|
Details
|
|
|
|
06-02-2013
|
1.00
|
Built up the Oil Cooler Duct Flange with 9 oz glas
|
Details
|
|
|
|
06-01-2013
|
2.00
|
Riveted the Hinge Half to the Left Cowling Half To
|
Details
|
")
")
|
|
05-31-2013
|
2.00
|
Drilled the Left Cowling Half Top Hinge to Cowling
|
Details
|
")
")
|
|
05-30-2013
|
2.00
|
Cut and Sanded the Left Cowling Top Center Line
|
Details
|
")
|
|
05-27-2013
|
2.00
|
Attached Hinge Half to the Right Cowling Half
|
Details
|
")
|
|
05-26-2013
|
2.00
|
Cut Right Cowling Half Top Center Line Edge
|
Details
|
")
|
|
05-25-2013
|
1.50
|
Applied 3 More Layers of Glass to the Front Corner
|
Details
|
")
|
|
05-24-2013
|
3.50
|
Applied Clay to Cowling Front Bottom Corners
|
Details
|
|
|
|
05-23-2013
|
1.50
|
Installed Aluminum Strips for Backing to Corners
|
Details
|
")
")
|
|
05-22-2013
|
3.00
|
Worked on Right Side Bottom Relieving Stresses
|
Details
|
")
")
|
|
05-21-2013
|
3.00
|
Worked on Shaping the Bottom Front Of Cowling
|
Details
|
")
")
")
|
|
05-20-2013
|
3.00
|
Re-did the Left Cowling Opening Using Styrofoam
|
Details
|
")
")
|
|
05-18-2013
|
2.00
|
Cut and Sanded the Foam, Applies Clay and Micro
|
Details
|
")
")
|
|
05-17-2013
|
1.00
|
Used Spray Foam to Fill the Void for Shaping
|
Details
|
")
|
|
05-16-2013
|
2.00
|
Cut the Left Side From Firewall to Front Corner
|
Details
|
")
|
|
05-15-2013
|
2.00
|
Centerline Split the Bottom of the Cowling
|
Details
|
")
")
|
|
05-14-2013
|
3.00
|
Applied 3 Layers of Glass to the Cowling Bottom
|
Details
|
|
|
|
05-13-2013
|
3.00
|
Finished Molding Clay, Applied 2 Ply 9 oz Glass
|
Details
|
")
")
|
|
05-12-2013
|
4.00
|
Cut Front Bottom Cowling, Installed Foam Sheets
|
Details
|
|
|
|
05-10-2013
|
3.00
|
Layed 2 Ply 9oz Glass Transverse the Cowl Bottom
|
Details
|
")
")
")
|
|
05-10-2013
|
1.50
|
Apply 2 ply 9oz Glass to Cowling Aft Bottom
|
Details
|
")
")
|
|
05-09-2013
|
1.50
|
Shaped the Foam Frame for the Cowling Bottom
|
Details
|
")
|
|
05-07-2013
|
1.00
|
Assembled Foam Framing to Shape Cowling Bottom
|
Details
|
")
")
|
|
05-05-2013
|
1.00
|
Made Some Relief Cuts in the Cowling Bottom
|
Details
|
")
")
|
|
05-02-2013
|
2.00
|
Got the Cowling Sides Attached to the Firewall
|
Details
|
")
")
")
|
|
05-02-2013
|
0.00
|
Got the Cowling Sides Attached to the Firewall
|
Details
|
")
")
")
|
|
05-01-2013
|
0.00
|
Fit the Cowling Halves to the Prop Disc and Firewa
|
Details
|
")
")
")
|
|
05-01-2013
|
0.00
|
Fit the Cowling Halves to the Prop Disc and Firewa
|
Details
|
")
")
")
|
|
05-01-2013
|
0.00
|
Fit the Cowling Halves to the Prop Disc and Firewa
|
Details
|
")
")
")
|
|
05-01-2013
|
4.00
|
Fit the Cowling Halves to the Prop Disc and Firewa
|
Details
|

")
")
|
|
04-28-2013
|
2.00
|
Primer Painted Windscreen Fairing and Skirt
|
Details
|
")
")
")
|
|
04-26-2013
|
2.00
|
Made a 13.5" Prop Disc for Mounting the Cowling
|
Details
|
")
")
|
|
04-24-2013
|
1.50
|
Sanded the Windscreen Transitions
|
Details
|
")
")
|
|
04-21-2013
|
2.00
|
Sanding and Re-Application Of UV Smooth Prime
|
Details
|
|
|
|
04-20-2013
|
2.00
|
Sanded and Re-Applied UV Smooth Prime
|
Details
|
|
|
|
04-19-2013
|
2.00
|
Sanded UV Smooth Prime then Re-Sprayed
|
Details
|
|
|
|
04-18-2013
|
1.00
|
Sprayed 3 Coats of UV Smooth Prime
|
Details
|
")
")
|
|
04-17-2013
|
3.00
|
Final Wet Sanding of the Epoxy Coated Skirts
|
Details
|
")
")
|
|
04-15-2013
|
2.50
|
Wet Sanded the Skirts to 400 Grit
|
Details
|
")
")
|
|
04-08-2013
|
1.50
|
Applied 3 Coats of Straight Epoxy
|
Details
|
")
")
")
|
|
04-07-2013
|
1.00
|
Sanded the Transition Around the Handle
|
Details
|
|
|
|
04-06-2013
|
3.00
|
Glued Canopy Shut!
|
Details
|
")
")
|
|
04-05-2013
|
2.00
|
Sanded the Handle Fiberglass Tube to Length
|
Details
|
")
|
|
04-03-2013
|
3.00
|
Sanded the Right and Left Windscreen Transitions
|
Details
|
")
")
")
|
|
04-02-2013
|
2.50
|
Sanded Right and Left Transition Areas
|
Details
|
|
|
|
04-01-2013
|
3.00
|
Sanded Right Transition, Re-applied Flox Mixture
|
Details
|
")
")
|
|
03-30-2013
|
6.00
|
Sanded the Right Side Canopy Skirt Transition
|
Details
|
")
")
")
|
|
03-29-2013
|
4.00
|
Applied Fiberglass and Carbon Fiber to Windscreen
|
Details
|
")
")
|
|
03-28-2013
|
2.50
|
Pulled the Tape and Plastic Off Windscreen
|
Details
|
")
")
")
|
|
03-27-2013
|
2.50
|
?Final Sanded Windscreen Fairing
|
Details
|
|
|
|
03-26-2013
|
1.50
|
Sanded Windscreen Fairing and Spot Epoxied
|
Details
|
|
|
|
03-25-2013
|
1.00
|
Light Sanding of Windscreen Fairing with 150 Grit
|
Details
|
|
|
|
03-24-2013
|
2.00
|
Sanded and Filled Fairing Epoxy Coating
|
Details
|
|
|
|
03-23-2013
|
3.00
|
Sanded the Epoxy Top Coat, Filled and Re-sanded
|
Details
|
")
")
|
|
03-21-2013
|
3.00
|
Detail Sanded Fairing, Applied Black Epoxy Coat
|
Details
|
")
")
|
|
03-20-2013
|
3.00
|
Sanded to Bottom Yellow Tape Layer
|
Details
|
|
|
|
03-19-2013
|
3.00
|
Spot Sanded, Spot Filled and Re-Sanded
|
Details
|
|
|
|
03-18-2013
|
4.00
|
Sanded Down to the Orange Tape
|
Details
|
")
")
|
|
03-17-2013
|
2.00
|
Sanded Down to White Tape Again
|
Details
|
|
|
|
03-16-2013
|
5.00
|
Sanded down to the Orange Tape
|
Details
|
")
")
|
|
03-15-2013
|
0.00
|
2nd Sanding of Fairing to Shape 2
|
Details
|
")
")
|
|
03-15-2013
|
3.00
|
2nd Sanding of Fairing to Shape
|
Details
|
")
")
")
|
|
03-14-2013
|
6.00
|
Sanded Entire Windscreen Fairing
|
Details
|
")
")
")
|
|
03-13-2013
|
1.00
|
Applied Blackened Epoxy/Microballoon/Flox
|
Details
|
")
")
")
|
|
03-12-2013
|
2.50
|
Sanded the Bow of the Windscreen Fairing
|
Details
|
")
")
")
|
|
03-11-2013
|
1.50
|
Sanded the Right Bottom of Windscreen Fairing
|
Details
|
")
")
|
|
03-10-2013
|
1.50
|
Sanded the Left Side of Bottom Fairing Layup
|
Details
|
")
")
")
|
|
03-09-2013
|
0.50
|
Separated the Canopy from the Bow Fiberglass
|
Details
|
")
")
")
|
|
03-08-2013
|
3.00
|
Glassed the Bow of the Windscreen
|
Details
|
")
")
")
|
|
03-07-2013
|
3.00
|
Glassed the Bottom of the Windscreen Fairing
|
Details
|
")
")
")
|
|
03-06-2013
|
1.00
|
Sanded the Fillet and the Filler
|
Details
|
")
")
")
|
|
03-05-2013
|
3.50
|
Sanded Top Skin and Windscreen With 60 Grit
|
Details
|
")
")
|
|
03-04-2013
|
3.00
|
Taped the Windscreen, Top Skin & Canopy
|
Details
|
")
")
")
|
|
03-02-2013
|
1.00
|
Drilled the Canopy Frame/Rollers Attachment Holes
|
Details
|
")
")
|
|
03-01-2013
|
3.50
|
Rough Shaped and Fit the Canopy Handle to Skirt
|
Details
|
")
")
")
|
|
03-01-2013
|
0.00
|
Rough Shaped and Fit the Canopy Handle to Skirt
|
Details
|
")
")
")
|
|
02-27-2013
|
2.00
|
Removed Tape and Residue from the Right Side
|
Details
|
")
")
|
|
02-26-2013
|
1.00
|
Touchup Painted the Interior of the Canopy Skirt
|
Details
|
|
|
|
02-26-2013
|
2.00
|
Removed Tape and Residue on the Aft Top Skin
|
Details
|
")
|
|
02-25-2013
|
1.00
|
Added Cosmetic Layer to the Windscreen
|
Details
|
|
|
|
02-24-2013
|
2.00
|
Glued the Windscreen in Place with SikaFlex
|
Details
|
")
")
")
|
|
02-24-2013
|
2.00
|
Glued the Canopy Skirts with SikaFlex
|
Details
|
")
")
")
|
|
02-24-2013
|
0.00
|
Glued Skirt to Canopy Frame
|
Details
|
")
")
")
|
|
02-23-2013
|
3.50
|
Primed and Top Coat Painted the Inside of Skirt
|
Details
|
|
|
|
02-22-2013
|
2.00
|
Taped the Windscreen,Bow,Top Skin for SikaFlex
|
Details
|
")
")
|
|
02-18-2013
|
2.00
|
Super Glued 1/8" Spacers to the Rollover Bar
|
Details
|
")
")
")
|
|
02-16-2013
|
2.00
|
Installed Baggage Door Latch Blocks
|
Details
|
")
")
")
|
|
02-16-2013
|
1.00
|
Installed "SeaDog SS Hatch Spring" Door Stay
|
Details
|
")
")
")
|
|
02-15-2013
|
1.00
|
Installed Baggage Door Lock and Latch Bars
|
Details
|
")
")
|
|
02-15-2013
|
0.50
|
Fire Barrier Sealed Top Skin/Firewall Union
|
Details
|
")
")
")
|
|
02-15-2013
|
1.00
|
Drilled/Riveted Top Skin Support Ribs
|
Details
|
")
")
|
|
02-15-2013
|
2.00
|
Drilled and Riveted Baggage Door Hinge
|
Details
|
")
")
|
|
02-13-2013
|
0.50
|
Sent the Pilot Lap Belt To Hooker for Short Anchor
|
Details
|
")
")
")
|
|
02-13-2013
|
2.00
|
Riveted the Right F-804N Bulkhead Cap
|
Details
|
")
|
|
02-11-2013
|
1.00
|
Wet Sanded the Glare Shield and Re-painted
|
Details
|
|
|
|
02-10-2013
|
1.50
|
Installed Hand Holds in the Rollover Bar
|
Details
|
")
")
")
|
|
02-10-2013
|
1.00
|
Fit the Windscreen to the Rollover Bar
|
Details
|
|
|
|
02-09-2013
|
1.00
|
Wet Sanded the Forward Top Skin Glare Shield
|
Details
|
")
|
|
02-07-2013
|
0.50
|
Installed the Instrument Panel LED Light Strip
|
Details
|
")
")
|
|
02-06-2013
|
1.50
|
Painted the Fwd Top Skin Glare Shield Flat Black
|
Details
|
|
|
|
02-03-2013
|
5.00
|
Riveted The Forward Top Skin
|
Details
|
")
")
|
|
02-02-2013
|
0.25
|
Secured the GPS Antennae
|
Details
|
")
")
")
|
|
02-02-2013
|
0.00
|
Rear Seat Belt Installation
|
Details
|
")
")
|
|
02-02-2013
|
2.00
|
Installed the Rear Seat Back and Seat Belts
|
Details
|
")
")
")
|
|
02-02-2013
|
1.00
|
Installed the Flaps Actuator Bar
|
Details
|
")
")
|
|
02-02-2013
|
1.50
|
Adjusted the Rear Seat Heater Harness Mounting
|
Details
|
|
|
|
02-01-2013
|
3.00
|
Installed Aft Baggage Compartment Shelf
|
Details
|
")
")
")
|
|
01-31-2013
|
2.50
|
Installed Large Stein's Passenger Vent Outlet
|
Details
|
")
")
")
|
|
01-30-2013
|
1.00
|
Painted the Glare Shield of the Forward Top Skin
|
Details
|
")
")
|
|
01-29-2013
|
4.00
|
Configured GRT EFISs for ADS-B
|
Details
|
|
|
|
01-28-2013
|
2.00
|
Secured the Anchor Block to F-807-1 Bulkhead
|
Details
|
")
")
")
|
|
01-28-2013
|
1.00
|
Called NavWorx
|
Details
|
|
|
|
01-27-2013
|
2.00
|
NavWorx ADS-B Configuration
|
Details
|
|
|
|
01-24-2013
|
1.00
|
Tapped Andair Fuel Selector Bolt Holes to AN4
|
Details
|
")
")
")
|
|
01-24-2013
|
2.00
|
Installed the F-829-1 Front Seat Floor
|
Details
|
")
|
|
01-23-2013
|
3.00
|
Installed the F-830-1 Left Seat Floor
|
Details
|
")
")
|
|
01-22-2013
|
0.75
|
Installed Rear Passenger Vent Tubing
|
Details
|
")
")
")
|
|
01-22-2013
|
3.00
|
Installed F-831-1 Right Seat Floor
|
Details
|
|
|
|
01-21-2013
|
0.00
|
Installed the Heated Seats' Harnesses 2
|
Details
|
")
")
")
|
|
01-21-2013
|
4.00
|
Installed the Heated Seats' Harnesses 1
|
Details
|
")
")
")
|
|
01-18-2013
|
2.00
|
Removed the Floor Panels
|
Details
|
|
|
|
01-18-2013
|
2.00
|
Removed Cabin Floor Panels
|
Details
|
|
|
|
01-17-2013
|
1.50
|
Painted Miscellaneous Fuselage Parts
|
Details
|
|
|
|
01-16-2013
|
1.50
|
Installed Tiedowns on Aft Baggage Compartment
|
Details
|
|
|
|
01-14-2013
|
1.00
|
Painted the Interior Surface of Forward Top Skin
|
Details
|
|
|
|
01-13-2013
|
1.50
|
Painted Fwd Baggage Shelf and Access Panels
|
Details
|
|
|
|
01-12-2013
|
1.00
|
Drilled Electrical Bay Cover & Shelf for Nutplates
|
Details
|
|
|
|
01-10-2013
|
2.50
|
Fabricated Forward Electrical Compartment Cover
|
Details
|
")
")
")
|
|
01-06-2013
|
2.00
|
Wired the Instrument Panel LED Light Strip
|
Details
|
")
")
")
|
|
01-06-2013
|
1.00
|
Garmin GPS 18x is Working Great
|
Details
|
")
")
|
|
01-05-2013
|
3.00
|
Installed VoiceFlight USB Update Port
|
Details
|
")
")
")
|
|
01-02-2013
|
0.00
|
Riveted the Access Panel Rings to Top Skin - 1
|
Details
|
")
")
")
|
|
01-02-2013
|
1.00
|
Riveted the Access Panel Rings to Top Skin
|
Details
|
")
")
")
|
|
01-02-2013
|
1.50
|
Bent to Fit the Avionics Access Panels Covers
|
Details
|
")
")
|
|
01-01-2013
|
1.00
|
ProSeal Applied Between the Top Skin and Ring
|
Details
|
|
|
|
12-29-2012
|
2.00
|
Fabricated Cover for Right Avionics Access Panel
|
Details
|
")
|
|
12-29-2012
|
4.00
|
Drilled, Deburred, Countersunk Access Panel Parts
|
Details
|
")
")
")
|
|
12-28-2012
|
4.00
|
Made a Cover for the Left Side Access Panel
|
Details
|
")
")
")
|
|
12-27-2012
|
2.00
|
Match Drilled the Access Panel Reinforcement
|
Details
|
")
")
")
|
|
12-26-2012
|
3.00
|
Fabricated Reinforcement Ring for Access Panels
|
Details
|
")
")
|
|
12-25-2012
|
1.50
|
Filed the Edges of the Forward Access Panels
|
Details
|
")
")
|
|
12-25-2012
|
0.00
|
Discovered Geometry of theTwo Panels Differ
|
Details
|
")
")
")
|
|
12-24-2012
|
1.00
|
Cut the Radius in Corners of the Access Openings
|
Details
|
|
|
|
12-23-2012
|
1.00
|
Cut Forward Top Skin Access Openings
|
Details
|
")
")
|
|
12-22-2012
|
1.50
|
Fit Windscreen Relative to Planned Access Panels
|
Details
|
")
")
")
|
|
12-21-2012
|
1.00
|
Added Power Switch for the VoiceFlight
|
Details
|
")
")
")
|
|
12-20-2012
|
1.00
|
Installed Defroster Vent in Forward Top Skin
|
Details
|
")
")
")
|
|
12-19-2012
|
1.00
|
Installed the VoiceFlight Voice Activation Switch
|
Details
|
|
|
|
12-17-2012
|
0.50
|
Bent the Edge of the Forward Top Skin
|
Details
|
")
")
|
|
12-16-2012
|
0.50
|
Removed Forward Top Skin For Access Panels
|
Details
|
|
|
|
12-14-2012
|
2.00
|
Sanded Bottom Edge of Windscreen to Fit Top Skin
|
Details
|
")
")
|
|
12-13-2012
|
1.00
|
Drilled a Positioning Hole In Top of the Windscree
|
Details
|
")
")
|
|
12-12-2012
|
1.50
|
Initial Fitting of the Windscreen
|
Details
|
")
")
")
|
|
12-10-2012
|
1.00
|
Sanded Yesterday's Transition Micro
|
Details
|
|
|
|
12-09-2012
|
1.50
|
Sanded the Reinforcement Glass on the Lt Lip
|
Details
|
|
|
|
12-08-2012
|
1.50
|
Pulled the Peel Ply from Yesterdays Lip Glassing
|
Details
|
|
|
|
12-07-2012
|
2.00
|
Sanded the Skirt Interior with 400 Grit
|
Details
|
|
|
|
12-06-2012
|
1.00
|
Interior Skirt Pinhole Sealing with Epoxy/Acetone
|
Details
|
")
")
|
|
12-05-2012
|
2.00
|
Lightly Finish Sanded the Skirt Exterior Sides
|
Details
|

(Click Here to view Full Log Entry)")
|
|
12-04-2012
|
4.00
|
Sanded the Exterior of the Left Skirt
|
Details
|
|
|
|
12-03-2012
|
4.00
|
Sanded the Right Skirt Exterior
|
Details
|
")
|
|
12-02-2012
|
3.50
|
Sanded the Left Skirt Exterior
|
Details
|
")
|
|
12-01-2012
|
2.00
|
Applied Micro and Cabosil to the Skirt Exterior Si
|
Details
|
")
")
|
|
11-30-2012
|
1.00
|
Started Sanding the Liquid Shim
|
Details
|
")
")
|
|
11-29-2012
|
1.00
|
Reapplied Liquid Shim to Canopy Frame/Skirt
|
Details
|
|
|
|
11-28-2012
|
2.00
|
Sanded Aft Skirt Tip to Shape
|
Details
|
")
")
")
|
|
11-26-2012
|
3.00
|
Sanded Aft Skirt Microballoon Application
|
Details
|
")
")
|
|
11-25-2012
|
3.00
|
Sanded Aft Skirt Then Applied Microballoons Again
|
Details
|
")
")
")
|
|
11-23-2012
|
3.00
|
Sanded the Top Of the Aft Skirt to a Better Taper
|
Details
|
")
")
")
|
|
11-22-2012
|
1.00
|
Sanded Aft Canopy Skirt Interior
|
Details
|
|
|
|
11-21-2012
|
2.00
|
Sanded Aft Inside of Skirt
|
Details
|
")
")
")
|
|
11-20-2012
|
3.00
|
Trimmed the Skirt Aft Top Edge
|
Details
|
")
")
")
|
|
11-20-2012
|
0.00
|
Trimmed the Skirt Aft Top Edge
|
Details
|
")
")
")
|
|
11-19-2012
|
3.00
|
Sanded the Skirt Side's Lip Transitions
|
Details
|
")
")
")
|
|
11-18-2012
|
3.00
|
Established a Contour Line for the Upper Aft Skirt
|
Details
|
")
")
")
|
|
11-17-2012
|
3.00
|
Sanded the Left Transitional Area
|
Details
|
")
")
|
|
11-16-2012
|
3.00
|
Sanded the Right Transitional Area of the Skirt
|
Details
|
")
")
|
|
11-15-2012
|
3.00
|
Sanded the Aft Transitional Areas of the Skirt
|
Details
|
")
")
")
|
|
11-14-2012
|
3.00
|
Sanded the Upper Lips of the Skirt
|
Details
|
|
|
|
11-13-2012
|
4.50
|
Sanded Aft Skirt Using Spray Can Paint as Witness
|
Details
|
")
|
|
11-12-2012
|
1.00
|
Applied Microballoon Slurry to Aft Skirt
|
Details
|
")
|
|
11-11-2012
|
3.50
|
Sanded the Aft Skirt and Applies 2 ply Glass
|
Details
|
")
|
|
11-10-2012
|
3.50
|
Sanded Aft Skirt and Applied Micro/Cotton Epoxy
|
Details
|
")
|
|
11-09-2012
|
2.00
|
Sanded the Aft Canopy Skirt
|
Details
|
")
|
|
11-09-2012
|
4.00
|
Fit and Gap Sealed Top & Bottom Empennage Fairings
|
Details
|
")
")
")
|
|
11-09-2012
|
0.00
|
Empennage Fairings Fitted
|
Details
|
")
")
")
|
|
11-08-2012
|
2.50
|
Fitted and Glassed the Empennage Fairings Union
|
Details
|
")
")
|
|
11-07-2012
|
4.00
|
Trimmed the Aft Top Edge of the Skirt
|
Details
|
")
")
")
|
|
11-06-2012
|
3.50
|
Cut and Shaped Aft Skirt to Clear Empennage Fairin
|
Details
|
")
")
")
|
|
11-05-2012
|
3.50
|
Sanded Aft Skirt and Re-Applied Loose Slurry
|
Details
|
")
")
")
|
|
11-04-2012
|
2.00
|
Sanded Inside of Skirt and Re-Applied Epoxy Slurry
|
Details
|
")
")
|
|
11-03-2012
|
1.50
|
Sanded and Shaped Interior of Aft Skirt
|
Details
|
")
")
")
|
|
11-01-2012
|
2.00
|
Added Gap Seal to Bottom of Aft Skirt
|
Details
|
")
|
|
10-31-2012
|
1.50
|
Sanded Sides and Aft End of Canopy Skirt
|
Details
|
")
|
|
10-30-2012
|
0.00
|
Results of Aft Canopy Skirt Gap Filling
|
Details
|
")
")
")
|
|
10-29-2012
|
1.00
|
Added Microballoon, Flox and CaboSil to Aft Skirts
|
Details
|
")
|
|
10-28-2012
|
2.00
|
Applied Filler to Skirt Tops and Clecoed to Canopy
|
Details
|
")
")
")
|
|
10-26-2012
|
3.00
|
Sanded the Recently Glassed Fracture Line Glass
|
Details
|
")
")
|
|
10-25-2012
|
0.00
|
Finished 4 Day Project of Building a Kayak Trailer
|
Details
|
")
")
")
|
|
10-21-2012
|
2.00
|
Sanded the Skirts Interior Fracture Line Micro Fil
|
Details
|
|
|
|
10-10-2012
|
0.00
|
Vacation to New England
|
|
|
|
|
10-07-2012
|
1.50
|
Glassed the Inside Aft Joint of the Canopy Skirts
|
Details
|
")
")
")
|
|
10-05-2012
|
1.00
|
Removed the Canopy Skirts to Glass the Inside Lip
|
Details
|
|
|
|
10-04-2012
|
1.00
|
Re-glassed the Canopy Skirts Aft Joint
|
Details
|
|
|
|
10-03-2012
|
3.00
|
Formed Clay Mold and Applied Aft Skirt Fiberglass
|
Details
|
")
")
|
|
10-02-2012
|
1.00
|
Cut Posterboard Contours of Each Skirt Aft End
|
Details
|
")
")
")
|
|
09-26-2012
|
1.00
|
Applied a Layer of 9 Oz. Glass and Peel Ply
|
Details
|
")
")
")
|
|
09-25-2012
|
0.50
|
Filled Small Void in Skirt Joint with Super Fil
|
Details
|
|
|
|
09-24-2012
|
0.25
|
Checked the Skirt vs. Empennage Clearance
|
Details
|
")
")
")
|
|
09-23-2012
|
2.00
|
Sanded Aft End of Skirts and the Left Side Repair
|
Details
|
")
")
")
|
|
09-22-2012
|
2.00
|
Sanded the Left Canopy Skirt
|
Details
|
")
")
")
|
|
09-21-2012
|
1.50
|
Sanded the Right Canopy Skirt Liquid Shim
|
Details
|
")
")
|
|
09-21-2012
|
0.50
|
Applied Liquid Shim to the Left Canopy Skirt
|
Details
|
")
")
|
|
09-20-2012
|
1.00
|
Liquid Shim Applied to the Right Canopy Skirt
|
Details
|
")
")
")
|
|
09-19-2012
|
1.00
|
Micro Balloon & Flox Gap Seal To Right Skirt Lip
|
Details
|
")
")
")
|
|
09-18-2012
|
1.50
|
Heat Formed the Upper Lip of Both Canopy Skirts
|
Details
|
")
")
")
|
|
09-17-2012
|
0.00
|
Sanded Filler and Adjusted the Skirt Top Lip 2
|
Details
|
")
")
")
|
|
09-17-2012
|
4.00
|
Sanded Filler and Adjusted the Skirt Top Lip
|
Details
|
")
")
")
|
|
09-15-2012
|
0.00
|
Filled the Fracture lines of the Canopy Skirts 2
|
|
")
")
")
|
|
09-15-2012
|
6.00
|
Filled the Fracture lines of the Canopy Skirts
|
Details
|
")
")
")
|
|
09-14-2012
|
0.00
|
Fitting the Canopy Skirt 3
|
Details
|
")
")
")
|
|
09-14-2012
|
4.00
|
Fitting the Canopy Skirt 2
|
Details
|
")
")
")
|
|
09-13-2012
|
2.00
|
Match Drilled the Skirts to the Canopy Frame
|
Details
|
")
")
")
|
|
09-13-2012
|
1.00
|
Fit the Skirts
|
Details
|
")
")
")
|
|
09-13-2012
|
2.00
|
Drilled the Canopy Frame with a #40 Bit
|
Details
|
")
")
")
|
|
09-12-2012
|
4.00
|
Troubleshot the Com Problems
|
Details
|
|
|
|
09-10-2012
|
3.00
|
Rewired the Grounds of the Copilot Stick Grip
|
Details
|
|
|
|
09-08-2012
|
1.00
|
Trimmed GPS Antennae Shims and Installed
|
Details
|
")
")
")
|
|
09-08-2012
|
1.00
|
Tested the Intercom and the Radios First Time
|
Details
|
|
|
|
09-07-2012
|
1.50
|
Re-fabricated the GPS Antennae Shims
|
Details
|
")
")
")
|
|
09-06-2012
|
1.50
|
Formed a Shim for the GPS Antennae
|
Details
|
")
")
")
|
|
09-05-2012
|
0.75
|
Fabricated Fiberglass HS Bottom Gap Seal
|
Details
|
")
")
")
|
|
09-05-2012
|
0.75
|
Drilled Holes in Aft Top Skin for the GPS Antennae
|
Details
|
")
|
|
09-04-2012
|
2.00
|
Installed Main Fuel Pump Disconnect Switch
|
Details
|
")
")
|
|
09-03-2012
|
1.50
|
Wired the VoiceFlight Wires to the Pilot's Com Jac
|
Details
|
")
|
|
08-31-2012
|
3.00
|
Wired the VoiceFlight Box
|
Details
|
")
")
")
|
|
08-31-2012
|
0.25
|
Installed the Cowl Flap Switch
|
Details
|
")
|
|
08-31-2012
|
0.50
|
Adjusted the Installation of the Avionics Post Gro
|
Details
|
")
")
|
|
08-31-2012
|
0.75
|
Adjusted the Heights of the Starboard Switch Panel
|
Details
|
")
|
|
08-30-2012
|
0.00
|
Removed Rudder and Vertical Stabilizer 2
|
Details
|
")
")
")
|
|
08-30-2012
|
4.00
|
Removed Rudder and Vertical Stabilizer
|
Details
|
")
")
")
|
|
08-29-2012
|
2.00
|
Laced Forward Baggage Compartment Wires
|
Details
|
")
")
")
|
|
08-26-2012
|
1.00
|
Set Nose Wheel Breakout Force
|
Details
|
")
")
|
|
08-24-2012
|
1.00
|
Fabricated Pull Attachment for Setting Breakout
|
Details
|
")
")
")
|
|
08-23-2012
|
1.00
|
Installed Oxygen Supply Line to Mid Cabin
|
Details
|
")
")
")
|
|
08-21-2012
|
2.00
|
Attached Doubler Plates to Baggage Comp. Floor
|
Details
|
")
")
")
|
|
08-20-2012
|
1.50
|
Started Installation of the Oxygen System
|
Details
|
")
")
|
|
08-17-2012
|
1.00
|
Attached VoiceFlight Box to Forward Avionics Bulkh
|
Details
|
")
|
|
08-16-2012
|
0.00
|
Installed Hat Shelf Access Door Latch
|
Details
|
")
")
|
|
08-16-2012
|
1.00
|
Installed Hat Shelf Access Door Latch
|
Details
|
")
")
")
|
|
08-15-2012
|
2.00
|
Riveted Stiffeners/Door Supports Around Opening
|
Details
|
")
")
|
|
08-14-2012
|
2.00
|
Fabricated and Installed Rear Stick Connector Moun
|
Details
|
")
")
")
|
|
08-13-2012
|
2.00
|
Made Hat Shelf Access Door in Aft Baggage Compartm
|
Details
|
")
")
|
|
08-13-2012
|
0.50
|
Glassed the Right Side of the Empennage Fairing
|
Details
|
")
")
|
|
08-12-2012
|
2.50
|
Modified the VS/HS Empennage Fairing
|
Details
|
")
")
")
|
|
08-11-2012
|
2.00
|
Installed Nutplates for the HS/VS Fairing
|
Details
|
")
")
")
|
|
08-10-2012
|
1.00
|
Trim Fitted the Large Empennage Fairing
|
Details
|
")
")
")
|
|
08-10-2012
|
0.50
|
Sprayed Empennage Fairing Pieces
|
Details
|
|
|
|
08-09-2012
|
2.00
|
Sanded the Empennage Fairings
|
Details
|
")
")
")
|
|
08-08-2012
|
1.00
|
Sprayed the Empennage Fairings with White Primer
|
Details
|
|
|
|
08-07-2012
|
3.00
|
Sanded UV Smooth Prime from Empennage Fairings
|
Details
|
")
|
|
08-06-2012
|
1.00
|
Applied 3 Thin Rolled Layers of UV Smooth Prime
|
Details
|
")
")
|
|
08-04-2012
|
3.00
|
Sprayed Primer of the Empennage Fairings
|
Details
|
")
")
|
|
08-03-2012
|
2.00
|
Sanded Awl Fair Smooth on Empennage Fairings
|
Details
|
")
|
|
08-02-2012
|
3.00
|
Sanded Empennage Fairings with Foam Blocks
|
Details
|
")
")
|
|
08-01-2012
|
2.00
|
Sanded the Awl Fair with 120 Grit Paper
|
Details
|
")
")
|
|
07-31-2012
|
3.50
|
Sanded Empennage Fairings with 120 Grit Paper
|
Details
|
|
|
|
07-30-2012
|
6.00
|
Applied Microballoon Slurry to Empennage Fairings
|
Details
|
")
")
")
|
|
07-23-2012
|
0.00
|
OSHKOSH 2012
|
Details
|
|
|
|
07-21-2012
|
1.50
|
Sanded Rudder Bottom Fairing with 120 Grit
|
Details
|
")
")
|
|
07-19-2012
|
2.00
|
Sanded Rudder Bottom Fairing
|
Details
|
")
")
")
|
|
07-18-2012
|
1.50
|
Applied Microballoon Slurry to Rudder Bottom Fairi
|
Details
|
")
")
")
|
|
07-16-2012
|
1.50
|
Finished Assembly of a Downdraft Box
|
Details
|
")
")
|
|
07-14-2012
|
1.50
|
Installed Rudder Hardware and Attached Cables
|
Details
|
")
")
")
|
|
07-13-2012
|
1.50
|
Adjusted the Rudder Alignment with Top Fairings
|
Details
|

")
")
|
|
07-12-2012
|
1.50
|
Test Fit the Rudder to the Empennage
|
Details
|
")
")

|
|
07-12-2012
|
0.50
|
Applied 2 Layers of Glass to Rudder Horn Opening
|
Details
|
|
|
|
07-11-2012
|
0.50
|
Applied a Layer of Glass to Rudder Horn Opening
|
Details
|
")
")
|
|
07-10-2012
|
1.00
|
Drilled, Countersunk Lower Rudder Cap
|
Details
|
|
|
|
07-09-2012
|
1.00
|
Fit the Lower Rudder Cap to the Rudder
|
Details
|
")
")
|
|
07-08-2012
|
2.00
|
Made Backing Strips for the Rudder Upper Cap
|
Details
|
")
")
|
|
07-07-2012
|
0.25
|
Trimmed/Sanded the Fiberglass from the HS Tips
|
Details
|
")
")
")
|
|
07-07-2012
|
1.00
|
Started Closure of the VS Tip Aft Opening
|
Details
|
")
")
|
|
07-06-2012
|
1.00
|
Polished the VS Prior to Installation
|
Details
|
|
|
|
07-06-2012
|
1.00
|
Layed 3 Sheets of Glass to Inside of the HS Tips
|
Details
|
")
")
")
|
|
07-06-2012
|
2.00
|
Attached the VS to the Empennage
|
Details
|
")
")
")
|
|
07-05-2012
|
1.50
|
Riveted the VS Attachment Plate and Spacer to VS
|
Details
|
")
|
|
07-05-2012
|
1.00
|
Removed Lead from the Elevator Counterweights
|
Details
|
")
")
")
|
|
07-05-2012
|
0.25
|
Countersunk the Tips' Attachment Holes
|
Details
|
|
|
|
07-05-2012
|
1.50
|
Began Closure of the Aft Opening Of the HS Tips
|
Details
|
")
")
|
|
07-04-2012
|
1.50
|
Made Backing Strips for the Fiberglass Tips
|
Details
|
|
|
|
07-03-2012
|
2.00
|
Fit Fiberglass Horizontal Stabilizer and Elevator
|
Details
|
")

")
|
|
07-02-2012
|
2.00
|
Installed the Pitch Servo
|
Details
|
")
")
")
|
|
07-02-2012
|
0.00
|
Installed Pitch Servo 2
|
Details
|
")
")
")
|
|
06-30-2012
|
1.00
|
Installled Hardware on Horizontal Stabilizer
|
Details
|
")
")
")
|
|
06-29-2012
|
1.50
|
Attached the Elevators without Permanent Hardware
|
Details
|
")
")
|
|
06-27-2012
|
1.50
|
Polished the Horizontal Stabilizer
|
Details
|
")
|
|
06-26-2012
|
2.50
|
Polished a Stain Off of the Elevators
|
Details
|
")
")
|
|
06-24-2012
|
0.25
|
Mounted the Canopy onto the Slide and Rails.
|
Details
|
")
")
")
|
|
06-24-2012
|
1.00
|
Installed the Black Anodized Canopy Rails
|
Details
|
")
")
")
|
|
06-22-2012
|
1.00
|
Installed the Canopy Slide Rail on the Aft Fuselag
|
Details
|
")
")
")
|
|
06-19-2012
|
0.25
|
Riveted Rear Passenger Shoulder Straps Anchors
|
Details
|
")
")
|
|
06-19-2012
|
2.00
|
Re-installed Battery Tray and Connected Cables
|
Details
|
")
")
")
|
|
06-18-2012
|
1.50
|
Changed GRT EFIS Tiny 4-40 Screws to Large Ones
|
Details
|
")
")
")
|
|
06-16-2012
|
0.00
|
Worked to Organize Left Side of Avionics Bay 2
|
Details
|
")
")
")
|
|
06-16-2012
|
2.00
|
Worked to Organize Left Side of Avionics Bay 1
|
Details
|
")
")
")
|
|
06-15-2012
|
0.00
|
Finished the Throttle Cable Installation 3
|
Details
|
")
|
|
06-15-2012
|
0.00
|
Finished the Throttle Cable Installation 2
|
Details
|
")
")
")
|
|
06-15-2012
|
3.00
|
Finished the Throttle Cable Installation 1
|
Details
|
")
")
")
|
|
06-14-2012
|
1.50
|
Cut a Hole in the Firewall for the Throttle Cable
|
Details
|
")
")
")
|
|
06-14-2012
|
0.50
|
Attached the Horizontal Stabilizer to the Fuselage
|
Details
|
")
")
")
|
|
06-12-2012
|
1.50
|
Attached Throttle Cable to the Throttle Lever
|
Details
|
")
")
|
|
06-11-2012
|
1.00
|
Started Throttle Cable Installation
|
Details
|
|
|
|
06-09-2012
|
1.50
|
Re-connected Aft Electrical Wiring to VP CU
|
Details
|
")
")
|
|
06-08-2012
|
5.00
|
Riveted the Aft Top Skin to the Fuselage
|
Details
|
")
")
")
|
|
06-08-2012
|
0.00
|
Riveted the Aft Top Skin to the Fuselage
|
Details
|
")
")
")
|
|
06-08-2012
|
0.00
|
Riveted the Aft Top Skin to the Fuselage
|
Details
|

")
")
|
|
06-06-2012
|
0.50
|
Installed 2 Mini LED Lights in Aft Fuselage
|
Details
|
")
")
")
|
|
06-06-2012
|
1.00
|
Cut 3/4" Plywood for Aft Fuselage
|
Details
|
")
")
")
|
|
06-06-2012
|
1.50
|
Clecoed the Aft Top Skin onto the Fuselage
|
Details
|
")
")
|
|
06-04-2012
|
2.00
|
Removed the Battery Tray and Secured Cables
|
Details
|
")
")
")
|
|
06-03-2012
|
0.00
|
Wired Cabin LED Lights to Ships Power 2
|
Details
|
")
")
")
|
|
06-03-2012
|
0.50
|
Wired Cabin LED Lights to Ships Power
|
Details
|
")
")
")
|
|
06-02-2012
|
3.50
|
Soldered Wiring to LED Strips for the Cabin Lights
|
Details
|
")
")
")
|
|
06-02-2012
|
0.00
|
Soldered Wiring to LED Strips for the Cabin Lights
|
Details
|
")
")

(Click Here to view Full Log Entry)")
|
|
06-01-2012
|
1.00
|
Installed Repaired Verical Power Control Unit
|
Details
|
|
|
|
05-31-2012
|
1.00
|
Installed the Front Seat Ramp
|
Details
|
")
")
")
|
|
05-30-2012
|
2.00
|
Moved the Rt MX150L Connector and Patched Hole
|
Details
|
")
")
")
|
|
05-30-2012
|
1.00
|
Installed the Fuselage Floor Panels with Clecoes
|
Details
|
")
")
")
|
|
05-29-2012
|
1.00
|
Fitted the Floors into the Fuselage
|
Details
|
|
|
|
05-28-2012
|
1.50
|
Riveted Stiffeners to Forward Part of Floor Panels
|
Details
|
")
|
|
05-28-2012
|
0.50
|
Installed Knife Splices in the Flap Motor Wires
|
Details
|
")
|
|
05-25-2012
|
1.00
|
Installed Rt and Lt Console Covers
|
Details
|
")
")
|
|
05-25-2012
|
1.00
|
Fabricated a Mount for the Rear Cool Air Vent
|
Details
|
")
")
")
|
|
05-24-2012
|
0.50
|
Stuck Pitot and AoA Tubes Through Lt Fuselage
|
Details
|
|
|
|
05-24-2012
|
0.50
|
Installed Heaater Hoses in Forward Electrical Bay
|
Details
|
")
|
|
05-23-2012
|
2.00
|
Wired the MX-150L 12 Position Socket Lt Fuselage
|
Details
|
")
")
|
|
05-22-2012
|
1.00
|
Corrected Rt Wing MX-150L Electrical Connector
|
Details
|
")
|
|
05-19-2012
|
1.00
|
Installed Molex MX-150L Socket in Lt Mid Fuselage
|
Details
|
")
|
|
05-18-2012
|
1.00
|
Installed 3 Position Molex Socket Rt Mid Fuselage
|
Details
|
")
")
")
|
|
05-17-2012
|
1.50
|
Installed a Molex MX-150L Socket in Fuselage Wall
|
Details
|
")
")
|
|
05-16-2012
|
0.50
|
Ran The VOR Coax Throught the Rt Fuselage Wall
|
Details
|
")
")
|
|
05-15-2012
|
1.00
|
Installed the Two Communication Antennae
|
Details
|
")
")
")
|
|
05-10-2012
|
1.00
|
Wired the IBBS Info Light
|
Details
|
")
")
|
|
05-09-2012
|
1.50
|
Used the Inline Ammeter to Check the Pumps
|
Details
|
|
|
|
05-09-2012
|
1.50
|
Really Fixed the Fuel Totalizer This Time
|
Details
|
")
")
|
|
05-08-2012
|
1.00
|
Troubleshot Fuel Pump High Current Draw
|
Details
|
|
|
|
05-08-2012
|
1.00
|
Installed a IBBS LED Indicator Light in the Panel
|
Details
|
")
|
|
05-07-2012
|
2.00
|
Troubleshot High Current Levels on Fuel Pumps
|
Details
|
|
|
|
05-07-2012
|
1.00
|
Re-Installed TCW IBBS
|
Details
|
|
|
|
04-15-2012
|
0.50
|
Removed IBBS for shipping
|
Details
|
|
|
|
04-15-2012
|
2.00
|
Found Out the GRT HX Can't Read IBBS Voltages
|
Details
|
|
|
|
04-14-2012
|
1.00
|
Re-installed the Electrical Bay Bulkhead Screws
|
Details
|
|
|
|
04-14-2012
|
1.00
|
Measured For Flex Hoses for the Fuel Pumps
|
Details
|
")
")
|
|
04-13-2012
|
1.00
|
Installed Bolts in Right Side Pedal Adjustment Hol
|
Details
|
")
")
")
|
|
04-12-2012
|
1.00
|
Installed the TCW IBBS Master Cutoff Switch
|
Details
|
")
")
|
|
04-11-2012
|
1.00
|
Loosened Screws for the Electrical Bay Bulkhead
|
Details
|
|
|
|
04-11-2012
|
1.00
|
Installed Fuel Selector Valve and Its Fuel Lines
|
Details
|
")
|
|
04-11-2012
|
0.50
|
Corrected Fuel Totalizer Wiring on #1 Injector
|
Details
|
")
")
|
|
04-10-2012
|
1.50
|
Installed Output Lines from the Pumps to the Firew
|
Details
|
")
")
")
|
|
04-09-2012
|
2.00
|
Installed the New Walbro Fuel Pumps
|
Details
|
")
")
")
|
|
03-25-2012
|
2.00
|
Installed the Blue Sea Sockets and Plugs
|
Details
|
")
")
")
|
|
03-25-2012
|
0.00
|
External View of the Charger Connections
|
Details
|
")
")
")
|
|
03-24-2012
|
3.00
|
Fabricated Doublers for the External Charger Plugs
|
Details
|
")
|
|
03-23-2012
|
1.00
|
Removing the Fuel Pumps, a Terminal Snaps Off
|
Details
|
|
|
|
03-22-2012
|
3.00
|
Tested Fuel Line Segments for Sources of Air
|
Details
|
|
|
|
03-21-2012
|
1.00
|
Sent the ADS-B Back for Hardware and Software
|
Details
|
")
|
|
03-20-2012
|
2.00
|
The VP Serial 7 Input to the GRT EFISs Missing
|
Details
|
|
|
|
03-20-2012
|
0.50
|
Removed the ADS-B for Return for Upgrade
|
Details
|
|
|
|
03-19-2012
|
1.00
|
Return to Troubleshoot Missing ELT GPS Signal
|
Details
|
|
|
|
03-18-2012
|
3.00
|
Checked ELT GPS Signal without success
|
Details
|
|
|
|
03-17-2012
|
2.00
|
Unable to configure the ADS-B
|
Details
|
|
|
|
03-15-2012
|
3.00
|
Configured the GRT HX Displays and the VP System
|
Details
|
|
|
|
03-14-2012
|
2.00
|
Investigated Absence of Fuel Totalizer Value on EI
|
Details
|
|
|
|
03-13-2012
|
4.00
|
Troubleshooting Fuel Pumps High Current Draw
|
Details
|
|
|
|
03-10-2012
|
3.00
|
Configured the EIS and GRT HX EFIS Displays
|
Details
|
|
|
|
03-06-2012
|
1.00
|
Troubleshoot Alternator Field Fault
|
Details
|
|
|
|
03-04-2012
|
0.50
|
Starter and Fuel Pumps Working
|
Details
|
|
|
|
03-03-2012
|
0.00
|
Unstalled Panel USB Plugs
|
|
")
")
")
|
|
03-03-2012
|
1.50
|
Trimmed Coolant Reservoir Hose
|
Details
|
|
|
|
03-03-2012
|
3.00
|
Installed 3 USB Plugs in the Instrument Panel
|
Details
|
")
")

(Click Here to view Full Log Entry)")
|
|
03-03-2012
|
1.00
|
Fixed a Leak at the Left Master Cylinder AN Fittin
|
Details
|
|
|
|
03-02-2012
|
0.00
|
Secured Heater Hoses
|
Details
|
")
")
")
|
|
03-02-2012
|
1.00
|
Changed the PSRU Oil and Installed Magnetic Plug
|
Details
|
|
|
|
03-02-2012
|
2.00
|
Attached Coolant Hoses to the Heater
|
Details
|
")
")
")
|
|
03-01-2012
|
1.50
|
Changed the Engine Oil and Filter
|
Details
|
|
|
|
02-28-2012
|
1.50
|
Wired the Cowl Flap Control Switch
|
Details
|
")
")
")
|
|
02-27-2012
|
3.00
|
Connected Engine Wires to Terminal and Connector
|
Details
|
")
")
")
|
|
02-26-2012
|
2.00
|
Fabricated and Mounted Engine Electrial Terminal
|
Details
|
")
")
")
|
|
02-25-2012
|
1.00
|
Filled the Brake System with Royco 782
|
Details
|
")
")
")
|
|
02-22-2012
|
3.00
|
Reinstalled Electrical Compartment Sidewall
|
Details
|
")
")
|
|
02-21-2012
|
2.50
|
Mounted ECU in the Fwd. Electrical Compartment
|
Details
|
")
")
")
|
|
02-16-2012
|
2.00
|
Fabricated Cover for Fwd. Electrical Compartment
|
Details
|
")
")
")
|
|
02-12-2012
|
4.00
|
Wired EIS to Eggenfellner Subaru 9 pin Connector
|
Details
|
")
")
")
|
|
02-12-2012
|
0.00
|
Wired EIS to Eggenfellner Subaru 9 pin Connector
|
Details
|
")
|
|
02-10-2012
|
2.00
|
Attached D-sub Connector to Manifold Press. Sensor
|
Details
|
")
")
|
|
02-09-2012
|
2.50
|
Installed Two Engine Grounds to the Firewall
|
Details
|
")
")
")
|
|
02-09-2012
|
0.50
|
Attached Fat Ground to the Firewall
|
Details
|
")
")
|
|
02-08-2012
|
1.00
|
Attached the Fat Ground to the Firewall
|
Details
|
")
")
|
|
02-07-2012
|
4.00
|
Attached Avionic Grounds and Fuel Pumps' Ground
|
Details
|
")
")
")
|
|
02-06-2012
|
2.00
|
Ran the Fuel Pump Grounds to the Forrest of Tabs
|
Details
|
")
")
")
|
|
02-06-2012
|
1.50
|
Installed Firewall to Bulkhead Fuel Return Line
|
Details
|
")
")
")
|
|
02-05-2012
|
2.50
|
Secured Ground Wires in Forward Cabin
|
Details
|
")
|
|
02-04-2012
|
1.50
|
Fuel Supply Line Firewall Forward
|
Details
|


|
|
02-02-2012
|
1.50
|
Ran Firesleeved 3/8" Fuel Return Line
|
Details
|
")
")
")
|
|
02-02-2012
|
0.50
|
Covered the Crossover Tube with Firesleeve
|
Details
|
")
|
|
01-22-2012
|
4.50
|
Secured the Fuel Pressure Regulator to Firewall
|
Details
|
")
")
")
|
|
01-22-2012
|
2.00
|
Mounted the EIS Fuel Pressure Sensor
|
Details
|
")
")
")
|
|
01-22-2012
|
0.25
|
Mounted Manifold Pressure Sensor to Firewall
|
Details
|
")
")
|
|
01-22-2012
|
1.50
|
Installed Firesleeve on the Firewall Penetration
|
Details
|
")
|
|
01-15-2012
|
3.50
|
Ran Fat Wire to Starter Contactor and Starter
|
Details
|
")
")
")
|
|
01-13-2012
|
0.50
|
Test Fit Airbox and Filter to Engine Mount
|
Details
|
")
")
|
|
01-13-2012
|
1.00
|
Attached ANL Fuse Holder and Starter Contactor
|
Details
|
")
")
")
|
|
01-13-2012
|
1.50
|
Attached Airbox Flange to Airbox
|
Details
|
")
")
")
|
|
01-12-2012
|
0.00
|
Fabricated Airbox
|
Details
|
")
")
")
|
|
01-12-2012
|
2.50
|
Assembled, Modified and Fit the Airbox
|
Details
|
")
")
")
|
|
01-11-2012
|
0.50
|
Mounted the Coolant Reservoir to the Firewall
|
Details
|
")
|
|
01-10-2012
|
1.00
|
Ran Engine Cables Through the Firewall
|
Details
|
")
")
")
|
|
01-09-2012
|
1.50
|
Made a Copper Bar to Attach Starter Relay to ANL
|
Details
|
")
|
|
01-03-2012
|
0.50
|
Patched Extra Firewall Penetrations
|
Details
|
")
")
")
|
|
01-03-2012
|
2.00
|
Made Several Firewall Penetrations
|
Details
|
")
")
")
|
|
01-03-2012
|
0.00
|
Made Several Firewall Penetrations
|
Details
|
")
")
|
|
01-03-2012
|
0.25
|
Attached the Forrest of Tabs to the Firewall
|
Details
|
")
|
|
01-02-2012
|
0.50
|
Attached the Andar Firewall Pass Through Filter
|
Details
|
")
")
|
|
01-01-2012
|
1.50
|
Cut Firewall Opening for Fuel Filter Pass Through
|
Details
|
")

")
|
|
12-31-2011
|
0.25
|
Cut Firewall Pass Through From SS Hand Rail
|
Details
|
")
")
|
|
12-28-2011
|
2.00
|
Riveted Fat Wire Firewall Pass Through to Firewall
|
Details
|
")
")
")
|
|
12-27-2011
|
0.50
|
Drilled Holes for the Fat Wire Firewall Pass Throu
|
Details
|
|
|
|
12-22-2011
|
0.50
|
Installed the Anti-Splat Stiffener on Nose Gear Le
|
Details
|
")
")
")
|
|
12-22-2011
|
4.00
|
Attached the Engine to the Fuselage
|
Details
|
")
")
")
|
|
12-20-2011
|
0.75
|
Flipped the Engine Vertical
|
Details
|
")
")
|
|
12-20-2011
|
3.25
|
Drilled the Nose Gear Retaining Bolt Hole
|
Details
|
")
")
")
|
|
12-19-2011
|
1.50
|
Split the Right Wheel Fairing
|
Details
|
|
|
|
12-19-2011
|
3.00
|
Put the Nose Gear Together
|
Details
|
")
")
")
|
|
12-18-2011
|
1.50
|
Right Lower Intersection Fairing Glassed
|
Details
|
")
")
")
|
|
12-16-2011
|
0.25
|
Taped the Fairing Mold to Keep Clay from Sticking
|
Details
|
")
")
")
|
|
12-15-2011
|
4.00
|
Fabricated Right Lower Intersection Fairing
|
Details
|
")
")
")
|
|
12-14-2011
|
4.00
|
Separated the Left Wheel Fairing Halves
|
Details
|
")
")
")
|
|
12-14-2011
|
0.50
|
Re-checked the Rt Gear Leg Fairing Position
|
Details
|
")
")
|
|
12-13-2011
|
3.00
|
Glassed the Left Lower Intersection Fairing
|
Details
|
")
")
")
|
|
12-12-2011
|
1.50
|
Trimmed the Left Intersection Fairing Some More
|
Details
|
")
")
")
|
|
12-11-2011
|
2.50
|
Trimmed and Shaped Lt Intersection Fairing
|
Details
|
")
")
")
|
|
12-09-2011
|
2.50
|
Carved/Shaped the Left Lower Intersection Fairing
|
Details
|
")
")
")
|
|
12-07-2011
|
1.50
|
Applied Clay to Left Wheel Fairing Intersection
|
Details
|
")
")
")
|
|
12-06-2011
|
2.50
|
Checked Left Gear Leg Fairing after Installation
|
Details
|
")
")
|
|
12-05-2011
|
3.00
|
Sanded and Shaped the Left Gear Leg Stiffener
|
Details
|
")
")
|
|
12-04-2011
|
3.00
|
Finished Riveting the Leg Gear Fairing Hinges
|
Details
|
")
")
|
|
12-03-2011
|
1.50
|
Riveted Half of Leg Fairing Hinges
|
Details
|
|
|
|
12-02-2011
|
3.00
|
Removed the Hinges from the Leg Fairings
|
Details
|
|
|
|
12-01-2011
|
0.50
|
Right Leg Fairing Too Tight After Glass Applicatio
|
Details
|
|
|
|
11-30-2011
|
5.00
|
Shaved and Sanded the Stiffeners to Fit the Fairin
|
Details
|
")
")
")
|
|
11-29-2011
|
0.25
|
Checked the Right Leg Fairing Alignment
|
Details
|
|
|
|
11-28-2011
|
3.00
|
Bonded a Leg Stiffener to the Right Leg
|
Details
|
")
")
")
|
|
11-27-2011
|
1.00
|
Confirmed Leg Fairing Alignment with a String
|
Details
|
")

")
|
|
11-26-2011
|
0.00
|
Attempting to Level the Gear Leg Fairing - 2
|
|
")
")

|
|
11-26-2011
|
1.50
|
Attempting to Level the Gear Leg Fairing
|
Details
|
")
")

|
|
11-25-2011
|
2.50
|
Riveted the U-808 Brackets to the Wheel Fairing
|
Details
|
")
")
")
|
|
11-24-2011
|
2.50
|
Fit and Drilled the Right Wheel Fairing
|
Details
|
")
")
|
|
11-23-2011
|
2.50
|
Drilled and Clecoed Left Wheel Fairing to U-810
|
Details
|
")
")
")
|
|
11-22-2011
|
2.50
|
Fit the Aft Half of the Left Wheel Pant to the Whe
|
Details
|
")
")
")
|
|
11-21-2011
|
3.00
|
Fit the Aft Half of the Right Wheel Pant to the Wh
|
Details
|
")
")
")
|
|
11-20-2011
|
2.50
|
Drilled Wheel Pants Halves Attachment Holes
|
Details
|
")
")
")
|
|
11-19-2011
|
2.00
|
Fitted Left Wheel Pant Halves Together
|
Details
|
")
|
|
11-18-2011
|
2.00
|
Fitted Two Halves of a Wheel Fairing Together
|
Details
|
")
")
")
|
|
11-17-2011
|
0.50
|
Trimmed the Rough Edges of the Glass Layups
|
Details
|
")
|
|
11-16-2011
|
2.00
|
Carved Excess Epoxy Flox from Fairings
|
Details
|
")
|
|
11-15-2011
|
0.50
|
Applied Epoxy Flox to the Tongue of the Fairings
|
Details
|
")
")
|
|
11-14-2011
|
2.00
|
Finished the Fairing Hinges Installation
|
Details
|
")
")
|
|
11-08-2011
|
3.50
|
Cut Clearances in the Fairings for the Brake Lines
|
Details
|
|
|
|
11-07-2011
|
1.00
|
Cut Template for the Main Gear Fairings from Plans
|
Details
|
")
")
")
|
|
11-06-2011
|
1.50
|
Taped Brake Lines with Split Tubing Spacers
|
Details
|
|
|
|
11-05-2011
|
1.00
|
Installed the Brake Line to the Right Wheel
|
Details
|
")
")
")
|
|
11-05-2011
|
1.00
|
Installed the Brake Line to the Left Wheel
|
Details
|
")
")
")
|
|
11-04-2011
|
1.00
|
Installed the Right Main Wheel
|
Details
|
")
")
")
|
|
11-02-2011
|
2.00
|
Installed the Left Main Wheel
|
Details
|
")
")
")
|
|
11-01-2011
|
0.50
|
Installed Wheel onto a Rim
|
Details
|
")
|
|
10-31-2011
|
1.00
|
Installed First Tire on a Wheel
|
Details
|
")
")
|
|
10-30-2011
|
4.00
|
Mounted the Brakes and Wheels on Gear Axels
|
Details
|
")
")
")
|
|
10-29-2011
|
1.50
|
Assembled Brakes for Mounting on the Axles
|
Details
|
")
")
")
|
|
10-28-2011
|
1.00
|
Corrosion Treated and Primed Wheel Fairing Mounts
|
Details
|
")
|
|
10-27-2011
|
1.50
|
Made U-408 Spacers and Assembled Brake Parts
|
Details
|
")
")
|
|
10-26-2011
|
2.50
|
Installed the Landing Gear Legs
|
Details
|
")
")
")
|
|
10-25-2011
|
1.00
|
Put Fuselage on Tall Sawhorse for Gear Installatio
|
Details
|

")
")
|
|
10-23-2011
|
4.00
|
Fabricated a Connection from Pre-Filter to Pumps
|
Details
|
")
")
")
|
|
10-22-2011
|
2.50
|
Tried Fabricating Pre-Filter to Pump Connection
|
Details
|
|
|
|
10-19-2011
|
1.50
|
Modified the Fuel Filter Mount for Better Access
|
Details
|
")
")
")
|
|
10-17-2011
|
1.50
|
Removed the Pre-Pumps Filter from the Aircraft
|
Details
|
|
|
|
10-06-2011
|
1.00
|
More Fuel Plumbing Decision Making
|
Details
|
|
|
|
10-04-2011
|
1.50
|
Installed Coter Pins on the Brake Pedal Assemblies
|
Details
|
|
|
|
10-02-2011
|
0.50
|
Re-Installed the Brake Peddles and Extensions
|
Details
|
")
")
")
|
|
09-27-2011
|
0.25
|
Re-applied Enamel to the Brake Pedals and Extensio
|
Details
|
")
|
|
09-26-2011
|
2.50
|
Assembled Brake Pedals and Extensions
|
Details
|
")
|
|
09-25-2011
|
1.00
|
Sprayed Black Appliance Enamel on Pedals
|
Details
|
|
|
|
09-24-2011
|
2.00
|
Primer Painted the Brake Pedals and Extensions
|
Details
|
|
|
|
09-22-2011
|
0.50
|
Removed the Rudder Pedals
|
Details
|
")
")
")
|
|
09-22-2011
|
1.50
|
Fabricated Rudder Pedal Extensions
|
Details
|
")
")
")
|
|
09-20-2011
|
1.00
|
Attached TNC Connector For G430W GPS
|
Details
|
")
")
|
|
09-18-2011
|
7.00
|
Fixed the G-430W Backup Power Problem
|
Details
|
")
")
")
|
|
09-17-2011
|
6.00
|
Tested EFISs OK. Checked Backup Power System
|
Details
|
|
|
|
09-15-2011
|
3.00
|
Finished EFIS/AHRSs CPC Connectors Installation
|
Details
|
")
")
")
|
|
09-14-2011
|
2.50
|
Re-wired the EFISs and AHRSs Secondary Power
|
Details
|
|
|
|
09-12-2011
|
4.00
|
Finished Avionics Installation and Power Up
|
Details
|
")
")
")
|
|
09-11-2011
|
2.50
|
Re-installed Avionics in Panel and Secured Wires
|
Details
|
")
")
")
|
|
09-07-2011
|
1.00
|
Wired the ADS-B Fault Light
|
Details
|
")
")
")
|
|
09-06-2011
|
0.75
|
Installed AHRSs and Pitot/Static Connections
|
Details
|
")
")
|
|
09-06-2011
|
0.25
|
Adel Secures Gretz and VP Cables
|
Details
|
")
")
|
|
09-06-2011
|
0.25
|
Added a Red Switch Guard to the Engine Kill Switch
|
Details
|
")
")
")
|
|
09-04-2011
|
1.00
|
Ran Cowl Flap Power Wire to Throttle Area
|
Details
|
|
|
|
09-01-2011
|
0.50
|
Connected G430W GPS Antenna to Rack
|
Details
|
")
|
|
09-01-2011
|
1.50
|
Connected Fuel Guardian and Autopilot Wires
|
Details
|
")
|
|
08-28-2011
|
0.50
|
Primed the AHRS Mount
|
Details
|
|
|
|
08-28-2011
|
1.00
|
Installed the ADS-B Fault Light in the Panel
|
Details
|
")
|
|
08-28-2011
|
0.50
|
Installed Rivnuts to Attach the AHRS Mount
|
Details
|
|
|
|
08-28-2011
|
1.00
|
Installed a Stud Grounding Block on the Brace
|
Details
|
")
|
|
08-27-2011
|
1.50
|
Clecoed the Forward Top Skin in place
|
Details
|
")
")
|
|
08-26-2011
|
2.50
|
Connected Antennae to the Avionics
|
Details
|
")
")
")
|
|
08-25-2011
|
1.50
|
Fabricated a Mount of the VOR Antenna Splitter
|
Details
|
")
")
")
|
|
08-23-2011
|
1.00
|
Connected Cowl Flap Wire to the Autopilot Terminal
|
Details
|
|
|
|
08-22-2011
|
1.50
|
Soldered an Extension on the Prop Motor Cable
|
Details
|
|
|
|
08-21-2011
|
4.00
|
Built the Prop Contoller Harness
|
Details
|
")
")
")
|
|
08-20-2011
|
1.00
|
Ran the Cabin Light Wires Down the Right Side
|
Details
|
|
|
|
08-20-2011
|
1.00
|
Ran Power Wire to the Prop Controller
|
Details
|
")
|
|
08-20-2011
|
2.00
|
Ran Panel Dimmer Source Grounds to the Terminal
|
Details
|
|
|
|
08-20-2011
|
2.00
|
Ran EIS Out Wire from EFIS towards the EIS
|
Details
|
|
|
|
08-20-2011
|
0.50
|
Connected TCW IBBS Info wire to the GRT EFIS
|
Details
|
|
|
|
08-19-2011
|
2.00
|
Installed the Left and Right Pilot Map Lights
|
Details
|
")
")
")
|
|
08-18-2011
|
2.00
|
Attached the Left Pilot Map Light Mount
|
Details
|
")
")
")
|
|
08-17-2011
|
2.50
|
Installed Passenger Map Light on Left Side
|
Details
|
")
")
")
|
|
08-16-2011
|
2.50
|
Ran Map Light Wires
|
Details
|
|
|
|
08-15-2011
|
2.50
|
Finished Pitot/Static Installation To the EIS
|
Details
|
")
")
")
|
|
08-14-2011
|
6.00
|
Wired the Autopilot Terminal
|
Details
|
")
")
")
|
|
08-12-2011
|
2.00
|
Wired Gretz Heated Pitot Tube Output to VP Sys.
|
Details
|
")
")
|
|
08-11-2011
|
1.00
|
Mounted Gretz to VP Conversion Circuit Board
|
Details
|
")
")
")
|
|
08-08-2011
|
2.00
|
Connected ELT Power, Ground and Shield
|
Details
|
")
")
")
|
|
08-06-2011
|
2.50
|
Straightened/Organized more wiring
|
Details
|
|
|
|
08-06-2011
|
1.00
|
Reversed the Antenna Pigtail Direction
|
Details
|
")
")
|
|
08-06-2011
|
1.00
|
Connected the AFS AoA to the Pitot/Static System
|
Details
|
")
")
|
|
08-06-2011
|
0.00
|
Connected GPS Serial Output to the ELT - Cont.
|
Details
|
")
")
|
|
08-06-2011
|
2.00
|
Connected GPS Serial Output to the ELT
|
Details
|
")
")
")
|
|
08-05-2011
|
5.00
|
Worked on several tasks that need to be done.
|
Details
|
")
|
|
08-05-2011
|
3.00
|
Wired the EIS System
|
Details
|
")
")
")
|
|
08-02-2011
|
0.50
|
Moved the avionics terminal bar down 3/4".
|
Details
|
|
|
|
07-30-2011
|
0.00
|
Back from Oshkosh
|
Details
|
")
")
")
|
|
07-24-2011
|
0.00
|
Off to Oshkosh!!!
|
Details
|
|
|
|
07-12-2011
|
2.00
|
Soldered the Mini DIN Connector for GPS to ELT
|
Details
|
")
")
")
|
|
07-12-2011
|
0.00
|
Soldered the Mini DIN Connector for GPS to ELT
|
Details
|
")
")
|
|
07-12-2011
|
1.00
|
Laced the ELT Related Wires
|
Details
|
")
")
")
|
|
07-10-2011
|
1.00
|
Painted the Baggage Compartment Shelf
|
Details
|
")
|
|
07-10-2011
|
1.00
|
Installed the ELT Antenna
|
Details
|
")
")
")
|
|
07-09-2011
|
3.00
|
Cut the Panel for the ELT Remote Panel Control
|
Details
|
")
")
")
|
|
07-08-2011
|
1.00
|
Ran the ELT Cables Forward Along Right Side
|
Details
|
")
")
")
|
|
07-07-2011
|
1.00
|
Flipped the ELT Securing Bands
|
Details
|
")
")
")
|
|
07-06-2011
|
3.00
|
Replaced the ELT Mounting Plate
|
Details
|
")
")
")
|
|
07-03-2011
|
2.00
|
Installed 6D Bulkhead Fitting in F-802A-L
|
Details
|
")
")
|
|
07-03-2011
|
0.00
|
Attached Fuel Return Line to F-802A-L Fitting
|
Details
|
")
")
")
|
|
06-30-2011
|
0.50
|
Put Nutplates on the Fuel Valve Mounting Plate
|
Details
|
")
|
|
06-26-2011
|
8.00
|
Installed the 100 Micron Fuel Filter
|
Details
|
")
")
|
|
06-26-2011
|
0.00
|
Installed Hoses for the Andair Valve Outlet and In
|
Details
|
")
")

|
|
06-25-2011
|
1.50
|
Riveted the EIS Tray to the Forward Right Panel
|
Details
|
")
")
")
|
|
06-25-2011
|
1.00
|
Fabricated 100 Micron Fuel Filter Bracket
|
Details
|
")
")
")
|
|
06-24-2011
|
0.50
|
Top Coated the EIS Tray Dawn Patrol Grey
|
Details
|
|
|
|
06-23-2011
|
2.00
|
Primed EIS Tray After Drilling to Right FWD Panel
|
Details
|
")
|
|
06-15-2011
|
1.50
|
Modified the EIS Tray
|
Details
|
")
")
")
|
|
06-14-2011
|
2.50
|
Fabricated the EIS Tray
|
Details
|
")
")
")
|
|
06-11-2011
|
2.00
|
Wired the Engine Critical Power CommonTerminal
|
Details
|
")
|
|
06-04-2011
|
1.00
|
Installed Mic and Headphone Jacks
|
Details
|
")
")
")
|
|
06-02-2011
|
2.50
|
Soldered Wires to the Mike and Headset Plugins
|
Details
|
")
")
|
|
05-30-2011
|
1.50
|
Wired the Tank Sensors for the Fuel Guardian
|
Details
|
")
")
")
|
|
05-28-2011
|
2.00
|
Ran Pitot/Static Lines to the AHRS
|
Details
|
")
")
")
|
|
05-28-2011
|
6.00
|
Organized Wires on the Left Side of the Panel
|
Details
|
")
|
|
05-28-2011
|
0.00
|
Organized Wires
|
Details
|
")
")
")
|
|
05-26-2011
|
1.00
|
Ran the Magnetometer Wires Through the Panel
|
Details
|
")
|
|
05-26-2011
|
2.00
|
Ran Backup Power Wires to the AHRSs
|
Details
|
")
")
")
|
|
05-25-2011
|
1.50
|
Organized Panel Wires
|
Details
|
")
")
")
|
|
05-24-2011
|
1.50
|
Put the Avionics Trays Back on the Panel
|
Details
|
")
")
")
|
|
05-24-2011
|
1.50
|
Laced More Wires Behind the Panel
|
Details
|
|
|
|
05-22-2011
|
1.50
|
Painted the Panels Rustoleum Graphite Gray
|
Details
|
")
|
|
05-22-2011
|
4.00
|
Organized Avionics Wires Behind the Panel
|
Details
|
|
|
|
05-22-2011
|
1.00
|
Cut Panel Holes for the Air Vents
|
Details
|
")
")
")
|
|
05-21-2011
|
1.00
|
Prepared to Cut Panel Holes for the Air Vents
|
Details
|
|
|
|
05-19-2011
|
8.00
|
Still Organizing Avionics Wires
|
Details
|
")
")
")
|
|
05-15-2011
|
8.00
|
Installed and Wired the TCW IBBS
|
Details
|
")
")
")
|
|
05-14-2011
|
6.50
|
Organizing Panel Wires
|
Details
|
|
|
|
05-13-2011
|
2.50
|
Polished the Right Wing
|
Details
|
|
|
|
05-10-2011
|
6.00
|
Organized Panel Wires
|
Details
|
")
")
")
|
|
05-10-2011
|
0.00
|
Organized Panel Wires
|
Details
|
")
")
")
|
|
05-09-2011
|
1.50
|
Worked on Organizing Avionics Wiring on Right Side
|
Details
|
")
")
|
|
05-09-2011
|
1.50
|
Soldered the SL-40 Antenna Pigtail in Place
|
Details
|
")
")
")
|
|
05-09-2011
|
0.00
|
Soldered the SL-40 Antenna Pigtail in Place
|
Details
|
")
")
")
|
|
05-06-2011
|
1.00
|
Wired the Pitch Servo
|
Details
|
")
|
|
05-06-2011
|
2.50
|
Soldered 10K Ohm Resistors in Keep Alive Wires
|
Details
|
")
")
")
|
|
05-06-2011
|
2.50
|
Removed the Instrument Panel Equipment
|
Details
|
")
")
|
|
05-05-2011
|
0.10
|
Replaced the Elevator Bellcrank Bolt
|
Details
|
")
|
|
05-05-2011
|
4.50
|
Exchanged the TruTrak Servos with GRT Servos
|
Details
|
")
")
")
|
|
05-05-2011
|
0.00
|
Exchanged the TruTrak Servos with GRT Servos
|
Details
|
")
")
")
|
|
05-05-2011
|
0.00
|
Exchanged the TruTrak Servos with GRT Servos
|
Details
|
")
")
")
|
|
05-04-2011
|
0.00
|
Canopy Rails to Ft. Walton To Be Anodized
|
Details
|
|
|
|
05-03-2011
|
0.00
|
Cosmetic Adhesive to Canopy
|
Details
|
")
")
")
|
|
05-03-2011
|
3.00
|
Applied the Cosmetic Surface of the Adhesive
|
Details
|
")
")
")
|
|
05-02-2011
|
3.00
|
Glued the Canopy to the Frame
|
Details
|
")
")
")
|
|
05-02-2011
|
0.00
|
Glued the Canopy to the Frame
|
Details
|
")
")
")
|
|
05-01-2011
|
2.50
|
Final Taped Canopy Areas To Be Glued
|
Details
|
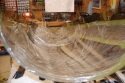
")
")
|
|
04-28-2011
|
1.50
|
Superglued 1/8" Spacer Chips on the Canopy Frame
|
Details
|
")
")
")
|
|
04-27-2011
|
1.50
|
Taped Canopy Edges
|
Details
|
|
|
|
04-25-2011
|
2.00
|
Trimmed and Dressed the Canopy Edges
|
Details
|
")
")
")
|
|
04-24-2011
|
1.00
|
Trimmed Some Excess Off of the Canopy Sides
|
Details
|
|
|
|
04-23-2011
|
8.00
|
Made "The Big Cut" in the Canopy
|
Details
|
")
")
")
|
|
04-23-2011
|
0.00
|
Made "The Big Cut" in the Canopy
|
Details
|
")
")
")
|
|
04-23-2011
|
0.00
|
Made "The Big Cut" in the Canopy
|
Details
|
")
")
")
|
|
04-23-2011
|
0.00
|
Made "The Big Cut" in the Canopy
|
Details
|
")
")
")
|
|
04-22-2011
|
3.00
|
Second Day of Canopy Trimming
|
Details
|
")
")
")
|
|
04-21-2011
|
2.50
|
Started Trimming the Front of the Canopy
|
Details
|

")
")
|
|
04-21-2011
|
0.00
|
Started Trimming the Front of the Canopy
|
Details
|


|
|
04-19-2011
|
2.50
|
Drilled and Attached C-803 Rails to F-816
|
Details
|
")
")
")
|
|
04-18-2011
|
0.00
|
Made a Canopy Frame Stand
|
Details
|
")

")
|
|
04-16-2011
|
0.00
|
Brought the Canopy to the Shop from the Hangar
|
Details
|
|
|
|
04-15-2011
|
2.00
|
Bent the Canopy Frame to the Fuselage
|
Details
|

|
|
04-13-2011
|
1.00
|
Checked the Canopy Frame Alignment to Fuselage
|
Details
|
")
")
")
|
|
04-12-2011
|
2.00
|
Drilled Slider Block for Pivot Pin and Cotter Pin
|
Details
|
")
")
")
|
|
04-11-2011
|
1.00
|
Broke out the Canopy Frame from the Attic
|
Details
|
")
")
")
|
|
04-10-2011
|
1.00
|
Temporarily Attached the Slider Rail to the Skin
|
Details
|
")
")
")
|
|
04-10-2011
|
3.00
|
Riveted the Canopy Slider Cap to the Spacer
|
Details
|

")
")
|
|
04-10-2011
|
3.00
|
Cut/Fit the Roller Rails for the Canopy Frame
|
Details
|
")
")
")
|
|
04-08-2011
|
2.00
|
Drilled Holes in the C-804 Slider Cap
|
Details
|
")
")
")
|
|
04-06-2011
|
0.00
|
Updated Finishing Kit Instructions in the Manual
|
Details
|
|
|
|
04-02-2011
|
6.00
|
Receiving Fault Message on the Backup B Panel
|
Details
|
|
|
|
04-02-2011
|
1.50
|
Checked and Corrected Heater Fan Wiring
|
Details
|
|
|
|
04-01-2011
|
2.00
|
Programming G430W and GRT EFISs
|
Details
|
|
|
|
03-31-2011
|
0.00
|
Sun 'N Fun Big Storm
|
|
")
")
")
|
|
03-30-2011
|
0.00
|
Sun 'N Fun
|
|
|
|
|
03-27-2011
|
1.50
|
Programmed the GRT EFISs until Battery Died
|
Details
|
")
")
|
|
03-23-2011
|
1.50
|
Programming the VP-200
|
Details
|
|
|
|
03-22-2011
|
1.50
|
Installed an Inline Fuse for the Fuel Guardian Lig
|
Details
|
")
")
|
|
03-21-2011
|
0.50
|
Changed the Engine Oil and Ran the Engine
|
Details
|
|
|
|
03-20-2011
|
1.00
|
Wired Inline Fuse Holders for the Fuel Guardian
|
Details
|
|
|
|
03-19-2011
|
1.50
|
Ran the Pitot/Static Lines for the Avionics and Ao
|
Details
|
|
|
|
03-16-2011
|
1.00
|
Corrected Light Wiring of Fuel Guardian
|
Details
|
|
|
|
03-14-2011
|
1.00
|
Farmiliarized Myself with Programming the VP-200
|
Details
|
")
|
|
03-12-2011
|
1.00
|
Updated the GRT EFISs Nav Data
|
Details
|
|
|
|
03-11-2011
|
2.00
|
Found the Cause of the AHRSs Failures
|
Details
|
")
")
")
|
|
03-10-2011
|
2.50
|
Started testing elctrical circuits
|
Details
|
")
")
")
|
|
03-09-2011
|
2.00
|
Linked the Forward Grounds Together
|
Details
|
")
")
")
|
|
03-08-2011
|
2.00
|
Re-routed Starter Cable Through Floor Rib
|
Details
|
")
")
")
|
|
03-04-2011
|
8.00
|
Installed the AHRSs Mounting Platform
|
Details
|
")
")
")
|
|
03-02-2011
|
1.00
|
Made Left Side of the AHRS Mount
|
Details
|
")
")

|
|
02-28-2011
|
1.50
|
Ran Five 20ga. Wires from the Hub to the Firewall
|
Details
|
")
")
")
|
|
02-27-2011
|
2.00
|
Wired the Grounding Hub
|
Details
|
")
")
")
|
|
02-27-2011
|
3.00
|
Installed and Wired the Panel Grounding Hub
|
Details
|
")
")
")
|
|
02-26-2011
|
3.00
|
Wired GNS 430W to the Avionics Power Terminal
|
Details
|
")
")
|
|
02-26-2011
|
1.00
|
Mounted the Fuel Guardian
|
Details
|
")
")
|
|
02-20-2011
|
1.00
|
Wired the Heater Fan to the Switch
|
Details
|
")
")
")
|
|
02-20-2011
|
2.00
|
Wired the AFS Sport Angle of Attack Indicator
|
Details
|
")
")
")
|
|
02-20-2011
|
4.00
|
Wired Power for Avionics to the Terminal
|
Details
|
")
")
")
|
|
02-20-2011
|
0.50
|
Started to Run Mic and Headphone Wires
|
Details
|
")
")
")
|
|
02-20-2011
|
1.00
|
Soldered Wires to AoA Test and Dimmer Buttons
|
Details
|
")
")
|
|
02-14-2011
|
2.00
|
Wired Power Side of the Lighting Terminal
|
Details
|
")
")
")
|
|
02-13-2011
|
3.00
|
Wired the Bottom Row of Avionics Power Terminal
|
Details
|
")
")
")
|
|
02-12-2011
|
8.00
|
Worked on Wiring the Left Side of the Panel
|
Details
|
")
")
")
|
|
02-11-2011
|
1.50
|
Attached TCW IBBS to the Baggage Bulkhead
|
Details
|
")
")
")
|
|
02-08-2011
|
1.00
|
Installed the Instrument Panel in the Aircraft
|
Details
|
")
")
")
|
|
02-06-2011
|
2.00
|
Switched Front Stick Grip Direction on the Stick
|
Details
|
|
|
|
02-06-2011
|
1.00
|
Re-Installed the Front Control Stick
|
Details
|
")
")
")
|
|
02-06-2011
|
1.00
|
Installed Connector on Rear Stick Fuselage Cable
|
Details
|
")
")
")
|
|
02-06-2011
|
2.50
|
Corrected the Wiring of the Grips PTT Switches
|
Details
|
")
")
")
|
|
02-06-2011
|
1.50
|
Attached D-sub Connector on Rear Stick Cable
|
Details
|
")
")
|
|
02-04-2011
|
2.50
|
Trimmed the F-803B L&R to Clear Installed Avionics
|
Details
|
")
")
")
|
|
02-03-2011
|
4.00
|
Installed Avionics in the Panel
|
Details
|
")
")
")
|
|
02-03-2011
|
2.00
|
Attached Cables to the Aft End of Avionics Trays
|
Details
|
")
")
")
|
|
02-02-2011
|
0.25
|
Drilled Holes for the AoA Button Switches
|
Details
|
")
")
|
|
02-02-2011
|
1.75
|
Cut Hole the Panel for the MT Propeller Contoller
|
Details
|
")
")
|
|
01-29-2011
|
2.00
|
Cut the Opening for the Advanced Flight AoA
|
Details
|
")
")
")
|
|
01-28-2011
|
3.00
|
Cut the Panel Opening for the Bottom EFIS
|
Details
|
")
")
|
|
01-27-2011
|
3.00
|
Cut the Upper GRT HX Opening in the Panel
|
Details
|
")
")
")
|
|
01-24-2011
|
1.00
|
Put D-sub Connector on the Front Stick Cable
|
Details
|
")
")
")
|
|
01-24-2011
|
1.00
|
Installed the Rear Stick Grip on the Stick
|
Details
|
|
|
|
01-23-2011
|
2.00
|
Installed the Grips Back on the Sticks
|
Details
|
")
")
|
|
01-18-2011
|
1.00
|
Re-Riveted Antennae Doublers to Fuselage
|
Details
|
|
|
|
01-17-2011
|
3.00
|
Removed all of the Antennae Doubler Installations
|
Details
|
")
")
")
|
|
01-16-2011
|
4.00
|
Used Hangers to Finish the Switch Panel Wiring
|
Details
|
")
")
")
|
|
01-15-2011
|
6.00
|
Wired the Switch Panel on the Fwd Rt Side
|
Details
|
")
")
|
|
01-12-2011
|
5.00
|
Installed the Fuel Guardian Lights in the Panel
|
Details
|
")
")
")
|
|
01-11-2011
|
3.00
|
Installed Other Rear Pedal Linkage Bar
|
Details
|
")
")
|
|
01-10-2011
|
2.00
|
Mounted a Flaps Microswitch for the Advanced AoA
|
Details
|
")
")
")
|
|
01-08-2011
|
3.00
|
Cut Mounting Holes for the TruTrak Turn and Bank
|
Details
|
")
")
")
|
|
01-06-2011
|
2.00
|
Match Drilled the Avionics Mounting Rail To Panel
|
Details
|
")
")
")
|
|
01-04-2011
|
2.50
|
Attached the Avionics Mounting Rail to Avionics
|
Details
|
")

")
|
|
01-03-2011
|
2.00
|
Re-routed switch panel wires from the panel
|
Details
|
")
")
|
|
01-02-2011
|
3.00
|
Wired the Switches of the Rt Forward Switch Panel
|
Details
|
")
")
|
|
12-31-2010
|
0.50
|
Put BNC Connector on the Transponder Cable
|
Details
|
")
")
")
|
|
12-31-2010
|
1.00
|
Made Hangers for the ADS-B GPS Antenna Cable
|
Details
|
")
")
")
|
|
12-28-2010
|
8.00
|
Cut the Holes for the Vertical Power Display Unit
|
Details
|
")
")
")
|
|
12-27-2010
|
1.50
|
Drew Verical Power Display Unit Opening
|
Details
|
")
|
|
12-26-2010
|
2.50
|
Made 16 Nuts for the Avionics Mounting Rail
|
Details
|
")
|
|
12-26-2010
|
0.50
|
Duct Taped the Avionics Trays Together
|
Details
|
")
")
|
|
12-26-2010
|
3.00
|
Cut the Avionics Stack Opening in the Panel
|
Details
|
")
")
")
|
|
12-20-2010
|
1.50
|
Drew GRT EFIS Positions on the Panel
|
|
|
|
|
12-18-2010
|
2.00
|
Instrument Panel Planning and Photos
|
Details
|
")
")
")
|
|
12-18-2010
|
0.00
|
Instrument Panel Planning and Photos
|
|
")
")
")
|
|
12-17-2010
|
1.50
|
Made Hangers for the Bundles in Aft Lt Mid Section
|
Details
|
")
|
|
12-16-2010
|
1.00
|
Ran the ADS-B GPS Cable
|
Details
|
")
")
")
|
|
12-15-2010
|
2.50
|
Installed the ADS-B cable 37 pin D-Sub Connector
|
Details
|
")
")
")
|
|
12-13-2010
|
0.00
|
Views of Rudder Cable Crossing Close to Longeron
|
Details
|
")
")
")
|
|
12-13-2010
|
0.00
|
Installed Rudder Cable Rub Blocks
|
Details
|
")
")
")
|
|
12-13-2010
|
2.50
|
Fabricated/Installed Rub Blocks for Rudder Cables
|
Details
|
")
")
")
|
|
12-12-2010
|
1.50
|
Installed Wiring Hangers in the Aft Section
|
Details
|
")
")
")
|
|
12-12-2010
|
0.25
|
Installed the Transponder Antenna
|
Details
|
|
|
|
12-12-2010
|
1.00
|
Installed the ADS-B UAT Antenna and Cable
|
Details
|
")
")
|
|
12-11-2010
|
2.00
|
Installed Split Conduit on Aft Section Wire Bundle
|
Details
|
")
")
|
|
12-10-2010
|
2.00
|
Drilled a Tail Light Hole Through the Aft Bulkhead
|
Details
|
")
")
")
|
|
12-08-2010
|
1.00
|
Put Shells on the Magnetometer D-Dub Connectors
|
Details
|
")
")
")
|
|
12-06-2010
|
1.00
|
Routed the Magnetometer Bundles
|
Details
|
")
")
")
|
|
12-05-2010
|
2.00
|
Laced the Remaining Magnetometer Wiring Bundle
|
Details
|
|
|
|
12-04-2010
|
2.50
|
Laced One of the Magnetometer Wire Bundles
|
Details
|
|
|
|
11-30-2010
|
1.00
|
Took Fuselage Off of Rotisserie
|
Details
|
")
")
")
|
|
11-28-2010
|
4.00
|
Riveted the Flap Fairings to the Fuselage
|
Details
|
")
")
")
|
|
11-27-2010
|
3.00
|
Installed a Doubler for the Right Flap Fairing
|
Details
|
")
|
|
11-26-2010
|
1.50
|
Made Paper Template for the Step Hole
|
Details
|
")
")
|
|
11-24-2010
|
2.00
|
Dimpled Skins and Riveted Antenna Doublers
|
Details
|
")
")
")
|
|
11-22-2010
|
3.00
|
Riveted the Step to the Fuselage.
|
Details
|
")
")
")
|
|
11-22-2010
|
0.00
|
Riveted the Step to the Fuselage
|
Details
|
")
")
|
|
11-21-2010
|
4.00
|
Fabricated the Transponder Antenna Doubler Plate
|
Details
|
")
")
|
|
11-20-2010
|
1.00
|
Attached the FastStack Pro-X Hub to Panel
|
Details
|
")
")
|
|
11-19-2010
|
3.00
|
Fabricated Doubler Plates for the Commo Antennae
|
Details
|
")
")
")
|
|
11-19-2010
|
3.00
|
Attached Aft Skin Stiffener to Fore & Aft Bulkhead
|
Details
|
")
")
")
|
|
11-18-2010
|
1.50
|
Re-routed #6 Cable to the Aft Power Terminal
|
Details
|
")
")
")
|
|
11-17-2010
|
1.00
|
Drilled and Dimpled the ADS-B Antenna Doubler
|
Details
|
")
")
")
|
|
11-16-2010
|
1.50
|
Fabricated the ADS-S Antenna Doubler
|
Details
|
")
|
|
11-13-2010
|
3.00
|
Secured Wires of the Left Side
|
Details
|
")
")
")
|
|
11-13-2010
|
4.00
|
Laced the Wires of the Left Side
|
Details
|
")
")
")
|
|
11-12-2010
|
3.00
|
Re-laced the Right Side Wires that Needed It
|
Details
|
")
")
")
|
|
11-12-2010
|
2.00
|
Installed the Dual Magnetometers
|
Details
|
")
")
")
|
|
11-12-2010
|
1.00
|
Changed the Heater Fan Switch Installation
|
Details
|
")
")
")
|
|
11-10-2010
|
0.50
|
Drilled Mounting Holes in the Magnetometers
|
Details
|
")
")
")
|
|
11-10-2010
|
0.50
|
Drew a Template for the Magnetometer Installation
|
Details
|
")
")
|
|
11-08-2010
|
1.50
|
Organized Forward Right Cabin Wires
|
Details
|
")
")
|
|
11-07-2010
|
2.00
|
Ran the RG-400 Cables for the Antennae
|
Details
|
")
")
")
|
|
11-07-2010
|
0.50
|
Ran Fuel Level Cables from the Panel Area
|
Details
|
")
")
|
|
11-07-2010
|
2.00
|
Organized the Wires/Cables of Rt Fwd Cabin Floor
|
Details
|
")
")
")
|
|
11-07-2010
|
1.50
|
Installed a Backup Fuselage Ground Wire
|
Details
|
")
|
|
11-06-2010
|
3.00
|
Installed Switches in the Fwd Right Switch Panel
|
Details
|
")
")
")
|
|
11-04-2010
|
2.50
|
Ran Battery Backup Wires From the Right Aft Side
|
Details
|
")
")
|
|
11-02-2010
|
3.00
|
Ran Autopilot Servo Wires
|
Details
|
")
")

(Click Here to view Full Log Entry)")
|
|
10-27-2010
|
1.50
|
Mounted the ADS-B to the Mounting Panel
|
Details
|
")
")
")
|
|
10-26-2010
|
2.50
|
Finished the ADS-B Mount
|
Details
|
")
")
")
|
|
10-25-2010
|
3.00
|
Started Fabrication of NavWorx ADS-B Mount
|
Details
|
")
")
")
|
|
10-18-2010
|
1.00
|
Removed the Front Top Skin for Storage
|
Details
|
|
|
|
10-17-2010
|
1.00
|
Installed Remainder of the Throttle Hardware
|
Details
|
|
|
|
10-07-2010
|
2.00
|
Spot Polished the Wings to Remove Corrosion
|
Details
|
|
|
|
10-06-2010
|
1.00
|
Stiffener Made for the F-804C-AL Bulkhead
|
Details
|
")
|
|
10-05-2010
|
2.50
|
Rebuilt the Front Throttle with Longer Bolts
|
Details
|
")
")
")
|
|
10-05-2010
|
0.00
|
Modified Front Throttle for Clevos Pin Access
|
Details
|
")
|
|
10-03-2010
|
1.50
|
Polished 0.5 of the light corrosion on Rt Wing
|
Details
|
|
|
|
09-27-2010
|
0.50
|
Riveted Nutplates to the Aft Deck
|
Details
|
")
")
|
|
09-26-2010
|
6.00
|
Rough Connected the Front and Rear Throttle
|
Details
|
")
")
")
|
|
09-23-2010
|
1.00
|
Made Spacer For the Front Throttle
|
Details
|
")
")
|
|
09-14-2010
|
1.00
|
Connected the Rear and Front Throttles
|
Details
|
")
")
")
|
|
09-13-2010
|
1.00
|
Holes for the Rear Throttle Connection Rod
|
Details
|
")
")
|
|
09-12-2010
|
1.50
|
Tapped the Rear Throttle Connecting Rod
|
Details
|
")
")
|
|
09-12-2010
|
2.00
|
Mounted the Front Throttle
|
Details
|
")
")
|
|
09-12-2010
|
0.25
|
Installed the Bearing and Clevis Rod Ends
|
Details
|
")
")
|
|
09-12-2010
|
1.00
|
Installed Nutplated for the Tip Lenses
|
Details
|
")
")
|
|
09-12-2010
|
1.00
|
Drilled/Clecoed for Horizontal Stabilizer Nutplate
|
Details
|
")
")
|
|
09-12-2010
|
0.50
|
Added Nutplates to the Fuselage Tank Brackets
|
Details
|
")
")
|
|
09-11-2010
|
3.00
|
Moved the Wings to the Hangar
|
Details
|
")
")
")
|
|
09-10-2010
|
1.00
|
Riveted Under Wing NACA Vent to Right Wing
|
Details
|
")
")
|
|
09-09-2010
|
1.00
|
Prosealed the Under Wing NACA Vent to Rt Wing
|
Details
|
")
")
|
|
09-07-2010
|
1.50
|
Checked the Operation of the Fuel Guardian
|
Details
|
")
")
")
|
|
09-06-2010
|
2.00
|
Riveted Nutplates to the Rt Wing Inboard Edges
|
Details
|
|
|
|
09-03-2010
|
2.00
|
Dimpled and Countersunk Top Skin Holes
|
Details
|
")
")
")
|
|
09-02-2010
|
1.50
|
Drilled, Deburred & Dimpled Rt Wing Inboard Edge
|
Details
|
")
")
|
|
09-01-2010
|
1.00
|
Re-Surface Converted the Left Flap
|
Details
|
")
")
")
|
|
08-31-2010
|
2.00
|
Finished Installation of Rt Wing Fairing Nutplates
|
Details
|
")
")
|
|
08-31-2010
|
1.00
|
Cut the Slot in the Rt Tank Attachment Bracket
|
Details
|
")
")
")
|
|
08-30-2010
|
4.00
|
Drilled, Dimpled & Countersunk Rt Inboard Wing
|
Details
|
")
")
|
|
08-28-2010
|
1.00
|
Removed the Left Wing Flap and Rolled the Edge
|
Details
|
|
|
|
08-25-2010
|
2.50
|
Fit the Left Tip Lens
|
Details
|
")
")
")
|
|
08-24-2010
|
1.50
|
Fitting the Right Tip Lens
|
Details
|
")
")
")
|
|
08-24-2010
|
1.00
|
Fitted the Right Tip Lens
|
Details
|
")
")
")
|
|
08-23-2010
|
2.00
|
Installed the Light Assembly in the Left Tip
|
Details
|
")
")
|
|
08-21-2010
|
0.00
|
View of 70 Degree Spacers on Rt. Tip Lights
|
Details
|
")
|
|
08-21-2010
|
1.00
|
Fitted the Light Assembly to the Right Tip
|
Details
|
")
")
")
|
|
08-20-2010
|
5.00
|
Worked on the Installation of the Tip Lights
|
Details
|
")
")
")
|
|
08-18-2010
|
1.50
|
Started the Installation of the Tip Lights
|
Details
|
")
|
|
08-17-2010
|
1.50
|
Finished the Installation of the Tip Nutplates
|
Details
|
")
|
|
08-06-2010
|
2.50
|
Installed 2/3 of Nutplates on the Left Tip
|
Details
|
")
")
|
|
08-05-2010
|
1.00
|
Installed the Archer VOR Antenna in Right Tip
|
Details
|
")
")
|
|
08-05-2010
|
1.50
|
Installed half of the Right Tip Nutplates
|
Details
|
|
|
|
08-03-2010
|
1.50
|
Fiberglass the Aft Inside of the Tips
|
Details
|
")
")
")
|
|
08-03-2010
|
1.50
|
Countersunk the Left Tip Holes
|
Details
|
|
|
|
08-02-2010
|
1.50
|
Countersunk Right Wing Tip Holes
|
Details
|
")
")
|
|
07-26-2010
|
0.00
|
To Oshkosh until July 31
|
Details
|
|
|
|
07-21-2010
|
1.00
|
Fuselage is back on the Rotisserie
|
Details
|
|
|
|
07-20-2010
|
2.00
|
Removed the Wings from the Fuselage
|
Details
|
")
")
")
|
|
07-19-2010
|
1.50
|
Drilled the Right Tip for Nutplate Installation
|
Details
|
")
")
|
|
07-18-2010
|
1.00
|
Drilled the Left Tip for Nutplate Installation
|
Details
|
|
|
|
07-17-2010
|
1.00
|
Drilled Right Wing Tip Attachment Hole to #26
|
Details
|
")
|
|
07-16-2010
|
1.50
|
Cut the Right Tips Trailing Edge
|
Details
|
")
|
|
07-15-2010
|
2.00
|
Matched Drilled Tip Edge Reinforcement Strips
|
Details
|
")
")
")
|
|
07-14-2010
|
0.50
|
Remover Tape From the Tips' Exterior
|
Details
|
")
")
")
|
|
07-13-2010
|
1.50
|
Riveted the Inside of the Baggage Door
|
Details
|
")
")
|
|
07-13-2010
|
1.50
|
Re-Did the Tips Trailing Edges
|
Details
|
")
")
|
|
07-12-2010
|
2.00
|
Cut and Epoxied the Tips Trailing Edges
|
Details
|
")
")
")
|
|
07-09-2010
|
1.50
|
Drilled #26 Holes in the Tip for #6 Screws
|
Details
|
|
|
|
06-27-2010
|
1.50
|
Fitted, Cut and Drilled Left Wing Tip
|
Details
|
")
")
")
|
|
06-26-2010
|
2.00
|
Fitted, Drilled and Clecoed Right Wing Tip
|
Details
|
")
")
")
|
|
06-22-2010
|
1.50
|
Final Drilled the Wing Fairing Holes to #19 Size
|
Details
|
|
|
|
06-21-2010
|
3.00
|
Installed the Flap Fairings
|
Details
|
")
")
")
|
|
06-21-2010
|
3.00
|
Finished Wing Fairings/Installed Flap Fairings
|
Details
|
")
")
|
|
06-20-2010
|
4.00
|
Started Wing Fairing Fitting
|
Details
|
")
")
")
|
|
06-18-2010
|
1.50
|
Re-checked the aileron neutral positions
|
Details
|
|
|
|
06-17-2010
|
4.00
|
Installed the Aileron Stops after talking to Van's
|
Details
|
|
|
|
06-16-2010
|
1.00
|
Checked the Ailerons' Range of Motion
|
Details
|
|
|
|
06-15-2010
|
1.00
|
Openned the Rt. Fuselage Flap Control Rod Hole
|
Details
|
|
|
|
06-14-2010
|
1.00
|
Opened Fuselage Hole for the Flap Control Rod
|
Details
|
")
")
")
|
|
06-10-2010
|
1.00
|
Enlarged the Hole for the Flap Control Rod
|
Details
|
")
")
")
|
|
06-08-2010
|
1.50
|
Replaced the Flap Control Rod mounting nuts
|
Details
|
|
|
|
06-07-2010
|
2.00
|
Opened the Rt Flap Control Rod Hole
|
Details
|
|
|
|
06-02-2010
|
2.00
|
Aligned the Ailerons in Neutral Trail Position
|
Details
|
")
")
")
|
|
06-01-2010
|
0.50
|
Surface Converted the Fuselage Tank Brackets
|
Details
|
")
")
")
|
|
06-01-2010
|
2.50
|
Started Rigging the Ailerons
|
Details
|
")
")
")
|
|
06-01-2010
|
1.50
|
Installed the Left Tank to Fuselage Supply Line
|
Details
|
")
")
")
|
|
05-31-2010
|
1.00
|
Drilled 1/4" hole in Forward Tank Supports
|
Details
|
|
|
|
05-30-2010
|
0.50
|
Match drilled the Fuselage Center Skins and Wing
|
Details
|
")

")
|
|
05-30-2010
|
0.00
|
Attached Rt Forward Tank Support Brackets
|
Details
|
")
")
|
|
05-30-2010
|
2.00
|
Attached Lt Forward Tank Support rtackets
|
Details
|
")
")
|
|
05-29-2010
|
0.00
|
Drilled the Right Rear Spar
|
Details
|
")
")
")
|
|
05-29-2010
|
2.00
|
Drilled the Left Rear Spar
|
Details
|
")
")

|
|
05-29-2010
|
0.00
|
Drilled the Left Rear Spar
|
|
")
")
")
|
|
05-28-2010
|
0.25
|
Re-measured the wings
|
Details
|
|
|
|
05-26-2010
|
1.00
|
Re-measured the wing required for rear spar drilli
|
Details
|
|
|
|
05-25-2010
|
0.00
|
Drawing of the Flap Actuator Rod Attachment
|
Details
|
")
|
|
05-25-2010
|
2.00
|
Attached Flap Actuator Rods to the Flaps
|
Details
|
")
")
")
|
|
05-23-2010
|
2.00
|
Fit Lt Flap to the Fuselage
|
Details
|
")
")
")
|
|
05-22-2010
|
2.00
|
Started fitting the Right Flap to the Fuselage
|
Details
|
")
")
")
|
|
05-22-2010
|
0.00
|
Rt Flap Fitted to the Fuselage
|
Details
|
")
")
|
|
05-21-2010
|
2.00
|
Made Flap Control Linkages
|
Details
|
")
")
|
|
05-18-2010
|
0.25
|
Replaced Rt Tank to Fuselage Vent Line
|
Details
|
")
")
|
|
05-17-2010
|
1.00
|
Installed Vent Line Between Rt Tank and Fuselage
|
Details
|
")
")
")
|
|
05-17-2010
|
1.50
|
Installed Vent Line between Lt Tank and Fuselage
|
Details
|
")
")
")
|
|
05-15-2010
|
0.25
|
Tip to Tail lengths were measured
|
Details
|

|
|
05-15-2010
|
0.50
|
Set the wings' angle of incidence
|
Details
|
")

|
|
05-15-2010
|
0.50
|
Leveled the fuselage
|
Details
|
")
")
|
|
05-15-2010
|
2.00
|
Installed a Left Tank Return Line
|
Details
|
")
")
")
|
|
05-15-2010
|
1.00
|
Connected the wings to the fuselage
|
Details
|
")
")
")
|
|
05-15-2010
|
0.50
|
Checked the trueness of the wing
|
Details
|
")
|
|
05-13-2010
|
0.50
|
Positioned the Wings on Saw Horses
|
Details
|
")
")
")
|
|
05-12-2010
|
1.00
|
Moved Fuselage and Wings to House Garage
|
Details
|
|
|
|
05-10-2010
|
0.50
|
Re-Installed the Heater
|
Details
|
|
|
|
05-08-2010
|
2.00
|
Re-wired heater with Molex Pins and Plugs
|
Details
|
")
")
")
|
|
04-27-2010
|
1.00
|
Powered up the Vertical Power System
|
Details
|
")
|
|
04-20-2010
|
1.50
|
Re- laced wires of the CU that were removed
|
Details
|
|
|
|
04-19-2010
|
0.25
|
Tested VP CU Serial Cables with the buzzer
|
|
|
|
|
04-18-2010
|
4.60
|
Tested VP CU Plugs/Pins for correct wiring
|
Details
|
|
|
|
04-17-2010
|
1.00
|
Assembled a circuit tester for the VP wiring
|
Details
|
")
")
|
|
04-13-2010
|
0.00
|
Sun 'N Fun through 4/16
|
|
|
|
|
04-02-2010
|
1.00
|
Secured ground cable in the mid-cabin
|
Details
|
|
|
|
03-28-2010
|
2.00
|
Installled Conduit under the Front Throttle Mount
|
Details
|
")
")
")
|
|
03-23-2010
|
1.00
|
Laced wires of the Left Mid Fuselage Floor
|
Details
|
")
")
|
|
03-21-2010
|
2.00
|
Laced the wires along the right side, aft to front
|
Details
|
")
")
")
|
|
03-21-2010
|
1.00
|
Laced the wires along the right side, aft to front
|
Details
|
")
")
")
|
|
03-20-2010
|
1.50
|
Fixed wiring conflict with Flap Position Sensor
|
Details
|
")
")
")
|
|
03-19-2010
|
1.00
|
Made #8 Power Cable to Aft Terminal Block
|
Details
|
")
")
")
|
|
03-19-2010
|
1.50
|
Finished J-7 plug
|
Details
|
")
")
")
|
|
03-18-2010
|
2.00
|
Finished wiring the J-7 Plug
|
Details
|
")
|
|
03-16-2010
|
1.00
|
Put pins on the J-7 Pins 31, 32, 34 and 35
|
Details
|
|
|
|
03-15-2010
|
1.00
|
Ran another power wire for the cowl flap control
|
Details
|

|
|
03-02-2010
|
1.50
|
Started wiring the J-7 plug on the CU
|
Details
|
")
")
|
|
02-28-2010
|
4.00
|
Ran spare switch wires from CU to behind panel
|
Details
|
|
|
|
02-26-2010
|
1.00
|
Connected Flap Position Sensor wires to Cable
|
Details
|
")
")
")
|
|
02-25-2010
|
1.50
|
Laced wires around the VP CU
|
Details
|
")
")
")
|
|
02-24-2010
|
0.75
|
Ran Flap Position Sensor Cable to the VP CU
|
Details
|
|
|
|
02-21-2010
|
7.00
|
Laces starter cable wires and CU wires
|
Details
|
")
")
")
|
|
02-20-2010
|
4.00
|
Finished wiring grips' terminal
|
Details
|
")
")
")
|
|
02-16-2010
|
1.00
|
Wired Servo outputs from the terminal strip
|
Details
|
")
")
|
|
02-13-2010
|
0.25
|
Ran Front Stick Ground to Aft Ground Terminal
|
Details
|
")
")
")
|
|
02-13-2010
|
3.75
|
Installed the Grips terminal strip
|
Details
|
")
")
")
|
|
02-09-2010
|
2.50
|
Re-wired the Front/Aft grips at the terminal strip
|
Details
|
")
")
")
|
|
02-08-2010
|
8.00
|
Wired the Front and Aft Grips together
|
Details
|
")
")
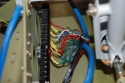
|
|
02-07-2010
|
2.00
|
Mounted the stick grips' terminal strip
|
Details
|
")
")
")
|
|
02-06-2010
|
1.50
|
Connected a 12 and 6 terminal strips together
|
Details
|
|
|
|
02-03-2010
|
1.50
|
Ran Control Sticks' cable aft to VP CU
|
Details
|
|
|
|
01-31-2010
|
6.00
|
Wired the Aft Stick Grip
|
Details
|
")
")
")
|
|
01-30-2010
|
0.00
|
Ring used to guide wires around the grip boss
|
Details
|
")
|
|
01-30-2010
|
10.00
|
Installed Infinity grip on Front Stick
|
Details
|
")
")
")
|
|
01-26-2010
|
1.00
|
Ran 14 ga seat heater wire from Fused terminal
|
Details
|
")
|
|
01-24-2010
|
7.00
|
Adjusted the flap position sensor setup
|
Details
|
")
")
")
|
|
01-21-2010
|
1.50
|
Drilled mount and added Platenuts for Aft Terminal
|
Details
|
")
")
")
|
|
01-17-2010
|
1.50
|
Installed/Fitted flap position sensor
|
Details
|
")
")
")
|
|
01-17-2010
|
3.00
|
Fabricated a mount for the Aft Fused Terminal
|
Details
|
")
")
")
|
|
01-17-2010
|
1.00
|
Crimped pins on Switch Panel plug wires
|
Details
|
")
|
|
01-17-2010
|
0.50
|
Bent reinforcement washers for stick holes
|
Details
|
")
|
|
01-06-2010
|
2.00
|
Fabricated a mount for the Flap Position Sensor
|
Details
|
|
|
|
01-04-2010
|
1.00
|
Ran Remote Starter Switch wire from VP CU
|
Details
|
|
|
|
01-01-2010
|
3.50
|
Ran the E-Bus Power for the VP CU
|
Details
|
")
")
")
|
|
01-01-2010
|
0.50
|
Ran Ground Wires from VP CU
|
Details
|
")
|
|
12-30-2009
|
2.00
|
Made cables for the Aft Ground Terminal Block
|
Details
|
")
")
")
|
|
12-28-2009
|
2.50
|
Fabrication/Installation Aft Grounding Block Mount
|
Details
|
")
")
")
|
|
12-20-2009
|
2.00
|
Made Cables from Contactor to Bus Block
|
Details
|
")
")
")
|
|
12-16-2009
|
1.00
|
Fabricated/Installed the Bus Block Mount
|
Details
|
")
")
")
|
|
12-16-2009
|
1.00
|
Fabricated/Installed the Bus Block Mount
|
Details
|
")
")
|
|
12-15-2009
|
2.00
|
Bundled forward cabin wires
|
Details
|
")
")
")
|
|
12-12-2009
|
3.50
|
Started bundling the VP CU wires
|
Details
|
")
")
")
|
|
12-09-2009
|
1.50
|
Put shellbacks on the CU serial cables
|
Details
|
")
|
|
12-06-2009
|
1.00
|
Running VP CU wires
|
Details
|
")
")
")
|
|
12-06-2009
|
1.00
|
Running VP CU wires
|
Details
|
")
")
")
|
|
12-06-2009
|
1.00
|
Ran wires for the J-4 and J-5 plugs
|
Details
|
")
")
")
|
|
12-05-2009
|
3.50
|
Ran wires from the J-3 and J-6 VP CU plugs
|
Details
|
")
")
|
|
12-03-2009
|
1.00
|
Electrical planning
|
Details
|
|
|
|
12-01-2009
|
1.00
|
Finished wiring VP CU plugs
|
Details
|
|
|
|
11-28-2009
|
1.75
|
Put d-sub connector on the aft SP cable
|
Details
|
")
")
|
|
11-25-2009
|
2.00
|
Put d-sub connector on the aft end of the DU Cable
|
Details
|
")
")
")
|
|
11-22-2009
|
1.00
|
Ran wires from VP CU to Flap Motor
|
Details
|
")
")
|
|
11-22-2009
|
2.00
|
Ran wires from the Vertical Power Control Unit
|
Details
|
")
")
")
|
|
11-21-2009
|
1.50
|
Attached Adel clamp mounting angles to floor ribs
|
Details
|
")
")
|
|
11-19-2009
|
1.50
|
Ran wires for the Backup A & B switches
|
Details
|
|
|
|
11-11-2009
|
0.00
|
To Disney for 5 days
|
|
|
|
|
11-08-2009
|
3.00
|
Wired plugs of the VP CU
|
|
|
|
|
11-07-2009
|
3.00
|
Continued to make VP CU Bundles
|
Details
|
")
|
|
11-04-2009
|
1.50
|
Made wires for a Vertical Power Plug
|
Details
|
|
|
|
10-29-2009
|
3.00
|
Made a new #6 cable for run from Battery to VP
|
Details
|
")
")
|
|
10-28-2009
|
2.50
|
Adjusted Starter cable run
|
Details
|
")
")
")
|
|
10-28-2009
|
1.00
|
Added Terminal to Starter Cable at Contactor
|
Details
|
")
")
|
|
10-26-2009
|
2.00
|
Called Van's and talked to Joe about fat cable run
|
Details
|
|
|
|
10-25-2009
|
2.50
|
Ran the Essential Engine Aux wires up left side
|
Details
|
")
")
")
|
|
10-24-2009
|
4.00
|
Ran Engine Main (Always Hot) Wires up Left Side
|
Details
|
")
")
|
|
10-22-2009
|
1.50
|
Put miniature d-sub connector on the roll trim cab
|
Details
|
")
")
|
|
10-22-2009
|
1.50
|
Fashioned a miniature d-sub connector for roll tri
|
Details
|
")
")
")
|
|
10-20-2009
|
1.00
|
Tested d-sub pins on the trim 26ga wires
|
Details
|
|
|
|
10-07-2009
|
1.50
|
Wired most of the J-5 and started J-6 Plug
|
Details
|
")
|
|
10-06-2009
|
1.50
|
Finished J-4 plug except for Ground Wire
|
Details
|
")
|
|
10-05-2009
|
2.00
|
Wired the J-3 & 3/4 of J-4 VP Plugs
|
Details
|
|
|
|
10-04-2009
|
1.00
|
Crimped connectors to the flap power wires
|
Details
|
")
")
")
|
|
09-26-2009
|
2.00
|
Put AN-6D fittings on fuselage fuel line terminati
|
Details
|
")
")
")
|
|
09-20-2009
|
1.50
|
Made the Right F-863A Bracket
|
Details
|
")
|
|
09-18-2009
|
1.50
|
Finished the Left F-863A bracket
|
Details
|
")
")

|
|
09-17-2009
|
1.00
|
Fabricated 1/2 of F-863A Tank Attachment Bracket
|
Details
|
")
")
")
|
|
09-17-2009
|
0.50
|
Fabricated 1/2 of F-863A Tank Attachment Bracket
|
Details
|
")
")
|
|
09-15-2009
|
3.00
|
Made/repaired some saw horses
|
Details
|
")
")
|
|
09-13-2009
|
1.00
|
Preparing for temporary attachment of the wings
|
Details
|
")

")
|
|
09-13-2009
|
0.50
|
Made a Drift pin for the wing attachment
|
Details
|

|
|
09-09-2009
|
2.00
|
Measured wiring lengths for the VP loadsheet
|
Details
|
|
|
|
08-16-2009
|
10.00
|
Started VP Load Planning Sheet
|
Details
|
|
|
|
08-15-2009
|
2.50
|
Installed bilateral Static Sensor ports on aft fus
|
Details
|
")
")
")
|
|
08-15-2009
|
0.00
|
Holes in center section for Static tubing run
|
Details
|
")
|
|
08-08-2009
|
3.00
|
Riveted the F-807B-810B bulkheads to fuselage
|
Details
|
")
")
|
|
08-07-2009
|
1.50
|
Riveted the Rail Receptacle to the F-807B
|
Details
|
")
|
|
08-06-2009
|
1.50
|
Epoxy primed the Aft top skin interior
|
Details
|
")
")
|
|
08-04-2009
|
1.00
|
Surface converted rail receptacle, anchors, gosset
|
Details
|
|
|
|
07-24-2009
|
5.00
|
Filed and fit the F-858 shoulder anchors
|
Details
|
")
")
|
|
07-22-2009
|
2.00
|
Fixed the F-808 bulkhead installation error
|
Details
|
")
")
")
|
|
07-21-2009
|
2.00
|
Tapped the tiedown nutplates
|
Details
|
")
")
")
|
|
07-21-2009
|
2.00
|
Fit the Canopy Rail Receptacle to Aft Skin
|
Details
|
|
|
|
07-20-2009
|
2.00
|
Started homemade nutplates for tiedowns
|
Details
|
")
")
|
|
07-19-2009
|
3.00
|
Finished installation of the Rear Pedals hardware
|
Details
|
")
")
")
|
|
07-19-2009
|
2.00
|
Attached the Aft bulkheads tops
|
Details
|
|
|
|
07-15-2009
|
1.50
|
Drilled/dimpled holes for Rear Pedal Guide nutplat
|
Details
|
")
")
|
|
07-13-2009
|
2.00
|
Fit/drilled the F-8117 L&R Rear Pedal Guides
|
Details
|
")
")
|
|
07-12-2009
|
2.00
|
Trimmed material from the F-8113 L&R
|
Details
|
|
|
|
07-11-2009
|
0.50
|
Replace the elevator bellcrank center bolt
|
Details
|
|
|
|
07-09-2009
|
2.00
|
Started Rear Rudder Pedal installation
|
Details
|
")
")
")
|
|
07-06-2009
|
1.00
|
Secures Rudder Cables at aft exit hole
|
Details
|
")
|
|
07-06-2009
|
1.50
|
Installed the Rudder Cables
|
Details
|
")
")
")
|
|
07-05-2009
|
2.00
|
Installed the Flap Actuator
|
Details
|
")
")
")
|
|
07-04-2009
|
1.00
|
Started the Flap Actuator installation
|
Details
|
|
|
|
07-04-2009
|
2.00
|
Put PIGD Push-on terminals on Aux Fuse Block
|
Details
|

(Click Here to view Full Log Entry)")
|
|
07-03-2009
|
1.00
|
Ran a #6AWG Tefzel Cable to the VP CU
|
Details
|
|
|
|
07-01-2009
|
1.50
|
Ran #8AWG Tefzel cable to the Fuse Blocks
|
Details
|
|
|
|
06-29-2009
|
2.50
|
Mounted the Vertical Power Control Unit
|
Details
|
")
")
")
|
|
06-29-2009
|
1.00
|
Installed the fuse blocks in the aft fuselage
|
Details
|
")
")
|
|
06-28-2009
|
2.50
|
Installed heater in forward right corner
|
Details
|
")
")
")
|
|
06-26-2009
|
2.50
|
Began heater installation
|
Details
|
")
")
|
|
06-25-2009
|
1.00
|
Mounted the battery tray into the fuselage
|
Details
|
")
")
|
|
06-22-2009
|
2.00
|
Made and attached 2 ground cables to the tray
|
Details
|
")
|
|
06-21-2009
|
4.00
|
Finished making positive cables for battery tray
|
Details
|
")
")
")
|
|
06-21-2009
|
0.00
|
Fathers' Day - Family gave me my Otto Pilot
|
Details
|
")
")
")
|
|
06-20-2009
|
3.00
|
Attached 200A ANL holders to platforms
|
Details
|
")
")
")
|
|
06-19-2009
|
1.50
|
Riveted the ANL fuse holder platform together
|
Details
|
")
")
|
|
06-17-2009
|
1.00
|
Re-painted the battery hold downs
|
Details
|
|
|
|
06-15-2009
|
2.50
|
Mounted battery contactors/Made ANL mounts
|
Details
|
")
|
|
06-14-2009
|
2.00
|
Mounted Battery Tray Ground Bus Bar
|
Details
|
")
")
")
|
|
06-13-2009
|
3.00
|
Made Spacers for the hold-down bolts
|
Details
|
")
")
")
|
|
06-12-2009
|
2.00
|
Riveted the K1000-426 nutplates on battery tray
|
Details
|
|
|
|
06-11-2009
|
1.00
|
Drilled 1/4" holes in the battery tray
|
Details
|
|
|
|
06-07-2009
|
4.00
|
New ECU/First Engine Start
|
Details
|
")
")
|
|
06-03-2009
|
0.00
|
Delivered the ECU to Jan Eggenfellner
|
Details
|
|
|
|
06-01-2009
|
3.00
|
Continued coil combinations
|
Details
|
|
|
|
05-31-2009
|
3.00
|
Can't stop blowing fuses
|
Details
|
|
|
|
05-30-2009
|
2.00
|
Blowing 20A inline fuse when engine terminal on
|
Details
|
")
")
")
|
|
05-29-2009
|
3.00
|
Daisy chain wired the terminal for engine start
|
Details
|
")
")
")
|
|
05-28-2009
|
1.50
|
Safety wired the bolts of the TruTrak Roll Servo
|
Details
|
")
|
|
05-27-2009
|
1.50
|
Tapped the housing of the Roll Servo
|
Details
|
")
")
|
|
05-26-2009
|
1.00
|
Started to install TruTrak Roll Servo
|
Details
|
|
|
|
05-25-2009
|
2.50
|
Riveted the roll servo bracket to Rt. Inbd Seat Ri
|
Details
|
")
")
|
|
05-24-2009
|
3.00
|
Surface converted roll servo bracket and primed
|
Details
|
|
|
|
05-22-2009
|
3.50
|
Started installation of the TruTrak Roll Servo
|
Details
|
")
")
|
|
05-21-2009
|
4.00
|
Installed the Roll Trim Servo
|
Details
|
")
")
")
|
|
05-19-2009
|
0.50
|
Installed Pitch Servo Control link
|
Details
|
")
|
|
05-18-2009
|
1.00
|
Installed the Pitch Control Servo
|
Details
|
")
")
")
|
|
05-17-2009
|
2.00
|
Installed the Trutrak Pitch Servo Bracket
|
Details
|
")
")
")
|
|
05-16-2009
|
1.00
|
Replaced the Left Tank Access Plate
|
Details
|
|
|
|
05-14-2009
|
1.00
|
Drilled the Left Tank Access Plate for the Guardia
|
Details
|
|
|
|
05-13-2009
|
2.00
|
Re-screwed the Left Tank to the wing
|
Details
|
|
|
|
05-08-2009
|
2.00
|
Replaced the Right Tank access plate
|
Details
|
")
|
|
05-06-2009
|
1.00
|
Prosealed the sensor to the rght tank access plate
|
Details
|
")
")
|
|
05-05-2009
|
0.50
|
Drilled a 0.47" hole in the right tank access plat
|
Details
|
")
|
|
05-04-2009
|
1.00
|
Marked the Right Tank for sensor location
|
Details
|
|
|
|
04-19-2009
|
4.00
|
Tried to remove Left tank for Fuel Guardian Instil
|
Details
|
|
|
|
04-17-2009
|
1.00
|
Riveted F805B L+R and spacer and nutplates
|
Details
|
|
|
|
03-29-2009
|
1.00
|
Sprayed epoxy primer to the aft fuselage interior
|
Details
|
")
")
")
|
|
03-28-2009
|
4.00
|
Surface converted the interior of fuselage tail
|
Details
|
")
")
")
|
|
03-27-2009
|
0.50
|
Added Gear oil to the PSRU
|
Details
|
")
")
")
|
|
03-23-2009
|
0.25
|
Added 4 quarts of 5W-30 Oil to the engine
|
Details
|
|
|
|
03-14-2009
|
1.50
|
Drilled and installed the battery mount
|
Details
|
")
")
")
|
|
03-11-2009
|
2.00
|
Fitted the battery mount to the fuselage
|
Details
|
")
")
|
|
03-07-2009
|
1.00
|
Painted battery mount glossy yellow
|
Details
|
|
|
|
03-05-2009
|
1.50
|
Finished fitting the outboard angles to the mount
|
Details
|
")
")
")
|
|
03-04-2009
|
1.00
|
Rough fit left outboard angle to battery mount
|
Details
|
|
|
|
03-03-2009
|
2.00
|
Fit the battery mount to the fuselage
|
Details
|
")
|
|
03-01-2009
|
4.50
|
Drilled, deburred, countersunk the battery mount
|
Details
|
")
")
|
|
02-28-2009
|
5.00
|
Riveted the baggage door together
|
Details
|
")
")
")
|
|
02-26-2009
|
2.50
|
Deburred, surface converted and sealed parts
|
Details
|
|
|
|
02-24-2009
|
2.00
|
Assembled and drilled the baggabe door
|
Details
|
")
")
|
|
02-22-2009
|
2.50
|
Fabricated F-837K latch pins for the baggage door
|
Details
|
")
")
|
|
02-20-2009
|
0.50
|
Located the parts for the Baggage Door assembly
|
Details
|
|
|
|
02-18-2009
|
0.50
|
Re-installed the Forward Top Skin
|
Details
|
|
|
|
02-17-2009
|
5.00
|
Match drilled all parts of the Forward Top Skin
|
Details
|
|
|
|
02-16-2009
|
0.50
|
Drilled the F-8104 Fwd Skin Support Ribs
|
Details
|
")
")
")
|
|
02-15-2009
|
1.00
|
Installed Windscreen support
|
Details
|
")
|
|
02-15-2009
|
5.50
|
Clecoed the front top skin in place
|
Details
|
")
")
")
|
|
02-14-2009
|
2.50
|
Surface converted the Instrument panel parts
|
Details
|
")
|
|
02-13-2009
|
2.50
|
Drilled the WD-814 Windscreen support in place
|
Details
|
")
")
")
|
|
02-13-2009
|
3.50
|
Assembled the Instrument panel and subpanels
|
Details
|
")
|
|
02-10-2009
|
2.00
|
Made a doubler plate for the battery mount
|
Details
|
")
")
|
|
02-09-2009
|
1.00
|
Drilled holes in the Battery Mount to match ribs
|
Details
|
")
|
|
02-08-2009
|
6.00
|
Connected F-846 pushrod to F-635 Elevator bellcran
|
Details
|
")
")
")
|
|
02-07-2009
|
2.00
|
Connected F-839-2 to control to front & back stick
|
Details
|
")
")
")
|
|
02-05-2009
|
1.00
|
Mounted the fuel pumps
|
Details
|
")
")
")
|
|
02-02-2009
|
0.50
|
Altered pump cover for bolt clearances
|
Details
|
|
|
|
01-29-2009
|
3.00
|
Mounted the pumps to fuselage
|
Details
|
")
")
")
|
|
01-27-2009
|
1.00
|
Top coated the pump cover
|
Details
|
|
|
|
01-27-2009
|
1.00
|
Surface converted and primed pump mount
|
Details
|
|
|
|
01-25-2009
|
5.00
|
Fabricated a fuel pump mount
|
Details
|
")
")
")
|
|
01-24-2009
|
2.00
|
Installed parking brake and torqued all lines
|
Details
|
")
")
")
|
|
01-24-2009
|
2.00
|
Fabricated a cover for the fuel pumps
|
Details
|
")
")
")
|
|
01-22-2009
|
1.50
|
Installed the left brake line
|
Details
|
")
|
|
01-17-2009
|
2.00
|
Installed the pedals, reservoirs and lines in fuse
|
Details
|
")
")
")
|
|
01-16-2009
|
2.00
|
Installed AN fittings in the gear weldments
|
Details
|
")
")
")
|
|
01-16-2009
|
3.00
|
Fabricated a Parking Brake bracket
|
Details
|
")
")
")
|
|
01-15-2009
|
10.00
|
Applied Fuel Lube to threads and torqued fittings
|
Details
|
")
")
")
|
|
01-14-2009
|
8.00
|
Re-bent Right Supply line and secured the lines
|
Details
|
")
")
")
|
|
01-13-2009
|
5.00
|
Bent Right tank return line
|
Details
|
|
|
|
01-12-2009
|
5.00
|
Installed Left tank return/Bent right tank supply
|
Details
|
")
")
")
|
|
01-12-2009
|
0.00
|
Additional Fuel system installation photos
|
Details
|
")
")
")
|
|
01-11-2009
|
3.00
|
Bent the Left tank supply to the Andair Valve
|
Details
|
")
|
|
01-02-2009
|
1.00
|
Riveted the rudder pedal angles to the floor
|
Details
|
")
")
|
|
01-02-2009
|
1.00
|
Installed Right tank vent line in forward fuselage
|
Details
|
")
|
|
01-01-2009
|
2.00
|
Installed the Left Tank cabin fuel vent line
|
Details
|
")
")
")
|
|
01-01-2009
|
4.00
|
Finished Installation of the Andair valve
|
Details
|
")
")
|
|
12-30-2008
|
3.50
|
Fabricated a bracket for the Andair Fuel Selector
|
Details
|
")
")
")
|
|
12-28-2008
|
2.00
|
Re-assembled the fuel pump setup
|
Details
|
")
")
|
|
12-27-2008
|
5.00
|
Assembled the Rudder Pedals and Master Cylinders
|
Details
|
")
")
|
|
12-26-2008
|
2.00
|
Riveted the flap hinges to the wings
|
Details
|
")
")
|
|
12-24-2008
|
1.00
|
Removed tape from seat support
|
Details
|
")
")
|
|
12-15-2008
|
1.00
|
Removed the lower corner bolts from spar
|
Details
|
|
|
|
12-13-2008
|
1.00
|
Topcoated F-866 access parts
|
Details
|
|
|
|
12-11-2008
|
2.00
|
Riveted and primed F-866 with access door
|
Details
|
|
|
|
12-09-2008
|
3.00
|
Drilled/dimpled/countersunk f-866 parts
|
Details
|
|
|
|
12-07-2008
|
4.00
|
Fabricated F-866 door opening doubler
|
Details
|
")
")
")
|
|
12-07-2008
|
4.00
|
Fabricated Avionics Door in F-866 bulkhead
|
Details
|
")
")
")
|
|
12-06-2008
|
3.00
|
Sprayed interior topcoat - Dawn Patrol Grey
|
Details
|
")
")
")
|
|
12-04-2008
|
6.00
|
Primed the cockpit interior
|
Details
|
")
")
")
|
|
11-29-2008
|
8.00
|
Closed Bottom Outer panels/Installed Heated Pitot
|
Details
|
")
")
|
|
11-27-2008
|
1.00
|
Taped the Front Seat Back Weldment
|
Details
|
")
")
")
|
|
11-24-2008
|
0.50
|
Put male pins on wires for heated pitot connection
|
Details
|
")
")
")
|
|
11-23-2008
|
1.00
|
Made molex connector for the heated pitot tube
|
Details
|
")
")
")
|
|
11-23-2008
|
3.00
|
Built a rear rotisserie
|
Details
|
")
")
")
|
|
11-21-2008
|
3.00
|
Closed Right Bottom Outbd wing skin panel
|
Details
|
|
|
|
11-19-2008
|
2.50
|
Riveted the seat frames together
|
Details
|
")
|
|
11-16-2008
|
0.00
|
Flange position for rear rotisserie stand
|
Details
|
")
|
|
11-16-2008
|
1.50
|
Cut and drilled hardwood for the rear rotisserie
|
Details
|
")
")
")
|
|
11-14-2008
|
1.00
|
Topcoat painted yesterday's primed parts
|
Details
|
|
|
|
11-13-2008
|
2.00
|
Painted more interior parts and re-did some parts
|
Details
|
|
|
|
11-11-2008
|
2.00
|
Painted re-primed parts from 11/09
|
Details
|
|
|
|
11-10-2008
|
2.00
|
Painted primed seat parts from first priming
|
Details
|
|
|
|
11-09-2008
|
3.00
|
Cleaned/Re-primed/etched earlier failed painting p
|
Details
|
")
|
|
11-08-2008
|
3.00
|
Fixed the leading edge crack
|
Details
|
")
")
")
|
|
11-06-2008
|
2.00
|
Added fan and filters to the paint booth
|
Details
|
")
")
")
|
|
11-04-2008
|
3.00
|
Made PVC paint booth
|
Details
|
|
|
|
11-02-2008
|
3.00
|
Removed the empennage from the fuselage
|
Details
|
")
")
|
|
10-30-2008
|
3.00
|
Drilled the engine stand bolt holes to 5/8"
|
Details
|
|
|
|
10-29-2008
|
2.00
|
Fit and drilled rotisserie angle irons
|
Details
|
|
|
|
10-28-2008
|
3.00
|
Made angle irons for the rotisserie
|
Details
|
|
|
|
10-27-2008
|
1.00
|
Drilled 1/4" engine mount holes in the firewall
|
Details
|
")
")
")
|
|
10-26-2008
|
2.00
|
Fit Engine mount to firewall
|
Details
|
|
|
|
10-25-2008
|
1.00
|
Bucking bar dropped into wing cracking leading edg
|
Details
|
|
|
|
10-11-2008
|
3.00
|
Riveted 1/2 of Rt bottom outboard skin
|
Details
|
|
|
|
10-08-2008
|
4.00
|
Poorly painted 1/2 of loose interior parts
|
Details
|
|
|
|
10-05-2008
|
6.50
|
Primed/Sealed floors and loose parts
|
Details
|
")
")
|
|
09-20-2008
|
2.00
|
BIG MISTAKE converting the Rudder Pedal parts
|
Details
|
")
")
|
|
09-18-2008
|
1.50
|
Converted the Rudder Pedal WD steel parts
|
Details
|
|
|
|
09-16-2008
|
2.50
|
Assembled Rudder pedal assembly
|
Details
|
")

|
|
09-15-2008
|
1.00
|
Started to lift engine to drill mount holes
|
Details
|
|
|
|
09-14-2008
|
3.00
|
Started the rudder pedal assembly
|
Details
|
")
")
")
|
|
09-13-2008
|
3.00
|
Riveted the rudder stops in place
|
Details
|
")
|
|
09-11-2008
|
0.50
|
Countersunk and primed rudder stops
|
Details
|
|
|
|
09-10-2008
|
1.50
|
Hung rudder/cut rudder stops
|
Details
|
")
")

|
|
09-09-2008
|
0.00
|
Rudder hitting VS on initial installation
|
Details
|
")
")
")
|
|
09-09-2008
|
4.50
|
Finished trimming the up elevator stop
|
Details
|
")
")
")
|
|
09-08-2008
|
2.00
|
Trimmed the Aft Deck and Aft Elevator Stop
|
Details
|
|
|
|
09-06-2008
|
4.00
|
Fabricated and fit new F-811D forward stop
|
Details
|
")
")
|
|
08-25-2008
|
0.00
|
Building EAA Benches
|
Details
|
")
")
")
|
|
08-18-2008
|
2.50
|
Installed F-841 Pushrod
|
Details
|
")
")
")
|
|
08-17-2008
|
0.00
|
Picked up my Eggenfellner H-6 Engine
|
Details
|
")
")
")
|
|
08-13-2008
|
1.00
|
Temporarily installed F-839-2 + F-340 Pushrods
|
Details
|
")
")
|
|
08-07-2008
|
2.50
|
Set the length of the F-829-2 pushrod
|
Details
|
")
")
")
|
|
08-06-2008
|
3.00
|
Drilled Rear Control Stick/fit sticks to Control C
|
Details
|
")
")
")
|
|
07-24-2008
|
2.50
|
Drilled Elevator horns for pushrod
|
Details
|
")

")
|
|
07-22-2008
|
0.00
|
Temporary hinge pins from Avery's
|
Details
|
")
|
|
07-22-2008
|
0.00
|
Elevator horns line up nearly perfectly
|
Details
|
")
")
")
|
|
07-22-2008
|
1.00
|
Drilled the elevator hole attachment holes
|
Details
|
")
|
|
07-22-2008
|
0.50
|
Attached the elevators to the HS
|
Details
|
")
")
")
|
|
07-21-2008
|
1.00
|
Determined number of elevator washers needed
|
Details
|
|
|
|
07-20-2008
|
4.00
|
Assembled the F-839/F-840/F-841 Pushrods
|
Details
|
")
")
|
|
07-19-2008
|
0.75
|
Set Elevator Rod Bearing depth to 7/8"
|
Details
|
")
")
|
|
07-17-2008
|
0.75
|
Made a rod bearing insertion wrench
|
Details
|
")
")
")
|
|
07-16-2008
|
1.50
|
Drilled the four bolt holes in the HS front spar
|
Details
|
")
|
|
07-14-2008
|
3.00
|
Drilled the Front Spar of the Vertical Stabilizer
|
Details
|
")
|
|
07-13-2008
|
1.50
|
Leveling VS Fore and Aft
|
Details
|
|
|
|
07-09-2008
|
2.50
|
Leveled the Vertical Stabilizer
|
Details
|
")

|
|
07-08-2008
|
1.00
|
Installed VS Front Spar centering lines
|
Details
|
")
")
|
|
07-08-2008
|
1.50
|
Drilled Vertical Stabilizer
|
Details
|
")
")
")
|
|
07-08-2008
|
2.50
|
Attached, balanced VS rear spar
|
Details
|
")
")
")
|
|
07-07-2008
|
2.00
|
Drilled the Rear Spar of the Horizontal Stabilizer
|
Details
|
|
|
|
07-05-2008
|
3.00
|
Drilled holes in Horizontal Stabilizer to the fuse
|
Details
|
")
")
")
|
|
07-04-2008
|
2.50
|
Finished re-assembly of the rear spar to HS
|
Details
|
")
")
")
|
|
07-03-2008
|
6.00
|
Riveted the Rear Spar stiffeners to rear spar
|
Details
|
")
")
|
|
07-02-2008
|
3.00
|
Drilled and primed the replacement HS-603PP
|
Details
|
")
|
|
06-29-2008
|
4.00
|
Assembled, drilled, primed elevator bellcrank
|
Details
|
")
")
")
|
|
06-27-2008
|
1.50
|
Torqued the installed Main Gear Weldment bolts
|
Details
|
")
")
|
|
06-24-2008
|
0.50
|
Blind riveted nutplates to the F-898 L&R
|
Details
|
|
|
|
06-21-2008
|
6.00
|
Disassembled the HS Rear Spar for repair
|
Details
|
")
")

|
|
06-17-2008
|
1.00
|
Squared the Horizontal Stabilizer
|
Details
|
")
")
")
|
|
06-17-2008
|
3.00
|
Drilled Horizontal Stabilizer upside down!
|
Details
|
")
")
|
|
06-16-2008
|
2.00
|
Fabricated the F-864E Cable anchor
|
Details
|
")
")
")
|
|
06-14-2008
|
2.50
|
Added nutplates to F-880A Fwd Seat Ramp
|
Details
|
|
|
|
06-13-2008
|
2.00
|
Started to install Right mid longeron nutplates
|
Details
|
")
")
")
|
|
06-11-2008
|
2.50
|
Assembled the F-8113 Mid-Cabin Assembly
|
Details
|
")
")
")
|
|
06-09-2008
|
2.50
|
Assembled F-830C Fwd Seat Ramp & F-8112 L&R
|
Details
|
")
")
|
|
06-03-2008
|
6.00
|
Dimpled and riveted stiffeners to floors
|
Details
|
")
")
")
|
|
05-29-2008
|
3.00
|
Surface converted Aft Baggage floor
|
Details
|
|
|
|
05-28-2008
|
2.00
|
Surface converted Seat Floor parts
|
Details
|
|
|
|
05-25-2008
|
2.50
|
Disassembled the seat floors and deburred all part
|
Details
|
|
|
|
05-24-2008
|
5.00
|
Attached and drilled the Floor Panels' stiffeners
|
Details
|
")
")
|
|
05-18-2008
|
2.50
|
Assembled, drilled and deburred foot wells
|
Details
|
|
|
|
05-16-2008
|
2.00
|
Drilled the Forward Seat Floor and F-805D
|
Details
|
")
")
|
|
05-15-2008
|
2.50
|
Temporarily attached flap actuator bar to floor
|
Details
|
")
")
")
|
|
05-14-2008
|
2.00
|
Drilled nutplate holes for the baggage ribs
|
Details
|
")
")
")
|
|
05-13-2008
|
1.75
|
Installed Aft Seat Floors
|
Details
|
")
")
|
|
05-09-2008
|
3.00
|
Installed the nutplates in the baggage ribs/F-807A
|
Details
|
")
")
|
|
05-08-2008
|
1.25
|
Drilled nutplate holes in baggage ribs and F-807
|
Details
|
|
|
|
05-06-2008
|
3.00
|
Drilled rear seat assembly; deburred seat floor pa
|
Details
|
|
|
|
05-02-2008
|
3.50
|
Primed the step, deburred rear seat parts
|
Details
|
")
")
")
|
|
04-28-2008
|
0.25
|
Matched drilled the Step Support Block
|
Details
|
")
|
|
04-27-2008
|
3.00
|
Inventoried the Hardware of Fininshing Kit
|
Details
|
|
|
|
04-26-2008
|
1.50
|
Inventoried Finishing kit
|
|
")
|
|
04-20-2008
|
3.00
|
Assembled the Front Seat
|
Details
|
")
")
|
|
04-19-2008
|
2.00
|
Fitted and drilled the step
|
Details
|
")
")
")
|
|
04-17-2008
|
1.50
|
Re-worked the step to satisfaction
|
Details
|
")
")
|
|
04-14-2008
|
4.00
|
Fit step to curve of the fuselage
|
Details
|
|
|
|
04-08-2008
|
0.00
|
Sun 'N Fun April 8-13
|
Details
|
|
|
|
04-07-2008
|
2.00
|
Started bolting Rt gear weldment to center section
|
Details
|
")
")
")
|
|
04-05-2008
|
3.00
|
Fitted the right main gear weldment into place
|
Details
|
")
|
|
04-03-2008
|
3.50
|
Fit Left gear weldment
|
Details
|
")
")
|
|
03-30-2008
|
0.50
|
Opened Forward Bottom Skin Gear Holes
|
Details
|
")
")
|
|
03-29-2008
|
3.50
|
Riveted the Cooling Ramp in place
|
Details
|
")
|
|
03-27-2008
|
0.50
|
Riveted the Bottom Fwd Skin to Center Spar
|
Details
|
")
")
|
|
03-25-2008
|
1.50
|
Riveted the Fwd Floor Ribs to the Fwd Floor
|
Details
|
")
")
")
|
|
03-23-2008
|
1.00
|
Riveted the Lt Forward Floor Rib to Bottom Skin
|
Details
|
|
|
|
03-22-2008
|
6.00
|
Clecoed the Forward Bottom Skin in place
|
Details
|
")
")
")
|
|
03-19-2008
|
3.50
|
Back riveted the Aft Floor ribs and F-802U to skin
|
Details
|
")
")
|
|
03-05-2008
|
1.50
|
Primed Fwd Bottom Skin and floor ribs
|
Details
|
|
|
|
03-04-2008
|
2.50
|
Drilled/Deburred/Converted F-894 Fwd Bottom Skin
|
Details
|
")
|
|
03-03-2008
|
2.50
|
Clecoed and drilled the F-894 Forward Bottom Skin
|
Details
|
")
")
")
|
|
03-02-2008
|
2.50
|
Made F-896 & F-897 Reinforcement Angles
|
Details
|


|
|
03-01-2008
|
0.50
|
Flipped the fuselage inverted
|
Details
|
|
|
|
02-29-2008
|
2.50
|
Screwed/Bolted Seat Support weldments
|
Details
|
")
")
")
|
|
02-28-2008
|
2.00
|
Cherry Max rivets shot in cockpit rail/Support wel
|
Details
|
")
")
")
|
|
02-25-2008
|
6.00
|
Riveted the cockpit rails and finished support pla
|
Details
|
")
")
")
|
|
02-24-2008
|
2.50
|
Riveted the F-805 Gossetts and F-805B supports
|
Details
|
")
")
|
|
02-23-2008
|
3.00
|
Bolted rear seat belt brackets in place
|
Details
|
")
")
")
|
|
02-19-2008
|
1.50
|
Riveted the F-818D Bellcrank Rib
|
Details
|
")
")
|
|
02-08-2008
|
0.00
|
Aeroelectric Connection Seminar in Lawrenceville,
|
Details
|
|
|
|
02-05-2008
|
3.00
|
Riveted the aft deck then flipped the fuselage ove
|
Details
|
")
")
|
|
02-04-2008
|
1.50
|
Finished riveting the upper longerons
|
Details
|
|
|
|
02-03-2008
|
4.50
|
Riveted upper longeron and baggage support ribs
|
Details
|
|
|
|
02-01-2008
|
2.50
|
Finished riveting aft bottom and aft side skins
|
Details
|
")
")
")
|
|
01-30-2008
|
3.50
|
Riveted the Aft Side and Foreward Bottom skins
|
Details
|
")
")
")
|
|
01-29-2008
|
3.00
|
Riveted Left Mid skin to sub-structures
|
Details
|
")
")
")
|
|
01-27-2008
|
3.50
|
Riveted Rt mid skin and around main spar openings
|
Details
|
")
")
|
|
01-26-2008
|
5.00
|
Finished riveting the fwd skins to the sub-structu
|
Details
|
")
")
")
|
|
01-13-2008
|
2.50
|
Clecoed the Fwd Bottom Skin in place
|
Details
|
")
")
|
|
01-12-2008
|
3.00
|
Clecoed Aft Bulkheads to Aft Side Skins
|
Details
|
")
")
")
|
|
01-11-2008
|
1.50
|
Finished riveting the F-811 and F-812 bulkheads
|
Details
|
")
")
")
|
|
01-09-2008
|
1.50
|
Replace more of the poor rivets with Oops rivets
|
Details
|
|
|
|
01-08-2008
|
2.00
|
Continued to rivet the F-811 and 812 bulkheads
|
Details
|
|
|
|
01-07-2008
|
3.50
|
Riveted F-811C & two F-811B bars to F-811
|
Details
|
")
")
")
|
|
01-05-2008
|
9.00
|
Clecoed the Aft Side Skins in place
|
Details
|
")
")
")
|
|
01-03-2008
|
5.00
|
Prosealed/clecoed forward skins onto fuselage
|
Details
|
")
")
")
|
|
01-01-2008
|
12.00
|
Riveted the bottom inboard skins
|
Details
|
")
")
")
|
|
12-31-2007
|
4.00
|
Finished rear floor platenuts installation
|
Details
|
")
")
")
|
|
12-29-2007
|
4.00
|
Finished drilling and dimpling nutplate holes
|
Details
|
")
")
|
|
12-26-2007
|
3.00
|
Started nutplate installation for rear floor
|
Details
|
")
")
|
|
12-24-2007
|
1.00
|
Riveted the upper forward holes of upper longerons
|
Details
|
")
")
|
|
12-23-2007
|
2.50
|
Installed Mid Skins and Upper Longerons
|
Details
|
")
")
")
|
|
12-22-2007
|
5.00
|
Installed the rear throttle assembly
|
Details
|
")
")
")
|
|
12-20-2007
|
2.00
|
Drilled, converted, dimpled F-815C-R and F-820W
|
Details
|
|
|
|
12-13-2007
|
4.00
|
Mid Fuselage assembly
|
Details
|
|
|
|
12-12-2007
|
3.00
|
Started rear throttle installation
|
Details
|
")
")

|
|
12-12-2007
|
3.00
|
Mid section assembly
|
Details
|
")
")
|
|
12-11-2007
|
4.00
|
Riveted the F-814E Seat Ramp Supports
|
Details
|
")
")
")
|
|
12-11-2007
|
0.50
|
Just received a Tungsten Bucking Bar
|
Details
|
")
|
|
12-10-2007
|
1.50
|
Start fuselage final assembly
|
Details
|
|
|
|
12-06-2007
|
3.50
|
Finished the surface conversion of fuselage parts
|
Details
|
")
|
|
12-03-2007
|
2.00
|
Surface converted more fuselage parts
|
Details
|
|
|
|
12-02-2007
|
6.50
|
Surface converted the upper longerons
|
Details
|
|
|
|
12-01-2007
|
1.50
|
Dimpled the cockpit rails and trimmed aft longeron
|
Details
|
")
|
|
11-30-2007
|
3.00
|
Dimpled all skins except the top tail skin
|
Details
|
|
|
|
11-28-2007
|
2.00
|
Dimpled the seat rib assembly fore and aft
|
Details
|
|
|
|
11-27-2007
|
3.50
|
Finished countersinking upper longeron
|
Details
|
|
|
|
11-26-2007
|
1.50
|
Deburred the fwd & center section substructures
|
Details
|
|
|
|
11-25-2007
|
3.00
|
Finished peeling and deburring aft skins
|
|
|
|
|
11-22-2007
|
3.00
|
Continued the peeling and deburring aft skins
|
Details
|
|
|
|
11-21-2007
|
2.00
|
Peeled vinyl and deburred F-891 & F-823 L+R skins
|
Details
|
|
|
|
11-20-2007
|
2.00
|
Finished deburring substructure parts
|
Details
|
|
|
|
11-19-2007
|
4.00
|
Started deburring substructure parts
|
Details
|
|
|
|
11-15-2007
|
10.00
|
Fitted and drilled F-883A fuel valve bracket
|
Details
|
")
")
")
|
|
11-12-2007
|
0.75
|
Countersunk Fwd floor/Center sect. common holes
|
Details
|
|
|
|
11-11-2007
|
4.00
|
Drilled #19 and #12 WD 808 Seat back support
|
Details
|
")
")
")
|
|
11-10-2007
|
4.00
|
Drilled front seat back support
|
Details
|
")
")
")
|
|
11-06-2007
|
3.00
|
Attached/Aligned/drilled Cockpit rails
|
Details
|
")
")
")
|
|
11-05-2007
|
1.50
|
Drilled the F-819 assembly
|
Details
|
")
")
")
|
|
11-03-2007
|
1.00
|
Attached the tail top skin
|
Details
|
")
")
")
|
|
10-15-2007
|
9.00
|
Drilled the Aft & Bottom skins, longerons & center
|
Details
|
")
")
")
|
|
10-14-2007
|
8.00
|
Drilled forward 2/3 of fuselage
|
Details
|
")

")
|
|
10-12-2007
|
2.00
|
Clamped the forward end of longerons
|
Details
|
")
")
")
|
|
10-09-2007
|
2.00
|
Re-bent the left upper longeron
|
Details
|
")
")
")
|
|
10-07-2007
|
3.00
|
Fit the upper longerons, re-bent the Rt longeron
|
Details
|
")
")
|
|
10-03-2007
|
2.00
|
Attached the F-828 Aft Bottom Skin
|
Details
|
")
|
|
10-02-2007
|
4.00
|
Attached tail side skins and bulkheads to fuselage
|
Details
|
")
")
")
|
|
10-01-2007
|
1.00
|
Deburred tail side and bottom skins
|
|
|
|
|
09-26-2007
|
2.00
|
Removed plastic from tail skin edges
|
|
|
|
|
09-25-2007
|
2.50
|
Riveted the Seat Belt Assemblies together
|
Details
|
")
")
|
|
09-24-2007
|
8.00
|
Primed aft bulkheads and riveted them together
|
Details
|
")
|
|
09-22-2007
|
4.00
|
Drilled/converted the F-807/F-808/F-809 bulkheads
|
Details
|
|
|
|
09-19-2007
|
3.50
|
Assembled F-811 Bulkhead, drilled and converted
|
Details
|
|
|
|
09-17-2007
|
1.50
|
Shaped the F-811B
|
Details
|
|
|
|
09-16-2007
|
3.00
|
Converted the F-812A&C and the tie down bar
|
Details
|
|
|
|
09-13-2007
|
2.50
|
Made F-712E Rear Tie Down Bar
|
Details
|
")

|
|
09-11-2007
|
2.00
|
Cut the F-800 parts bar and deburred the parts.
|
Details
|
")
|
|
09-09-2007
|
2.00
|
Installed F-804 Doubler and F-848 L&R
|
Details
|
|
|
|
09-08-2007
|
3.00
|
Attached the fwd side skins (F-891 L&R)
|
Details
|
")
")
")
|
|
09-02-2007
|
2.50
|
Clecoed longeron clips to F-802A- L&R
|
Details
|
")
")
")
|
|
09-01-2007
|
4.00
|
Drilled the lower longerons & Rt armrest #30 holes
|
Details
|
")
")
")
|
|
08-31-2007
|
2.50
|
Put bend in the new F-823 for the right side
|
Details
|
")
")
")
|
|
08-30-2007
|
0.25
|
Lower Longerons ready to drill per Bruce At Van's
|
Details
|
|
|
|
08-29-2007
|
1.00
|
Removed blocks from under the firewall per Bruce
|
Details
|
")
")
|
|
08-28-2007
|
0.50
|
Called Van's about WD-821 and lower longeron
|
Details
|
")
")
")
|
|
08-27-2007
|
2.50
|
Clamped the lower longeron to gear weldment
|
Details
|
")
")
")
|
|
08-26-2007
|
2.50
|
Clecoed the Fwd/Center/Mid Fuselage together
|
Details
|
")
")
")
|
|
08-25-2007
|
2.00
|
Attached the Lt armrests and drilled them
|
Details
|
")
")
")
|
|
08-21-2007
|
1.50
|
Clecoed the F-815 A&B L&R and F-815C L&R on
|
Details
|
")
")
")
|
|
08-20-2007
|
1.50
|
Bent Lt F-823, cut a 2 5/8" hole in F-815A-R
|
Details
|


")
|
|
08-18-2007
|
1.50
|
Fit the Rt lower longeron to the floor assembly
|
Details
|
|
|
|
08-18-2007
|
6.50
|
Deburred parts for the Mid-Fuselage
|
Details
|
")
")
")
|
|
08-17-2007
|
1.00
|
Drilled Fwd hole of floor to lower longeron to mou
|
Details
|
|
|
|
08-16-2007
|
2.00
|
Bent the F-804H Center section side plates
|
Details
|
")
")
")
|
|
08-14-2007
|
1.50
|
Went back and primed the Fwd Sub-Floor
|
Details
|
|
|
|
08-12-2007
|
3.00
|
Riveted the F-826 & 827 Center Bottom Skins on
|
Details
|
")
|
|
08-11-2007
|
4.00
|
Riveted F-814A L&R to F-814G, HPPX, + F-805D
|
Details
|
")
")
|
|
08-09-2007
|
1.00
|
Riveted F-806 C,D,F + G to F-806B
|
Details
|
")
")
|
|
08-07-2007
|
2.00
|
Primed the Seat Rib Subassembly
|
Details
|
")
")
")
|
|
08-05-2007
|
3.00
|
Bent upper longerons' fwd downward deflection
|
Details
|
")
")
")
|
|
08-04-2007
|
3.00
|
Bent aft end of Lt upper longeron, bent Rt longero
|
Details
|

")

|
|
08-02-2007
|
2.00
|
Bent Left upper longeron forward section
|
Details
|

")
|
|
08-01-2007
|
1.50
|
Bent right aux. longeron
|
Details
|

|
|
07-31-2007
|
0.50
|
Bent the Right lower longeron
|
Details
|
")
")
")
|
|
07-31-2007
|
1.50
|
Bent the F-898-L Auxillary Longeron
|
Details
|

")
|
|
07-30-2007
|
2.50
|
Bent the left lower longeron
|
Details
|
")
")
")
|
|
07-11-2007
|
1.00
|
Attached platenuts to aileron electric trim bracke
|
Details
|
|
|
|
07-08-2007
|
3.00
|
Dimpled the ribs, converted and dimpled the skins
|
Details
|
|
|
|
07-05-2007
|
2.50
|
Finished surface converting seat rib assembly
|
Details
|
|
|
|
07-04-2007
|
4.00
|
Finished assembly of the Center Section
|
Details
|
")
")
|
|
07-01-2007
|
2.00
|
Deburred the holes in the seat rib assembly
|
Details
|
|
|
|
06-28-2007
|
1.50
|
Deburred the edges of the Seat Rib Assembly
|
Details
|
|
|
|
06-27-2007
|
2.00
|
Drilled the F-826 & F-827 skins/Seat Rib Assembly
|
Details
|
|
|
|
06-26-2007
|
1.50
|
Fluted the F-827 bottom skin
|
Details
|
")
|
|
06-24-2007
|
0.50
|
Drilled aileron trim brackets to seat ribs
|
Details
|
")
")
|
|
06-24-2007
|
3.00
|
Assembled and drilled the seat rib assembly
|
Details
|
")
")
")
|
|
06-23-2007
|
1.00
|
Fabricated F-805D L&R Brackets
|
Details
|

")
")
|
|
06-23-2007
|
1.00
|
Drilled #12 bolt holes in the F-806 C/D/E parts
|
Details
|
")
|
|
06-19-2007
|
1.50
|
Fabricated the F-806E spacers
|
Details
|
")
")
|
|
06-18-2007
|
1.00
|
Countersunk F-814C, drilled the F-806B assembly
|
Details
|
|
|
|
06-14-2007
|
1.00
|
Sealed the center section parts
|
Details
|
|
|
|
06-13-2007
|
1.50
|
Drilled top of F-804B and disassembled section
|
Details
|
|
|
|
06-12-2007
|
2.00
|
Temporarily Attached F-804 A&B
|
Details
|
")

")
|
|
06-12-2007
|
0.25
|
Made feeler guage to check F806 A&B spacer gap
|
Details
|
")
|
|
06-08-2007
|
2.50
|
Riveted the F-804G Vertical Bars in place
|
Details
|
|
|
|
06-06-2007
|
2.00
|
Rivet F-804B Aft Center Section Assembly
|
Details
|
")
")
")
|
|
06-05-2007
|
3.50
|
Assembled the F-804B
|
Details
|
")
")
")
|
|
06-03-2007
|
3.00
|
Rivet F-804C-FL & FR to F802A
|
Details
|
")
")
|
|
06-01-2007
|
6.00
|
Drilled landing gear and weldments with reamer
|
Details
|
")
|
|
05-31-2007
|
2.50
|
Made F-804M Seat belt lug spacers
|
Details
|
")
")
")
|
|
05-29-2007
|
0.50
|
Studied plans
|
|
|
|
|
05-22-2007
|
3.00
|
Flange material removal from F-804A
|
Details
|
")
")
")
|
|
05-21-2007
|
2.00
|
Drilled rudder cable holes center section F-804 A&
|
Details
|
")
|
|
05-20-2007
|
2.50
|
Riveted Firewall to the Fwd Floor
|
Details
|
")
")
")
|
|
05-18-2007
|
3.00
|
Converted the Fwd Fuse. Sub Assembly parts
|
Details
|
|
|
|
05-17-2007
|
1.50
|
Countersunk and dimpled F-866D/F-866A/Floor
|
Details
|
|
|
|
05-16-2007
|
3.00
|
Fwd fuselage sub structure assembled
|
Details
|
")
")
")
|
|
05-12-2007
|
4.00
|
Constructed the cooling ramp
|
Details
|
")
")
")
|
|
05-11-2007
|
2.00
|
Converted/sealed Fwd subfloor assembly
|
Details
|
")
")
")
|
|
05-10-2007
|
1.50
|
Countersunk/dimpled fwd subfloor parts
|
Details
|
|
|
|
05-09-2007
|
3.00
|
Finished Firewall, fwd subfloor assembly drilled/d
|
Details
|
")
")
|
|
05-07-2007
|
3.50
|
Started riveting the firewall assembly
|
Details
|
")
")
|
|
05-05-2007
|
0.50
|
F-801C-1 elongated holes
|
Details
|
")
")
")
|
|
05-05-2007
|
7.50
|
Assembled the firewall for riveting
|
Details
|
")
")
|
|
05-04-2007
|
3.00
|
Assembled the firewall for drilling
|
Details
|
")
")
|
|
05-03-2007
|
2.00
|
Deburred the firewall and its attachments
|
Details
|
")
|
|
05-01-2007
|
1.50
|
Read instructions and gathered parts
|
Details
|
|
|
|
04-30-2007
|
3.00
|
Drilled, deburred, dimpled W-822 access plates
|
Details
|
")
")
|
|
04-28-2007
|
2.00
|
Organized Fuselage parts
|
Details
|
|
|
|
04-26-2007
|
3.00
|
Put bottom skins on wings and stowed fuseage parts
|
Details
|
|
|
|
04-25-2007
|
3.00
|
Fabricated the anti-hangup tank access bracket
|
Details
|
")
")
|
|
04-17-2007
|
2.00
|
Flared Pitot tube tubing and connected it
|
Details
|
")
")
|
|
04-12-2007
|
2.00
|
Mounted the pitot tube circuit board
|
Details
|
")
")
|
|
04-10-2007
|
2.00
|
Fit pitot tube to the mast
|
Details
|
")
")
|
|
04-09-2007
|
2.50
|
Installed the AOA sensors
|
Details
|
")
")
")
|
|
04-07-2007
|
0.50
|
Marked the wing for the AFS AOA
|
Details
|
")
")
|
|
04-01-2007
|
1.00
|
Bent the pitot system tube into the mast
|
Details
|
")
")
|
|
03-15-2007
|
2.50
|
Pitot tubing and conduit tubing installed
|
Details
|
")
")
")
|
|
03-14-2007
|
0.50
|
Attached the Gretz pitot backing plate
|
Details
|
")
|
|
03-11-2007
|
5.00
|
Started Gretz Pitot tube installation
|
Details
|
")
")
")
|
|
03-11-2007
|
0.50
|
Opening pitot mast hole
|
Details
|
")
")
")
|
|
02-25-2007
|
4.00
|
Attached the Rt flap
|
Details
|
")
")
")
|
|
02-22-2007
|
2.00
|
Atached the Rt aileron push-pull tubes
|
Details
|
")
")
")
|
|
02-21-2007
|
2.00
|
Left flap attached to the wing
|
Details
|
")
")
")
|
|
02-19-2007
|
2.50
|
Tried fitting the Lt flap with wing in the cradle
|
Details
|
|
|
|
02-18-2007
|
0.25
|
Put the Lt wing back in the cradle
|
Details
|
|
|
|
02-17-2007
|
2.50
|
Can't attach Lt Flap because of edge distance
|
Details
|
")
")
")
|
|
02-15-2007
|
2.50
|
Attached the Lt aileron to wing
|
Details
|
")
")
")
|
|
02-14-2007
|
1.50
|
Attached the Lt W-816 Push/Pull tube to bellcrank
|
Details
|
")
")
|
|
02-11-2007
|
2.50
|
Reemed the aileron bellcrank brass bushings
|
Details
|
")
")
|
|
02-10-2007
|
2.00
|
Attached the rod ends to the push/pull tubes
|
Details
|
")
")
|
|
02-07-2007
|
0.50
|
Primed the outside of the large tubes
|
Details
|
|
|
|
02-07-2007
|
1.50
|
Cut the aileron push/pull tubes
|
Details
|
")
|
|
02-04-2007
|
7.00
|
Finished the Rt flap
|
Details
|
")
|
|
02-03-2007
|
7.00
|
Finished conversion and sealing of Rt flap parts
|
Details
|
|
|
|
02-01-2007
|
3.00
|
Converted Rt flap parts
|
Details
|
|
|
|
01-31-2007
|
1.00
|
Disassembled the right flap, deburred ribs and spa
|
Details
|
|
|
|
01-27-2007
|
7.00
|
This finished the Left flap
|
Details
|
")
")
")
|
|
01-26-2007
|
8.00
|
Riveted the Lt flap together
|
Details
|
")
")
")
|
|
01-24-2007
|
1.00
|
Made V-cradle for the flap contruction
|
Details
|
|
|
|
01-23-2007
|
2.00
|
Fabricated Rt FL406B, converted bracket pieces
|
Details
|
")
|
|
01-22-2007
|
1.50
|
Dimpled the Lt Flap parts
|
Details
|
|
|
|
01-21-2007
|
8.00
|
Surface converted the Lt Flap, deburred, dimpled
|
Details
|
")
|
|
01-20-2007
|
1.00
|
Deburred left flap skeleton
|
Details
|
|
|
|
01-19-2007
|
1.00
|
Drilled the Left FL406 A + B according to plans
|
Details
|
")
")
|
|
01-18-2007
|
1.50
|
Re-cut FL406C pieces
|
Details
|
|
|
|
01-17-2007
|
1.50
|
Fine shaped the FL406B and bent the 406A
|
Details
|
|
|
|
01-14-2007
|
2.00
|
Started fabrication of FL 406 A+B+C
|
Details
|
")
")
")
|
|
01-10-2007
|
3.00
|
Drilled flap top skins
|
Details
|
|
|
|
01-06-2007
|
3.00
|
Drilled flap ribs/skins and attached/drilled hinge
|
Details
|
")
")
")
|
|
01-04-2007
|
2.50
|
Started the flaps
|
Details
|
")
")
")
|
|
01-04-2007
|
0.50
|
Drilled flap ribs
|
|
")
")
|
|
01-01-2007
|
0.25
|
RTV used in the ailerons
|
Details
|
")
")
")
|
|
01-01-2007
|
8.00
|
Finished the Ailerons
|
Details
|
")
")
")
|
|
12-26-2006
|
3.50
|
Deburred/dimpled/converted aileron skins/ribs
|
Details
|
|
|
|
12-23-2006
|
8.00
|
Converted/sealed aileron spars & A-408
|
Details
|
")
")
")
|
|
12-22-2006
|
3.00
|
Drilled aileron spar re-inforcement plates & hinge
|
Details
|
")
")
|
|
12-20-2006
|
2.50
|
Formed and drilled the A-408
|
Details
|
|
|
|
12-17-2006
|
0.50
|
Bent the aileron skins
|
Details
|
")
")
|
|
12-16-2006
|
4.00
|
Riveted stiffeners to aileron skin and sealed
|
Details
|
")
")
")
|
|
12-14-2006
|
2.00
|
Dimpled aileron stiffeners and skins
|
Details
|
")
|
|
12-11-2006
|
1.50
|
Surface converted the right aileron stiffeners
|
Details
|
")
|
|
12-10-2006
|
9.00
|
Cut, drilled, and deburred aileron stiffeners/skin
|
Details
|
")
|
|
12-09-2006
|
5.50
|
Riveted the flap braces and gap seals in place
|
Details
|
")
")
|
|
12-08-2006
|
1.00
|
Dimpled the aileron gap seals and top skin attachm
|
Details
|
|
|
|
12-07-2006
|
1.00
|
Dimpled the flap braces/countersunk the W-707 D
|
Details
|
")
|
|
12-06-2006
|
3.00
|
Surface converted and seal braces and gap seals
|
Details
|
|
|
|
12-05-2006
|
2.00
|
Deburred the flap braces and the aileron gap seals
|
Details
|
|
|
|
12-04-2006
|
2.00
|
Fitted the aileron gap seal and flap braces
|
Details
|
")
")
")
|
|
12-02-2006
|
4.00
|
Attached the aileron hinges to the rear spar
|
Details
|
")
")
")
|
|
11-29-2006
|
2.25
|
Riveted the aileron hinges together
|
Details
|
")
")
")
|
|
11-28-2006
|
3.50
|
Drilled the aileron hinges, surface converted them
|
Details
|
")
")
")
|
|
11-25-2006
|
0.50
|
Wings placed in the wing cradle
|
Details
|
")
")
")
|
|
11-25-2006
|
2.00
|
Riveted the top left outboard skin on
|
Details
|
")
")
")
|
|
11-21-2006
|
0.50
|
Riveting the top inboard skins (Cont.)
|
Details
|
")
")
")
|
|
11-21-2006
|
4.00
|
Riveted on the inboard top skins
|
Details
|
")
")
")
|
|
11-19-2006
|
4.50
|
Attached the Lt tank and installed tie down loops
|
Details
|
")
")
")
|
|
11-18-2006
|
3.00
|
Leak tested the right tank
|
Details
|
")
")
")
|
|
11-16-2006
|
2.00
|
Repaired the right tank baffle leaks
|
Details
|
")
")
")
|
|
11-14-2006
|
4.00
|
Checked the right tank for leaks
|
Details
|
")
")
")
|
|
11-12-2006
|
3.50
|
Riveted the Leading Edges to the spars
|
Details
|
")
")
")
|
|
11-08-2006
|
2.00
|
Riveted top rib holes to the spar; Clecoed LE to s
|
Details
|
|
|
|
11-07-2006
|
1.00
|
Attached the right tank access plate
|
Details
|
")
")
")
|
|
11-06-2006
|
4.00
|
Riveted the right tank baffle
|
Details
|
|
|
|
11-05-2006
|
6.00
|
Sealed the right tank with the baffle panel
|
Details
|
")
")
")
|
|
11-04-2006
|
6.00
|
Repaired the left tank leaks
|
Details
|
")
")
")
|
|
11-04-2006
|
3.00
|
Pressure tested the left tank
|
Details
|
")
")
")
|
|
11-03-2006
|
1.50
|
Sealed the left tank access plate
|
Details
|
|
|
|
10-29-2006
|
1.00
|
Put foam strip on edge of Plexi lens
|
Details
|
|
|
|
10-28-2006
|
7.00
|
Installed the right100W Halogen round taxi light
|
Details
|
")
")
")
|
|
10-23-2006
|
3.00
|
Installed the Plexi lens on left light
|
Details
|
")
")
")
|
|
10-17-2006
|
2.00
|
Mounted the HID Power supply on Left spar
|
Details
|
")
")
")
|
|
10-17-2006
|
0.50
|
Installed HID Lamp and retainer bracket
|
Details
|
")
")
")
|
|
10-14-2006
|
3.50
|
Cut LT LE for the Duckworks HID Landing Light
|
Details
|
")
")
")
|
|
10-12-2006
|
4.00
|
Riveted the Right Leading edge together
|
Details
|
")
|
|
10-11-2006
|
4.50
|
Riveted the Left leading edge together
|
Details
|
|
|
|
10-10-2006
|
4.00
|
Scarf jointed the top skins; assembled Lt LE
|
Details
|
")
")
")
|
|
10-08-2006
|
10.00
|
Sealed interior of surface converted skins
|
Details
|
")
")
|
|
10-07-2006
|
5.00
|
Drilled the platenut holes for the Duckworks light
|
Details
|
")
|
|
10-06-2006
|
0.50
|
Drilled the W-423 for the platenuts
|
Details
|
")
|
|
10-04-2006
|
1.00
|
Cosmetic correction of black converted areas of sk
|
Details
|
|
|
|
10-03-2006
|
2.00
|
Dimpled the skins
|
Details
|
|
|
|
10-02-2006
|
1.50
|
Dimpled the skins
|
Details
|
")
|
|
10-01-2006
|
9.00
|
Surface converted the wings' skins interior surfac
|
Details
|
")
|
|
09-27-2006
|
2.00
|
Continued deburring skin holes
|
|
|
|
|
09-25-2006
|
2.50
|
Remove vinyl from upper skins and deburred holes
|
Details
|
")
")
|
|
09-19-2006
|
2.50
|
Dimpled the rear spar
|
Details
|
")
|
|
09-18-2006
|
2.00
|
Dimpled the main ribs
|
Details
|
")
|
|
09-17-2006
|
9.00
|
Readied the wing skeletons for the skins
|
Details
|
")
")
|
|
09-16-2006
|
1.50
|
Deburred and dimpled LE ribs
|
Details
|
")
|
|
09-14-2006
|
2.00
|
Dimpled the leading edge skins
|
Details
|
")
|
|
09-13-2006
|
2.50
|
Deburred and surface converted leading edge skins
|
Details
|
")
")
|
|
09-12-2006
|
1.00
|
Pulled the vinyl from the leading edge skins
|
Details
|
|
|
|
09-10-2006
|
3.50
|
Riveted the Lt tank baffle and end attachment brac
|
Details
|
|
|
|
09-09-2006
|
4.00
|
Installed the rear baffle of the left tank
|
Details
|
")
")
")
|
|
09-08-2006
|
0.50
|
Checked the continuity of the fuel senders
|
Details
|
|
|
|
09-07-2006
|
1.50
|
Prepped the left tank for closure
|
Details
|
|
|
|
09-01-2006
|
2.00
|
Attached Lt tank outboard sender and vent line
|
Details
|
")
")
")
|
|
08-30-2006
|
1.25
|
Installed the left tank fuel return line
|
Details
|
")
")
")
|
|
08-30-2006
|
1.25
|
Fitted/installed Left tank vent line
|
Details
|
")
")
|
|
08-29-2006
|
1.50
|
Installed the fuel return line in the right tank
|
Details
|
")
")
")
|
|
08-29-2006
|
1.00
|
Attached right inboard sender plate
|
Details
|
")
")
")
|
|
08-28-2006
|
0.75
|
Installed the right tank fuel return fitting
|
Details
|
")
")
")
|
|
08-28-2006
|
0.75
|
Installed fuel return fitting in left fuel tank.
|
Details
|
")
")
")
|
|
08-28-2006
|
1.50
|
Connected the terminals to the Rt inboard sender
|
Details
|
")
")
")
|
|
08-27-2006
|
3.00
|
Installing capacitance fuel sender and fuel return
|
Details
|
")
")
")
|
|
08-27-2006
|
0.50
|
Drilled the right tank fuel return hole
|
Details
|
")
|
|
08-24-2006
|
3.00
|
Started the installation of the right capacitance
|
Details
|
")
")
")
|
|
08-24-2006
|
0.25
|
SB 06-2-23 Safety wired the right tank fuel pickup
|
Details
|
")
")
|
|
08-22-2006
|
2.00
|
Installed the vent line in the right tank
|
Details
|
")
")
")
|
|
08-22-2006
|
0.50
|
Flared the vent line with the Parker flaring tool
|
Details
|
")
")
")
|
|
08-22-2006
|
0.25
|
Drilled the fuel return line hole in the second ri
|
Details
|
")

|
|
08-19-2006
|
2.00
|
Sealed the outboard tank rib machine hole
|
Details
|
")
")
|
|
08-19-2006
|
2.00
|
Installed the T405 and two T-410s and sealed them
|
Details
|
")
")
")
|
|
08-19-2006
|
4.00
|
Finished riveting ribs of right tank and sealing r
|
Details
|
")
")
")
|
|
08-17-2006
|
3.00
|
Wet riveted half of the right tank
|
Details
|
|
|
|
08-13-2006
|
0.50
|
Prosealed/riveted anti-rotation bracket right tank
|
Details
|
")
")
")
|
|
08-13-2006
|
2.00
|
Installed anti-hangup bracket in the left tank
|
Details
|
")
")
")
|
|
08-13-2006
|
6.00
|
Assembled the right tank and prosealed the ribs
|
Details
|
")
")
")
|
|
08-12-2006
|
1.50
|
Service bulletin SB 06-2-23 compliance left tank
|
Details
|
")
|
|
08-12-2006
|
2.00
|
Installed T-405 & T-410 to left tank nose
|
Details
|
")
")
")
|
|
08-09-2006
|
2.00
|
Finished riveting left tank ribs with pneumatic sq
|
Details
|
|
|
|
08-08-2006
|
2.50
|
Wet riveted the 5 left tank bottom middle ribs
|
Details
|
|
|
|
08-07-2006
|
2.50
|
Riveted left tank ribs x 5 one side
|
Details
|
")
")
")
|
|
08-06-2006
|
5.00
|
Prosealed the left tank ribs and skin together
|
Details
|
")
")
")
|
|
08-05-2006
|
3.00
|
Installed flop tube left tank then removed it for
|
Details
|
")
")
|
|
08-03-2006
|
3.00
|
Drilled the outboard T-410 pieces and installed ri
|
Details
|
")
")
")
|
|
08-02-2006
|
1.00
|
MEK cleaned inside of left tank getting ready to i
|
Details
|
|
|
|
07-24-2006
|
0.00
|
To OSH for Airventure 2006 until 06Jul30
|
|
|
|
|
07-23-2006
|
4.00
|
Finished riveting the stiffeners, filler flange an
|
Details
|
")
")
")
|
|
07-22-2006
|
5.50
|
Finished riveting the right tank stiffeners, cap f
|
Details
|
|
|
|
07-21-2006
|
4.00
|
Finished proseal attaching stiffeners, gas cap and
|
Details
|
")
")
")
|
|
07-20-2006
|
3.00
|
Started ProSealing the stiffeners to the right tan
|
Details
|
")
")
")
|
|
07-13-2006
|
1.00
|
Cleaned tank stiffener areas to be Prosealed
|
Details
|
|
|
|
07-12-2006
|
2.50
|
Sanded the surfaces that will be ProSealed
|
Details
|
")
")
")
|
|
07-09-2006
|
5.00
|
Finished deburring and dimpling all of the tank ri
|
Details
|
")
")
|
|
07-08-2006
|
2.50
|
Deburred and started dimpling left tank ribs
|
Details
|
|
|
|
07-06-2006
|
4.00
|
Deburred and dimpled the right tank skin
|
Details
|
")
")
|
|
07-05-2006
|
1.00
|
Drilled drain valves to skins
|
Details
|
")
")
|
|
07-05-2006
|
4.00
|
Deburred and dimpled the left tank skin
|
Details
|
")
")
")
|
|
07-03-2006
|
3.00
|
Fuel cap preparation for attachment
|
Details
|
")
")
")
|
|
07-02-2006
|
1.50
|
Riveted the Platenuts to the tank rings
|
Details
|
")
")
|
|
07-02-2006
|
1.00
|
Fabricated the Fuel Pickup Anti-Rotation Bracket
|
Details
|
")
")
")
|
|
07-02-2006
|
2.00
|
Drilled the T-407 and T-408 pieces
|
Details
|
")
")
")
|
|
07-02-2006
|
0.50
|
Cut opening in the T-703 ribs for the inspection h
|
Details
|
")
|
|
06-26-2006
|
1.50
|
Trimmed the sender plates
|
Details
|
")
")
|
|
06-25-2006
|
3.50
|
Preparing to install Capacative Fuel Quantity Send
|
Details
|
")
")
")
|
|
06-25-2006
|
3.50
|
Preparing to install Capacative Fuel Quantity Send
|
Details
|
")
")
")
|
|
06-21-2006
|
1.00
|
Disassembled the left tank
|
Details
|
|
|
|
06-19-2006
|
4.00
|
Match drilled the left tank holes and machine coun
|
Details
|
")
")
|
|
06-18-2006
|
2.00
|
Fitted left tank skins onto the ribs
|
Details
|
")
")
|
|
06-17-2006
|
3.50
|
Finished the T-405 pieces by Scotchbrite buffing t
|
Details
|
")
")
|
|
06-14-2006
|
1.50
|
Fabricated the T-405 Tank Attachment Angles
|
Details
|
")
")
")
|
|
06-12-2006
|
1.00
|
Drilled screw attachment holes on the right tank t
|
Details
|
|
|
|
06-07-2006
|
4.00
|
Fit the right tank skin to the ribs, drilled all h
|
Details
|
")
|
|
06-04-2006
|
3.00
|
Installed right tank ribs and drilled ribs, bracke
|
Details
|
")
")
|
|
06-03-2006
|
2.00
|
Fit tank skins to the spar and baffle
|
Details
|
")
")
")
|
|
06-03-2006
|
2.00
|
Cut tank skin stiffeners for both tanks and drille
|
Details
|
")
")
|
|
05-31-2006
|
1.00
|
Studied the tank construction plans
|
Details
|
|
|
|
05-27-2006
|
1.50
|
Riveted the three inboard platenuts onto the spars
|
Details
|
|
|
|
05-26-2006
|
2.00
|
Riveted the platenuts onto the Z-Brackets
|
Details
|
")
|
|
05-26-2006
|
1.50
|
Attached the Z-brackets to the spars
|
Details
|
")
|
|
05-25-2006
|
1.50
|
Drilled Platenut holes on the the Z-brackets
|
Details
|
")
")
")
|
|
05-23-2006
|
1.50
|
Match hole drilled the Z-brackets
|
Details
|
")
|
|
05-22-2006
|
0.50
|
Cleco attached the Z-brackets to the main spar aft
|
Details
|
")
|
|
05-21-2006
|
3.00
|
Cut, drilled and deburred the tank attachment Z-br
|
Details
|
")
")
|
|
05-20-2006
|
4.00
|
Fitted the skins to the left leading edge
|
Details
|
")
")
")
|
|
05-19-2006
|
4.00
|
Fitted the right leading edge skins
|
Details
|
")
")
")
|
|
05-15-2006
|
1.00
|
Sealed the leading edge nose ribs
|
Details
|
|
|
|
05-12-2006
|
1.00
|
Finished drilling skins on the bottom of the left
|
Details
|
|
|
|
05-10-2006
|
1.00
|
Matched hole drilled the left bottom skins after a
|
Details
|
")
|
|
05-08-2006
|
2.00
|
Match hole drilled the skin holes on the right win
|
Details
|
")
|
|
05-07-2006
|
1.00
|
Attached the bottom skins to the wings
|
Details
|
|
|
|
05-04-2006
|
5.00
|
Fitted the top skins to the wing after studying pl
|
Details
|
")
")
")
|
|
05-03-2006
|
1.00
|
Drilled the wing doublers
|
Details
|
")
|
|
04-30-2006
|
4.00
|
Constructed the tank jig and the dimpler table
|
Details
|
")
")
|
|
04-29-2006
|
1.00
|
Studied the plans
|
Details
|
|
|
|
04-27-2006
|
2.00
|
Studied the plans
|
Details
|
|
|
|
04-25-2006
|
2.00
|
Adjusted the outboard jig clearances
|
Details
|
|
|
|
04-22-2006
|
6.00
|
Riveted the right wing and hung it on the jig
|
Details
|
")
")
")
|
|
04-19-2006
|
4.00
|
Match drilled, deburred the right main ribs and sp
|
Details
|
")
")
|
|
04-18-2006
|
3.00
|
Assembled the right wing main ribs and spars
|
Details
|
")
")
|
|
04-16-2006
|
3.00
|
Riveted the left main ribs to the main spar
|
Details
|
")
")
")
|
|
04-14-2006
|
2.00
|
Riveted the left main ribs to the rear spar
|
Details
|
")
")
|
|
04-13-2006
|
4.50
|
Drilled, deburred the left wing main ribs
|
Details
|
|
|
|
04-12-2006
|
2.00
|
Assembled the left main ribs and spar together
|
Details
|
")
")
|
|
04-03-2006
|
2.00
|
Cut nuts off with Dremel tool; ordered new hardwar
|
|
|
|
|
04-02-2006
|
1.00
|
Stripped the tie down attachment nuts
|
Details
|
|
|
|
04-01-2006
|
2.50
|
Sealed and assembled the right rear spar
|
|
|
|
|
03-31-2006
|
3.50
|
Sealed and assembled the left rear spar
|
|
")
")
")
|
|
03-30-2006
|
1.50
|
Tank rib conversion of outer surfaces
|
|
|
|
|
03-28-2006
|
1.50
|
Finished right inboard and outboard ribs
|
|
|
|
|
03-27-2006
|
2.50
|
Right rib treatments
|
|
|
|
|
03-26-2006
|
3.50
|
Right ribs converted
|
|
|
|
|
03-25-2006
|
3.50
|
Inboard and outboard right ribs converted
|
|
|
|
|
03-23-2006
|
3.50
|
ConversionTreatment of the left wing ribs
|
|


")
|
|
03-21-2006
|
2.00
|
Treated the left rear spar
|
|
|
|
|
03-19-2006
|
3.00
|
Treated the left rear spar parts
|
|
")
|
|
03-18-2006
|
4.50
|
Sanchem treated the right rear spar
|
|
")
")
|
|
03-15-2006
|
2.50
|
Drilled the rib conduit holes
|
|
")
")
")
|
|
03-14-2006
|
2.00
|
Studied conduit construction
|
|
|
|
|
03-12-2006
|
5.00
|
Finished wing jig instillation
|
|
")
")
")
|
|
03-10-2006
|
2.50
|
Finished holes in the W-709, W-711 & W-712
|
|
")
")
")
|
|
03-09-2006
|
2.00
|
Rib deburring
|
|
")
")
|
|
03-08-2006
|
2.00
|
Edge deburred ribs W-711
|
|
|
|
|
03-06-2006
|
1.50
|
Edge deburred part of W-711 left and right
|
|
|
|
|
03-05-2006
|
4.50
|
Fluted the ribs and deburred W-709, W-711 & W-712
|
|
")
")
|
|
03-01-2006
|
5.00
|
Clecoed, drilled, deburred the right rear spar par
|
Details
|
")
")
")
|
|
02-28-2006
|
2.00
|
Studied instructions; Drilled attached left W-707
|
|
|
|
|
02-11-2006
|
3.00
|
Deburred the tank ribs
|
|
|
|
|
12-19-2005
|
3.00
|
Wing Shipment Inventory
|
|
")
")
")
|