Date
|
Hours
|
Work Log Summary

|
Details

|
06-12-2022
|
0.00
|
Constructed a Wing Tank Cradle
|
Details
|
   |
|
06-10-2022
|
0.00
|
Removed the RV-8A Left Fuel Tank
|
Details
|
   |
|
04-27-2014
|
1.00
|
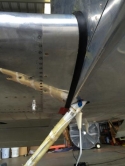
Installed Wing Fuselage Gap Channel Seal
|
Details
|


|
|
03-10-2014
|
0.00
|
Bottom Wing Skin Dent from Jack
|
Details
|


|
|
02-28-2014
|
1.00
|
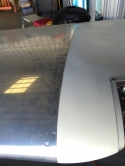
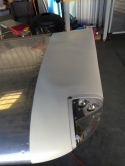
Attached the Left Wing Tip Fairing
|
Details
|
 |
|
12-06-2013
|
4.00
|
Sanded the UV Smooth Prime on the Wing Tips
|
Details
|
   |
|
12-03-2013
|
1.00
|
Reinstalled Faps and Safety Wired the Hinge Pins
|
Details
|

  |
|
12-03-2013
|
0.00
|
Checked the Rigging of the Ailerons 2
|
Details
|


|
|
12-03-2013
|
2.00
|
Checked the Rigging of the Ailerons
|
Details
|


|
|
12-02-2013
|
2.50
|
Removed the Mechanical Aileron Stops
|
Details
|

  |
|
11-30-2013
|
2.00
|
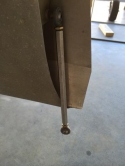
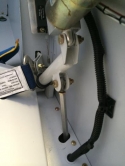
Changed the Flaps' Connecting Rods To Avery's
|
Details
|

|
|
11-27-2013
|
1.50
|
Installed Terminal Block on End of Each Wing
|
Details
|


 |
|
11-21-2013
|
0.50
|
Installed Rear Spar Bolts
|
Details
|


|
|
11-10-2013
|
2.00
|
Installed Missing Bolts on Each Weldment
|
Details
|
   |
|
11-09-2013
|
8.00
|
My Plane Got Winged Today!!!
|
Details
|


|
|
11-08-2013
|
8.00
|
Installed Four Close Tolerance Bolts in Each Wing
|
Details
|
   |
|
10-24-2013
|
2.00
|
The Boys Got the Left Wing Off
|
Details
|

  |
|
10-22-2013
|
3.00
|
Attempted to Attach the Left Wing
|
Details
|
   |
|
05-30-2012
|
2.00
|
Moved the Rt MX150L Connector and Patched Hole
|
Details
|


|
|
05-23-2012
|
2.00
|
Wired the MX-150L 12 Position Socket Lt Fuselage
|
Details
|


 |
|
05-22-2012
|
1.00
|
Corrected Rt Wing MX-150L Electrical Connector
|
Details
|

  |
|
05-13-2011
|
2.50
|
Polished the Right Wing
|
Details
|
   |
|
10-07-2010
|
2.00
|
Spot Polished the Wings to Remove Corrosion
|
Details
|
   |
|
10-03-2010
|
1.50
|
Polished 0.5 of the light corrosion on Rt Wing
|
Details
|
   |
|
09-12-2010
|
1.00
|
Installed Nutplated for the Tip Lenses
|
Details
|


 |
|
09-12-2010
|
0.50
|
Added Nutplates to the Fuselage Tank Brackets
|
Details
|


 |
|
09-11-2010
|
3.00
|
Moved the Wings to the Hangar
|
Details
|


|
|
09-10-2010
|
1.00
|
Riveted Under Wing NACA Vent to Right Wing
|
Details
|


 |
|
09-09-2010
|
1.00
|
Prosealed the Under Wing NACA Vent to Rt Wing
|
Details
|


 |
|
09-06-2010
|
2.00
|
Riveted Nutplates to the Rt Wing Inboard Edges
|
Details
|
   |
|
09-03-2010
|
2.00
|
Dimpled and Countersunk Top Skin Holes
|
Details
|


|
|
09-02-2010
|
1.50
|
Drilled, Deburred & Dimpled Rt Wing Inboard Edge
|
Details
|


 |
|
09-01-2010
|
1.00
|
Re-Surface Converted the Left Flap
|
Details
|


|
|
08-31-2010
|
2.00
|
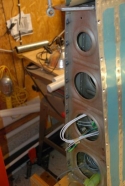
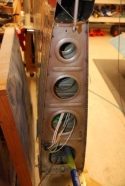
Finished Installation of Rt Wing Fairing Nutplates
|
Details
|
 |
|
08-31-2010
|
1.00
|
Cut the Slot in the Rt Tank Attachment Bracket
|
Details
|


|
|
08-30-2010
|
4.00
|
Drilled, Dimpled & Countersunk Rt Inboard Wing
|
Details
|


 |
|
08-28-2010
|
1.00
|
Removed the Left Wing Flap and Rolled the Edge
|
Details
|
   |
|
08-25-2010
|
2.50
|
Fit the Left Tip Lens
|
Details
|


|
|
08-24-2010
|
1.50
|
Fitting the Right Tip Lens
|
Details
|


|
|
08-24-2010
|
1.00
|
Fitted the Right Tip Lens
|
Details
|


|
|
08-21-2010
|
0.00
|
View of 70 Degree Spacers on Rt. Tip Lights
|
Details
|

  |
|
08-17-2010
|
1.50
|
Finished the Installation of the Tip Nutplates
|
Details
|

  |
|
08-06-2010
|
2.50
|
Installed 2/3 of Nutplates on the Left Tip
|
Details
|


 |
|
08-05-2010
|
1.00
|
Installed the Archer VOR Antenna in Right Tip
|
Details
|


 |
|
08-05-2010
|
1.50
|
Installed half of the Right Tip Nutplates
|
Details
|
   |
|
08-03-2010
|
1.50
|
Fiberglass the Aft Inside of the Tips
|
Details
|


|
|
08-03-2010
|
1.50
|
Countersunk the Left Tip Holes
|
Details
|
   |
|
08-02-2010
|
1.50
|
Countersunk Right Wing Tip Holes
|
Details
|


 |
|
07-20-2010
|
2.00
|
Removed the Wings from the Fuselage
|
Details
|


|
|
07-19-2010
|
1.50
|
Drilled the Right Tip for Nutplate Installation
|
Details
|


 |
|
07-18-2010
|
1.00
|
Drilled the Left Tip for Nutplate Installation
|
Details
|
   |
|
07-17-2010
|
1.00
|
Drilled Right Wing Tip Attachment Hole to #26
|
Details
|

  |
|
07-16-2010
|
1.50
|
Cut the Right Tips Trailing Edge
|
Details
|

  |
|
07-15-2010
|
2.00
|
Matched Drilled Tip Edge Reinforcement Strips
|
Details
|


|
|
07-14-2010
|
0.50
|
Remover Tape From the Tips' Exterior
|
Details
|


|
|
07-13-2010
|
1.50
|
Re-Did the Tips Trailing Edges
|
Details
|


 |
|
07-12-2010
|
2.00
|
Cut and Epoxied the Tips Trailing Edges
|
Details
|


|
|
07-09-2010
|
1.50
|
Drilled #26 Holes in the Tip for #6 Screws
|
Details
|
   |
|
06-27-2010
|
1.50
|
Fitted, Cut and Drilled Left Wing Tip
|
Details
|


|
|
06-26-2010
|
2.00
|
Fitted, Drilled and Clecoed Right Wing Tip
|
Details
|


|
|
06-22-2010
|
1.50
|
Final Drilled the Wing Fairing Holes to #19 Size
|
Details
|
   |
|
06-21-2010
|
3.00
|
Installed the Flap Fairings
|
Details
|


|
|
06-21-2010
|
3.00
|
Finished Wing Fairings/Installed Flap Fairings
|
Details
|


 |
|
06-20-2010
|
4.00
|
Started Wing Fairing Fitting
|
Details
|


|
|
06-02-2010
|
2.00
|
Aligned the Ailerons in Neutral Trail Position
|
Details
|


|
|
06-01-2010
|
0.50
|
Surface Converted the Fuselage Tank Brackets
|
Details
|


|
|
05-31-2010
|
1.00
|
Drilled 1/4" hole in Forward Tank Supports
|
Details
|
   |
|
05-30-2010
|
0.50
|
Match drilled the Fuselage Center Skins and Wing
|
Details
|


|
|
05-30-2010
|
0.00
|
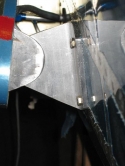
Attached Rt Forward Tank Support Brackets
|
Details
|

 |
|
05-30-2010
|
2.00
|
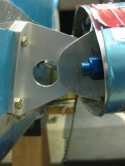
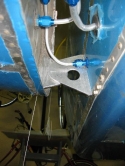
Attached Lt Forward Tank Support rtackets
|
Details
|
 |
|
05-29-2010
|
0.00
|
Drilled the Right Rear Spar
|
Details
|


|
|
05-29-2010
|
2.00
|
Drilled the Left Rear Spar
|
Details
|


|
|
05-29-2010
|
0.00
|
Drilled the Left Rear Spar
|
|


|
|
05-28-2010
|
0.25
|
Re-measured the wings
|
Details
|
   |
|
05-26-2010
|
1.00
|
Re-measured the wing required for rear spar drilli
|
Details
|
   |
|
05-15-2010
|
0.25
|
Tip to Tail lengths were measured
|
Details
|

  |
|
05-15-2010
|
0.50
|
Set the wings' angle of incidence
|
Details
|


 |
|
05-15-2010
|
1.00
|
Connected the wings to the fuselage
|
Details
|


|
|
05-15-2010
|
0.50
|
Checked the trueness of the wing
|
Details
|

  |
|
05-13-2010
|
0.50
|
Positioned the Wings on Saw Horses
|
Details
|


|
|
09-13-2009
|
1.00
|
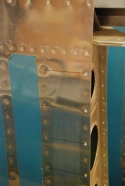
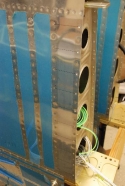
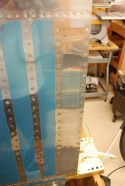
Preparing for temporary attachment of the wings
|
Details
|
|
|
09-13-2009
|
0.50
|
Made a Drift pin for the wing attachment
|
Details
|

  |
|
05-13-2009
|
2.00
|
Re-screwed the Left Tank to the wing
|
Details
|
   |
|
12-26-2008
|
2.00
|
Riveted the flap hinges to the wings
|
Details
|


 |
|
11-29-2008
|
8.00
|
Closed Bottom Outer panels/Installed Heated Pitot
|
Details
|


 |
|
11-24-2008
|
0.50
|
Put male pins on wires for heated pitot connection
|
Details
|


|
|
11-23-2008
|
1.00
|
Made molex connector for the heated pitot tube
|
Details
|


|
|
11-21-2008
|
3.00
|
Closed Right Bottom Outbd wing skin panel
|
Details
|
   |
|
11-08-2008
|
3.00
|
Fixed the leading edge crack
|
Details
|


|
|
10-25-2008
|
1.00
|
Bucking bar dropped into wing cracking leading edg
|
Details
|
   |
|
10-11-2008
|
3.00
|
Riveted 1/2 of Rt bottom outboard skin
|
Details
|
   |
|
01-01-2008
|
12.00
|
Riveted the bottom inboard skins
|
Details
|


|
|
04-30-2007
|
3.00
|
Drilled, deburred, dimpled W-822 access plates
|
Details
|


 |
|
04-26-2007
|
3.00
|
Put bottom skins on wings and stowed fuseage parts
|
Details
|
   |
|
04-25-2007
|
3.00
|
Fabricated the anti-hangup tank access bracket
|
Details
|


 |
|
04-17-2007
|
2.00
|
Flared Pitot tube tubing and connected it
|
Details
|


 |
|
04-12-2007
|
2.00
|
Mounted the pitot tube circuit board
|
Details
|


 |
|
04-10-2007
|
2.00
|
Fit pitot tube to the mast
|
Details
|


 |
|
04-09-2007
|
2.50
|
Installed the AOA sensors
|
Details
|


|
|
04-07-2007
|
0.50
|
Marked the wing for the AFS AOA
|
Details
|


 |
|
04-01-2007
|
1.00
|
Bent the pitot system tube into the mast
|
Details
|


 |
|
03-15-2007
|
2.50
|
Pitot tubing and conduit tubing installed
|
Details
|


|
|
03-14-2007
|
0.50
|
Attached the Gretz pitot backing plate
|
Details
|

  |
|
03-11-2007
|
5.00
|
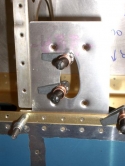
Started Gretz Pitot tube installation
|
Details
|


|
|
03-11-2007
|
0.50
|
Opening pitot mast hole
|
Details
|


|
|
02-25-2007
|
4.00
|
Attached the Rt flap
|
Details
|


|
|
02-22-2007
|
2.00
|
Atached the Rt aileron push-pull tubes
|
Details
|


|
|
02-21-2007
|
2.00
|
Left flap attached to the wing
|
Details
|


|
|
02-19-2007
|
2.50
|
Tried fitting the Lt flap with wing in the cradle
|
Details
|
   |
|
02-18-2007
|
0.25
|
Put the Lt wing back in the cradle
|
Details
|
   |
|
02-17-2007
|
2.50
|
Can't attach Lt Flap because of edge distance
|
Details
|


|
|
02-15-2007
|
2.50
|
Attached the Lt aileron to wing
|
Details
|


|
|
02-14-2007
|
1.50
|
Attached the Lt W-816 Push/Pull tube to bellcrank
|
Details
|


 |
|
02-11-2007
|
2.50
|
Reemed the aileron bellcrank brass bushings
|
Details
|


 |
|
02-10-2007
|
2.00
|
Attached the rod ends to the push/pull tubes
|
Details
|


 |
|
02-07-2007
|
0.50
|
Primed the outside of the large tubes
|
Details
|
   |
|
02-07-2007
|
1.50
|
Cut the aileron push/pull tubes
|
Details
|

  |
|
02-04-2007
|
7.00
|
Finished the Rt flap
|
Details
|

  |
|
02-03-2007
|
7.00
|
Finished conversion and sealing of Rt flap parts
|
Details
|
   |
|
02-01-2007
|
3.00
|
Converted Rt flap parts
|
Details
|
   |
|
01-31-2007
|
1.00
|
Disassembled the right flap, deburred ribs and spa
|
Details
|
   |
|
01-27-2007
|
7.00
|
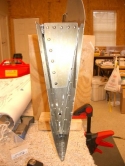
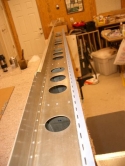
This finished the Left flap
|
Details
|

|
|
01-26-2007
|
8.00
|
Riveted the Lt flap together
|
Details
|


|
|
01-24-2007
|
1.00
|
Made V-cradle for the flap contruction
|
Details
|
   |
|
01-23-2007
|
2.00
|
Fabricated Rt FL406B, converted bracket pieces
|
Details
|

  |
|
01-22-2007
|
1.50
|
Dimpled the Lt Flap parts
|
Details
|
   |
|
01-21-2007
|
8.00
|
Surface converted the Lt Flap, deburred, dimpled
|
Details
|

  |
|
01-20-2007
|
1.00
|
Deburred left flap skeleton
|
Details
|
   |
|
01-19-2007
|
1.00
|
Drilled the Left FL406 A + B according to plans
|
Details
|


 |
|
01-18-2007
|
1.50
|
Re-cut FL406C pieces
|
Details
|
   |
|
01-17-2007
|
1.50
|
Fine shaped the FL406B and bent the 406A
|
Details
|
   |
|
01-14-2007
|
2.00
|
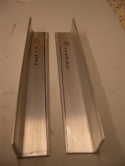
Started fabrication of FL 406 A+B+C
|
Details
|


|
|
01-10-2007
|
3.00
|
Drilled flap top skins
|
Details
|
   |
|
01-06-2007
|
3.00
|
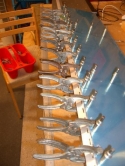
Drilled flap ribs/skins and attached/drilled hinge
|
Details
|


|
|
01-04-2007
|
2.50
|
Started the flaps
|
Details
|


|
|
01-04-2007
|
0.50
|
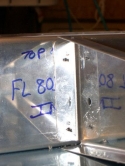
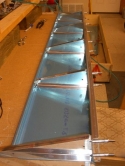
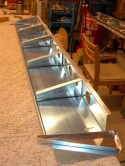
Drilled flap ribs
|
|
 |
|
01-01-2007
|
0.25
|
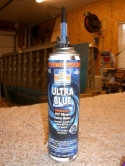
RTV used in the ailerons
|
Details
|


|
|
01-01-2007
|
8.00
|
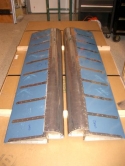
Finished the Ailerons
|
Details
|


|
|
12-26-2006
|
3.50
|
Deburred/dimpled/converted aileron skins/ribs
|
Details
|
   |
|
12-23-2006
|
8.00
|
Converted/sealed aileron spars & A-408
|
Details
|


|
|
12-22-2006
|
3.00
|
Drilled aileron spar re-inforcement plates & hinge
|
Details
|


 |
|
12-20-2006
|
2.50
|
Formed and drilled the A-408
|
Details
|
   |
|
12-17-2006
|
0.50
|
Bent the aileron skins
|
Details
|


 |
|
12-16-2006
|
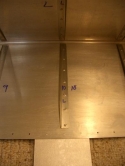
4.00
|
Riveted stiffeners to aileron skin and sealed
|
Details
|


|
|
12-14-2006
|
2.00
|
Dimpled aileron stiffeners and skins
|
Details
|

  |
|
12-11-2006
|
1.50
|
Surface converted the right aileron stiffeners
|
Details
|

  |
|
12-10-2006
|
9.00
|
Cut, drilled, and deburred aileron stiffeners/skin
|
Details
|

  |
|
12-09-2006
|
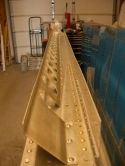
5.50
|
Riveted the flap braces and gap seals in place
|
Details
|

 |
|
12-08-2006
|
1.00
|
Dimpled the aileron gap seals and top skin attachm
|
Details
|
   |
|
12-07-2006
|
1.00
|
Dimpled the flap braces/countersunk the W-707 D
|
Details
|

  |
|
12-06-2006
|
3.00
|
Surface converted and seal braces and gap seals
|
Details
|
   |
|
12-05-2006
|
2.00
|
Deburred the flap braces and the aileron gap seals
|
Details
|
   |
|
12-04-2006
|
2.00
|
Fitted the aileron gap seal and flap braces
|
Details
|


|
|
12-02-2006
|
4.00
|
Attached the aileron hinges to the rear spar
|
Details
|


|
|
11-29-2006
|
2.25
|
Riveted the aileron hinges together
|
Details
|


|
|
11-28-2006
|
3.50
|
Drilled the aileron hinges, surface converted them
|
Details
|


|
|
11-25-2006
|
0.50
|
Wings placed in the wing cradle
|
Details
|


|
|
11-25-2006
|
2.00
|
Riveted the top left outboard skin on
|
Details
|


|
|
11-21-2006
|
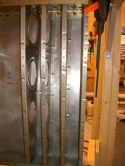
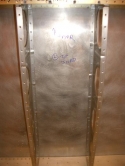
0.50
|
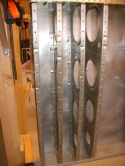
Riveting the top inboard skins (Cont.)
|
Details
|
|
|
11-21-2006
|
4.00
|
Riveted on the inboard top skins
|
Details
|


|
|
11-19-2006
|
4.50
|
Attached the Lt tank and installed tie down loops
|
Details
|


|
|
11-18-2006
|
3.00
|
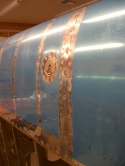
Leak tested the right tank
|
Details
|


|
|
11-16-2006
|
2.00
|
Repaired the right tank baffle leaks
|
Details
|


|
|
11-14-2006
|
4.00
|
Checked the right tank for leaks
|
Details
|


|
|
11-12-2006
|
3.50
|
Riveted the Leading Edges to the spars
|
Details
|


|
|
11-08-2006
|
2.00
|
Riveted top rib holes to the spar; Clecoed LE to s
|
Details
|
   |
|
11-07-2006
|
1.00
|
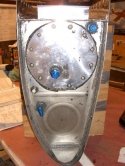
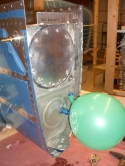
Attached the right tank access plate
|
Details
|

|
|
11-06-2006
|
4.00
|
Riveted the right tank baffle
|
Details
|
   |
|
11-05-2006
|
6.00
|
Sealed the right tank with the baffle panel
|
Details
|


|
|
11-04-2006
|
6.00
|
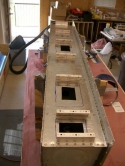
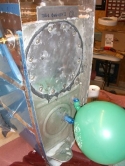
Repaired the left tank leaks
|
Details
|

|
|
11-04-2006
|
3.00
|
Pressure tested the left tank
|
Details
|


|
|
11-03-2006
|
1.50
|
Sealed the left tank access plate
|
Details
|
   |
|
10-29-2006
|
1.00
|
Put foam strip on edge of Plexi lens
|
Details
|
   |
|
10-28-2006
|
7.00
|
Installed the right100W Halogen round taxi light
|
Details
|


|
|
10-23-2006
|
3.00
|
Installed the Plexi lens on left light
|
Details
|


|
|
10-17-2006
|
2.00
|
Mounted the HID Power supply on Left spar
|
Details
|


|
|
10-17-2006
|
0.50
|
Installed HID Lamp and retainer bracket
|
Details
|


|
|
10-14-2006
|
3.50
|
Cut LT LE for the Duckworks HID Landing Light
|
Details
|


|
|
10-12-2006
|
4.00
|
Riveted the Right Leading edge together
|
Details
|

  |
|
10-11-2006
|
4.50
|
Riveted the Left leading edge together
|
Details
|
   |
|
10-10-2006
|
4.00
|
Scarf jointed the top skins; assembled Lt LE
|
Details
|


|
|
10-08-2006
|
10.00
|
Sealed interior of surface converted skins
|
Details
|

 
|
|
10-07-2006
|
5.00
|
Drilled the platenut holes for the Duckworks light
|
Details
|

  |
|
10-06-2006
|
0.50
|
Drilled the W-423 for the platenuts
|
Details
|

  |
|
10-04-2006
|
1.00
|
Cosmetic correction of black converted areas of sk
|
Details
|
   |
|
10-03-2006
|
2.00
|
Dimpled the skins
|
Details
|
   |
|
10-02-2006
|
1.50
|
Dimpled the skins
|
Details
|

  |
|
10-01-2006
|
9.00
|
Surface converted the wings' skins interior surfac
|
Details
|

  |
|
09-27-2006
|
2.00
|
Continued deburring skin holes
|
|
   |
|
09-25-2006
|
2.50
|
Remove vinyl from upper skins and deburred holes
|
Details
|


 |
|
09-19-2006
|
2.50
|
Dimpled the rear spar
|
Details
|

  |
|
09-18-2006
|
2.00
|
Dimpled the main ribs
|
Details
|

  |
|
09-17-2006
|
9.00
|
Readied the wing skeletons for the skins
|
Details
|


 |
|
09-16-2006
|
1.50
|
Deburred and dimpled LE ribs
|
Details
|

  |
|
09-14-2006
|
2.00
|
Dimpled the leading edge skins
|
Details
|

  |
|
09-13-2006
|
2.50
|
Deburred and surface converted leading edge skins
|
Details
|


 |
|
09-12-2006
|
1.00
|
Pulled the vinyl from the leading edge skins
|
Details
|
   |
|
09-10-2006
|
3.50
|
Riveted the Lt tank baffle and end attachment brac
|
Details
|
   |
|
09-09-2006
|
4.00
|
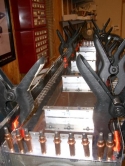
Installed the rear baffle of the left tank
|
Details
|


|
|
09-08-2006
|
0.50
|
Checked the continuity of the fuel senders
|
Details
|
   |
|
09-07-2006
|
1.50
|
Prepped the left tank for closure
|
Details
|
   |
|
09-01-2006
|
2.00
|
Attached Lt tank outboard sender and vent line
|
Details
|


|
|
08-30-2006
|
1.25
|
Installed the left tank fuel return line
|
Details
|


|
|
08-30-2006
|
1.25
|
Fitted/installed Left tank vent line
|
Details
|


 |
|
08-29-2006
|
1.50
|
Installed the fuel return line in the right tank
|
Details
|


|
|
08-29-2006
|
1.00
|
Attached right inboard sender plate
|
Details
|


|
|
08-28-2006
|
0.75
|
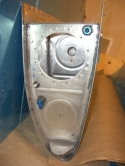
Installed the right tank fuel return fitting
|
Details
|


|
|
08-28-2006
|
0.75
|
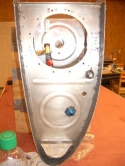
Installed fuel return fitting in left fuel tank.
|
Details
|


|
|
08-28-2006
|
1.50
|
Connected the terminals to the Rt inboard sender
|
Details
|


|
|
08-27-2006
|
3.00
|
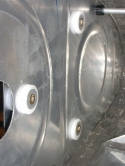
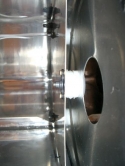
Installing capacitance fuel sender and fuel return
|
Details
|

|
|
08-27-2006
|
0.50
|
Drilled the right tank fuel return hole
|
Details
|

  |
|
08-24-2006
|
3.00
|
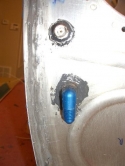
Started the installation of the right capacitance
|
Details
|


|
|
08-24-2006
|
0.25
|
SB 06-2-23 Safety wired the right tank fuel pickup
|
Details
|


 |
|
08-22-2006
|
2.00
|
Installed the vent line in the right tank
|
Details
|


|
|
08-22-2006
|
0.50
|
Flared the vent line with the Parker flaring tool
|
Details
|


|
|
08-22-2006
|
0.25
|
Drilled the fuel return line hole in the second ri
|
Details
|


 |
|
08-19-2006
|
2.00
|
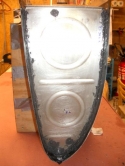
Sealed the outboard tank rib machine hole
|
Details
|

 |
|
08-19-2006
|
2.00
|
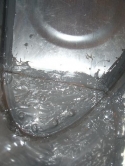
Installed the T405 and two T-410s and sealed them
|
Details
|


|
|
08-19-2006
|
4.00
|
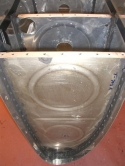
Finished riveting ribs of right tank and sealing r
|
Details
|


|
|
08-17-2006
|
3.00
|
Wet riveted half of the right tank
|
Details
|
   |
|
08-13-2006
|
0.50
|
Prosealed/riveted anti-rotation bracket right tank
|
Details
|


|
|
08-13-2006
|
2.00
|
Installed anti-hangup bracket in the left tank
|
Details
|


|
|
08-13-2006
|
6.00
|
Assembled the right tank and prosealed the ribs
|
Details
|


|
|
08-12-2006
|
2.00
|
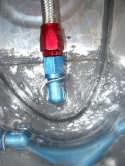
Installed T-405 & T-410 to left tank nose
|
Details
|


|
|
08-09-2006
|
2.00
|
Finished riveting left tank ribs with pneumatic sq
|
Details
|
   |
|
08-08-2006
|
2.50
|
Wet riveted the 5 left tank bottom middle ribs
|
Details
|
   |
|
08-07-2006
|
2.50
|
Riveted left tank ribs x 5 one side
|
Details
|


|
|
08-06-2006
|
5.00
|
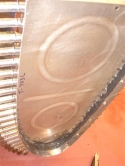
Prosealed the left tank ribs and skin together
|
Details
|


|
|
08-05-2006
|
3.00
|
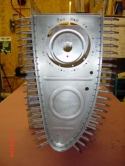
Installed flop tube left tank then removed it for
|
Details
|


 |
|
08-03-2006
|
3.00
|
Drilled the outboard T-410 pieces and installed ri
|
Details
|


|
|
08-02-2006
|
1.00
|
MEK cleaned inside of left tank getting ready to i
|
Details
|
   |
|
07-24-2006
|
0.00
|
To OSH for Airventure 2006 until 06Jul30
|
|
   |
|
07-23-2006
|
4.00
|
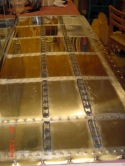
Finished riveting the stiffeners, filler flange an
|
Details
|


|
|
07-22-2006
|
5.50
|
Finished riveting the right tank stiffeners, cap f
|
Details
|
   |
|
07-21-2006
|
4.00
|
Finished proseal attaching stiffeners, gas cap and
|
Details
|


|
|
07-20-2006
|
3.00
|
Started ProSealing the stiffeners to the right tan
|
Details
|


|
|
07-13-2006
|
1.00
|
Cleaned tank stiffener areas to be Prosealed
|
Details
|
   |
|
07-12-2006
|
2.50
|
Sanded the surfaces that will be ProSealed
|
Details
|


|
|
07-09-2006
|
5.00
|
Finished deburring and dimpling all of the tank ri
|
Details
|


 |
|
07-08-2006
|
2.50
|
Deburred and started dimpling left tank ribs
|
Details
|
   |
|
07-06-2006
|
4.00
|
Deburred and dimpled the right tank skin
|
Details
|


 |
|
07-05-2006
|
1.00
|
Drilled drain valves to skins
|
Details
|


 |
|
07-05-2006
|
4.00
|
Deburred and dimpled the left tank skin
|
Details
|


|
|
07-03-2006
|
3.00
|
Fuel cap preparation for attachment
|
Details
|


|
|
07-02-2006
|
1.50
|
Riveted the Platenuts to the tank rings
|
Details
|


 |
|
07-02-2006
|
1.00
|
Fabricated the Fuel Pickup Anti-Rotation Bracket
|
Details
|


|
|
07-02-2006
|
2.00
|
Drilled the T-407 and T-408 pieces
|
Details
|


|
|
07-02-2006
|
0.50
|
Cut opening in the T-703 ribs for the inspection h
|
Details
|

  |
|
06-26-2006
|
1.50
|
Trimmed the sender plates
|
Details
|


 |
|
06-25-2006
|
3.50
|
Preparing to install Capacative Fuel Quantity Send
|
Details
|


|
|
06-25-2006
|
3.50
|
Preparing to install Capacative Fuel Quantity Send
|
Details
|


|
|
06-21-2006
|
1.00
|
Disassembled the left tank
|
Details
|
   |
|
06-19-2006
|
4.00
|
Match drilled the left tank holes and machine coun
|
Details
|


 |
|
06-18-2006
|
2.00
|
Fitted left tank skins onto the ribs
|
Details
|


 |
|
06-17-2006
|
3.50
|
Finished the T-405 pieces by Scotchbrite buffing t
|
Details
|


 |
|
06-14-2006
|
1.50
|
Fabricated the T-405 Tank Attachment Angles
|
Details
|


|
|
06-12-2006
|
1.00
|
Drilled screw attachment holes on the right tank t
|
Details
|
   |
|
06-07-2006
|
4.00
|
Fit the right tank skin to the ribs, drilled all h
|
Details
|

  |
|
06-04-2006
|
3.00
|
Installed right tank ribs and drilled ribs, bracke
|
Details
|


 |
|
06-03-2006
|
2.00
|
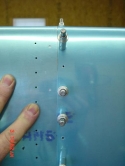
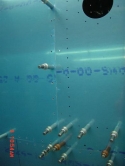
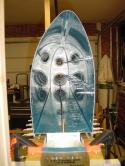
Fit tank skins to the spar and baffle
|
Details
|
|
|
06-03-2006
|
2.00
|
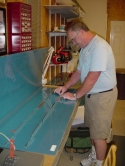
Cut tank skin stiffeners for both tanks and drille
|
Details
|

 |
|
05-31-2006
|
1.00
|
Studied the tank construction plans
|
Details
|
   |
|
05-27-2006
|
1.50
|
Riveted the three inboard platenuts onto the spars
|
Details
|
   |
|
05-26-2006
|
2.00
|
Riveted the platenuts onto the Z-Brackets
|
Details
|

  |
|
05-26-2006
|
1.50
|
Attached the Z-brackets to the spars
|
Details
|

  |
|
05-25-2006
|
1.50
|
Drilled Platenut holes on the the Z-brackets
|
Details
|


|
|
05-23-2006
|
1.50
|
Match hole drilled the Z-brackets
|
Details
|

  |
|
05-22-2006
|
0.50
|
Cleco attached the Z-brackets to the main spar aft
|
Details
|
  |
|
05-21-2006
|
3.00
|
Cut, drilled and deburred the tank attachment Z-br
|
Details
|


 |
|
05-20-2006
|
4.00
|
Fitted the skins to the left leading edge
|
Details
|


|
|
05-19-2006
|
4.00
|
Fitted the right leading edge skins
|
Details
|


|
|
05-15-2006
|
1.00
|
Sealed the leading edge nose ribs
|
Details
|
   |
|
05-12-2006
|
1.00
|
Finished drilling skins on the bottom of the left
|
Details
|
   |
|
05-10-2006
|
1.00
|
Matched hole drilled the left bottom skins after a
|
Details
|

  |
|
05-08-2006
|
2.00
|
Match hole drilled the skin holes on the right win
|
Details
|

  |
|
05-07-2006
|
1.00
|
Attached the bottom skins to the wings
|
Details
|
   |
|
05-04-2006
|
5.00
|
Fitted the top skins to the wing after studying pl
|
Details
|

|
|
05-03-2006
|
1.00
|
Drilled the wing doublers
|
Details
|

  |
|
04-30-2006
|
4.00
|
Constructed the tank jig and the dimpler table
|
Details
|


 |
|
04-29-2006
|
1.00
|
Studied the plans
|
Details
|
   |
|
04-27-2006
|
2.00
|
Studied the plans
|
Details
|
   |
|
04-25-2006
|
2.00
|
Adjusted the outboard jig clearances
|
Details
|
   |
|
04-22-2006
|
6.00
|
Riveted the right wing and hung it on the jig
|
Details
|


|
|
04-19-2006
|
4.00
|
Match drilled, deburred the right main ribs and sp
|
Details
|

 |
|
04-18-2006
|
3.00
|
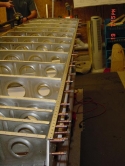
Assembled the right wing main ribs and spars
|
Details
|

 |
|
04-16-2006
|
3.00
|
Riveted the left main ribs to the main spar
|
Details
|


|
|
04-14-2006
|
2.00
|
Riveted the left main ribs to the rear spar
|
Details
|


 |
|
04-13-2006
|
4.50
|
Drilled, deburred the left wing main ribs
|
Details
|
   |
|
04-12-2006
|
2.00
|
Assembled the left main ribs and spar together
|
Details
|


 |
|
04-03-2006
|
2.00
|
Cut nuts off with Dremel tool; ordered new hardwar
|
|
   |
|
04-02-2006
|
1.00
|
Stripped the tie down attachment nuts
|
Details
|
   |
|
04-01-2006
|
2.50
|
Sealed and assembled the right rear spar
|
|
   |
|
03-31-2006
|
3.50
|
Sealed and assembled the left rear spar
|
|


|
|
03-30-2006
|
1.50
|
Tank rib conversion of outer surfaces
|
|
   |
|
03-28-2006
|
1.50
|
Finished right inboard and outboard ribs
|
|
   |
|
03-27-2006
|
2.50
|
Right rib treatments
|
|
   |
|
03-26-2006
|
3.50
|
Right ribs converted
|
|
   |
|
03-25-2006
|
3.50
|
Inboard and outboard right ribs converted
|
|
   |
|
03-23-2006
|
3.50
|
ConversionTreatment of the left wing ribs
|
|


|
|
03-21-2006
|
2.00
|
Treated the left rear spar
|
|
   |
|
03-19-2006
|
3.00
|
Treated the left rear spar parts
|
|

  |
|
03-18-2006
|
4.50
|
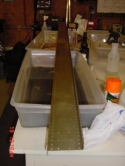
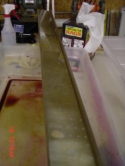
Sanchem treated the right rear spar
|
|
 |
|
03-15-2006
|
2.50
|
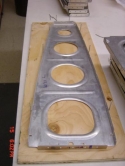
Drilled the rib conduit holes
|
|


|
|
03-14-2006
|
2.00
|
Studied conduit construction
|
|
   |
|
03-12-2006
|
5.00
|
Finished wing jig instillation
|
|


|
|
03-10-2006
|
2.50
|
Finished holes in the W-709, W-711 & W-712
|
|


|
|
03-09-2006
|
2.00
|
Rib deburring
|
|


 |
|
03-08-2006
|
2.00
|
Edge deburred ribs W-711
|
|
   |
|
03-06-2006
|
1.50
|
Edge deburred part of W-711 left and right
|
|
   |
|
03-05-2006
|
4.50
|
Fluted the ribs and deburred W-709, W-711 & W-712
|
|


 |
|
03-01-2006
|
5.00
|
Clecoed, drilled, deburred the right rear spar par
|
Details
|


|
|
02-28-2006
|
2.00
|
Studied instructions; Drilled attached left W-707
|
|
   |
|
02-11-2006
|
3.00
|
Deburred the tank ribs
|
|
   |
|
12-19-2005
|
3.00
|
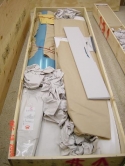
Wing Shipment Inventory
|
|


|

