Brief Description: Glassed the Bottom of the Windscreen Fairing
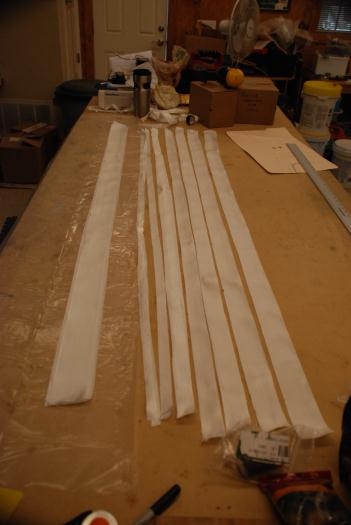
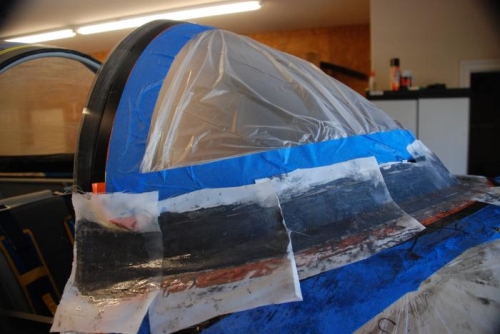
Glassed the Bottom of the Windscreen Fairing. Cut 3" fiberglass tape into strips ranging from 0.5" to 2.5" in increments of 1/4". The strips were stacked on top of each other and a black dyed epoxy was poured over the assembled stack. The epoxy was worked into the stack while the stack was inside a sheet of 2 mil clear plastic doubled over the stack and epoxy. With a squeege, the epoxy was worked into the fiberglass then the excess was worked out to the edges. The plastic was cut from the edges of the fiberglass leaving a layer of plastic on the top and the bottom of the fiberglass assembly. One layer was pealed off and the fiberglass was applied to the bottom of the windscreen. I thought this would be pretty simple. As it turned out, the single, continuous layup was somewhat difficult to handle and managed to hit a much of places other than the windscreen. As a result, there was black epoxy everywhere. Thankfully there is plenty of plastic and tape on everything. I got the fiberglass positioned but had a hard time getting the center of the windscreen fiberglass to lay flat against the windscreen. When the fit was good everywhere, the center of the windscreen fiberglass would either be sitting too high up or buckling away from the screen. Eventually, I worked everything into a good position and Peel Ply was applied to the fiberglass. Since I'm writing this after the fact, I'll let you know that the center of the windscreen fiberglass buckled away from the windscreen during the curing even though it was flat after the peel ply application.