Brief Description: Made "The Big Cut" in the Canopy
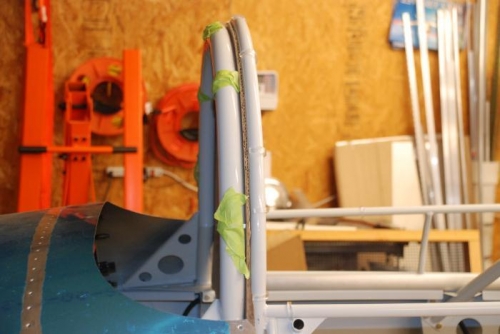
Made some small cuts to lower the canopy onto the spacers placed on the Rollover and Frame Bows. The canopy started resting on the Canopy Frame but remained slightly above the spacers on the Rollover Bow. I removed the canopy frame and removed about 1/8" of frame material from were the rollers insert into the frame to lower the canopy frame relative to the Rollover Bow. We trimmed and sanded the canopy to get the canopy as low as possible but it remains slightly higher then the spacers. I'm satisfied with the contour of the canopy on the forward top skin and the gap of the canopy to the Bows is within my needs for gluing the canopy to the frames. Therefore, we prepped the canopy for the Big Cut.
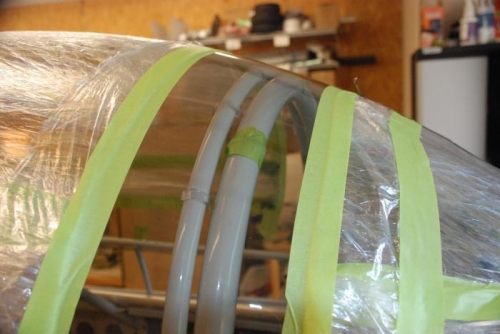
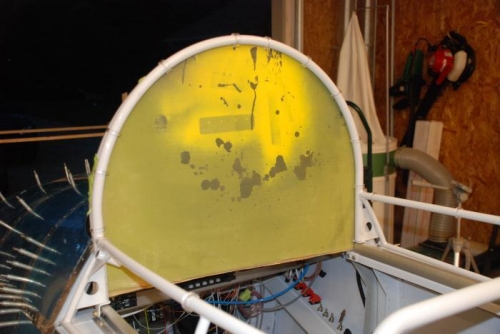
We sandwiched a cardboard cutout between the Rollover Bow and the Canopy Frame Bow to help define the cutting plane. The cut line was marked with a dry erase marker, Green painter's tape was put on the canopy in line with each Bow which marks the positions of the Bows for after the cut as well as helping to define the limits of the cutting area. I used red vinyl tape to further define the cut line. Finally, I taped yellow vinyl tape to the inside of the canopy to provide contrast for the cut line. This helped but was not as brilliant as I had hoped.
With the cut line well marked, the canopy was removed from the frame and cut on the workbench using a diamond cutoff wheel on a flexable Dremel shaft. The cot went very well and the kerf was narrow.