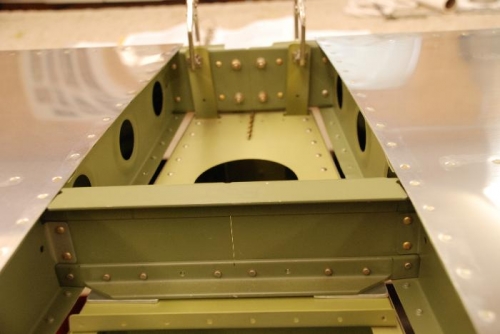
Everything was going along perfectly as I installed the Horizontal Stabilizer. Good readings all around. I drilled the #30 holes into the rear spar using the holes in the stabilizer attachment bar as guides. Squared the Stabilizer before going to drill the front spar and spacers. Something looked wrong! There wasn't enough attachment angle covering the spacers to drill for the attachment bolts! After reviewing the drawings, I discovered that I had layed the Horizontal Stabilizer on the aft deck upside down. When I read the drawings at the beginning, I had seen only what I wanted to see, not what I needed to see. The top angle has tapered ends, an important clue, thus not enough material to drill.
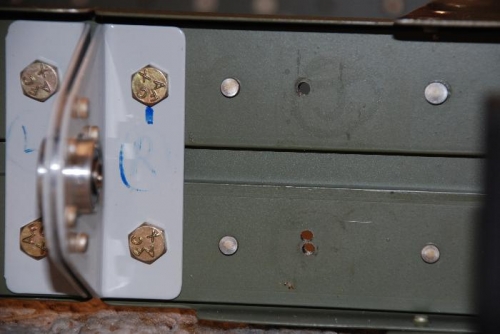
I flipped the HS over and started all over again. I drilled one matching hole into the rear spar, hoping that it would be far enough from the original hole to be useable. What I got was a "figure 8" pattern.
There is a good chance that all of my re-drilled holes will yield similar results. The final drill out of these holes will be a #19 hole for some bolts. My questions that need answers are: 1. Should I rivet these holes to fill them then re-drill the correct holes or; 2. Do I need to rivet a patch over the holes and then re-drill? If so, How thick does the patch need to be? 3. Is it fixable with drilling or does it need more complex/time consuming repair?
Will be posting to VansAirforce and will call Van's tomorrow.