Brief Description: Assembled the F-839/F-840/F-841 Pushrods
Before I could insert the rod bearings into the ends of the F-841 pushrod, I had to clean the epoxy primer that was used to coat the inside of the pushrod from the threads of the rod bearing end caps. Note to self - clean primer from the threads before it dries. The task was time comsuming. I used MEK in cotton swabs and slowly threaded/unthreaded the rod beading until the threads were clear. Made a Rod bearing wrench for the larger sized bearings on the F-841 pushrod.
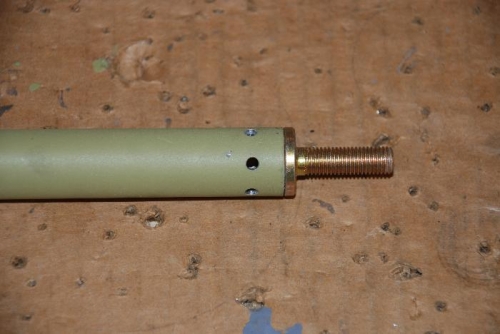
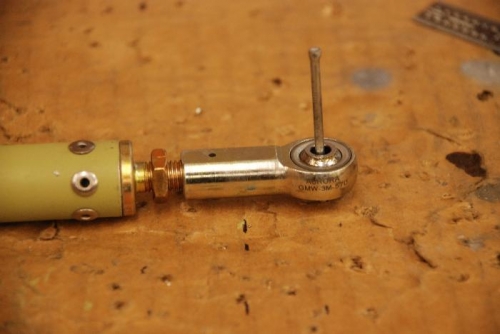
For the F-840 Pushrod, I cut it to length, cleaned the inside with a rag soaked in acetone dragged through the tube several times, deburred the ends then drilled the rivet holes in the ends. After deburring the holes, I primed the outside of the tube. The Threaded Rod End of the assembly is very tight to fit. Knowing this, I taped the rod ends onto the tube using wood blocks and a rubber mallot then match drilled the rod ends to the tube. I deburred the holes using a Burraway deburring tool and shook the shaving from the inside through the drilled holes. Pulled rivets were applied and the Threaded Bearings were attached to the specified length. I used a pair of nails set at the specified distance. The length of the pushrod was adjusted to the center of the hole in the bearings. The only variance to this was that the F-841 aft bearing was threaded to only just over half the threads distance to help avoid movement clearance issues. The final length distance will be from the forward bearing length.
The F-839 pushrod was a straight forward assembly and length adjustment.