Date
|
Hours
|
Work Log Summary

|
Details

|
10-05-2013
|
2.00
|
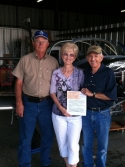
Airworthiness Inspection Completed
|
Details
|
  |
|
09-18-2013
|
5.00
|
Installing interior materials & carpet.
|
Details
|

  |
|
09-11-2013
|
4.00
|
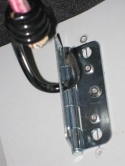
Added hinges to baggage floor for tie downs.
|
Details
|


|
|
09-05-2013
|
4.00
|
Added a fire extinguisher and installed the GPS.
|
Details
|


|
|
09-03-2013
|
5.50
|
Unwired stick fuel boost switches.
|
Details
|


 |
|
08-31-2013
|
3.50
|
Charlotte applied N numbers to fuselage.
|
Details
|


 |
|
08-23-2013
|
3.50
|
Installed Kroger sun shade.
|
Details
|


|
|
08-17-2013
|
3.50
|
Engine "First Start"!
|
Details
|


|
|
08-14-2013
|
8.00
|
Programed Dynon and applied labels to panel.
|
Details
|


 |
|
08-10-2013
|
4.00
|
Cowling work completed (well almost).
|
Details
|


 |
|
08-07-2013
|
4.00
|
Panel lables and cowling work.
|
Details
|


|
|
08-06-2013
|
5.00
|
Installing cowling with the prop installed.
|
Details
|


|
|
08-04-2013
|
6.00
|
Installed the Whirlwind 200RV prop.
|
Details
|


|
|
08-03-2013
|
4.00
|
Checked fuel boost pump operation.
|
Details
|
   |
|
08-01-2013
|
4.00
|
Programing the Dynon D180 & D100.
|
Details
|


|
|
07-30-2013
|
4.00
|
Parking brake lever & wing root fairing.
|
Details
|


|
|
07-28-2013
|
3.00
|
Removed and replaced leaking brake fitting.
|
Details
|


|
|
07-27-2013
|
3.50
|
Uploaded a new Dynon firmware update.
|
Details
|


 |
|
07-26-2013
|
4.00
|
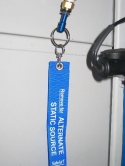
Installed alternate static air source.
|
Details
|


|
|
07-25-2013
|
5.00
|
Installed wingtips.
|
Details
|


|
|
07-24-2013
|
6.00
|
Aligned the ailerons.
|
Details
|


|
|
07-23-2013
|
5.00
|
Flap rod adjustments.
|
Details
|


 |
|
07-22-2013
|
4.00
|
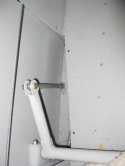
Wing work.
|
Details
|


|
|
07-21-2013
|
10.00
|
Cut the sticks shorter.
|
Details
|


|
|
07-17-2013
|
6.00
|
Both wings on.
|
Details
|


 |
|
07-16-2013
|
5.50
|
Installed the left wing.
|
Details
|


|
|
07-15-2013
|
4.00
|
Bled the brakes & removed windshield protection.
|
Details
|


|
|
07-14-2013
|
6.00
|
Painted canopy bow aluminum band.
|
Details
|


|
|
07-13-2013
|
5.00
|
Applied the primer to the windshield layups.
|
Details
|


|
|
07-12-2013
|
4.00
|
Removed tape from the windshield layup.
|
Details
|


|
|
07-11-2013
|
8.00
|
Windshield layup filling, sanding, & priming.
|
Details
|


|
|
07-08-2013
|
4.00
|
Windshield sand & fill, fill & sand.
|
Details
|


|
|
07-05-2013
|
4.00
|
Sanded edges & added glass beads.
|
Details
|


|
|
07-03-2013
|
5.00
|
Sanding the windshield layup.
|
Details
|


|
|
07-02-2013
|
6.50
|
Filling and sanding the windshield.
|
Details
|


|
|
07-01-2013
|
4.50
|
The windshield fiberglass layup.
|
Details
|


|
|
06-29-2013
|
3.50
|
Final prep on the windshield before the layup.
|
Details
|


 |
|
06-28-2013
|
4.50
|
Sanded flox and filled with Superfil.
|
Details
|


|
|
06-27-2013
|
4.00
|
More prep for windshield installation.
|
Details
|


 |
|
06-26-2013
|
12.00
|
Preparation for windshield fiberglass layup.
|
Details
|


|
|
06-23-2013
|
6.00
|
Installed glareshield cover & started taping.
|
Details
|


|
|
06-22-2013
|
4.50
|
Removed windshield to prep for glareshield coverin
|
Details
|


|
|
06-21-2013
|
6.00
|
Riveted, Superfiled, & visited with windshield adv
|
Details
|


|
|
06-20-2013
|
5.00
|
Sanded elevator weights & sealed FW.
|
Details
|


|
|
06-19-2013
|
4.00
|
Still waiting for windshield advice.
|
Details
|


 |
|
06-18-2013
|
5.50
|
Trying to fit windshield.
|
Details
|


|
|
06-15-2013
|
6.50
|
Finished forward top skin riveting.
|
Details
|


|
|
06-08-2013
|
5.00
|
Started riveting the forward top skin.
|
Details
|


|
|
06-07-2013
|
5.00
|
Prepaired forward top skin for riveting.
|
Details
|


 |
|
06-06-2013
|
5.00
|
Made false floor to rivet top forward skin.
|
Details
|


|
|
06-05-2013
|
5.00
|
Located pitot tubes positions behind subpanel.
|
Details
|


|
|
06-03-2013
|
4.00
|
Prepping to install the wings for naught.
|
Details
|
   |
|
05-31-2013
|
5.50
|
Sanded cowling filler and painted plenum.
|
Details
|


|
|
05-30-2013
|
5.50
|
Filler on the cowling and drilled out rivets.
|
Details
|


|
|
05-29-2013
|
5.50
|
Drained preservitive oil and moved quick drain.
|
Details
|


 |
|
05-28-2013
|
5.50
|
Finished scat hose install & worked on cowl.
|
Details
|


|
|
05-27-2013
|
5.50
|
Reinstalling engine stuff.
|
Details
|


|
|
05-26-2013
|
7.00
|
Fabricated baffle tension rods.
|
Details
|


|
|
05-24-2013
|
2.50
|
Added nutplates for intersection fairings.
|
Details
|


|
|
05-23-2013
|
5.00
|
Set breakout force on nose gear fork.
|
Details
|


|
|
05-22-2013
|
4.00
|
Marked wheel pants for tire inflation holes.
|
Details
|

  |
|
05-21-2013
|
5.00
|
Installed engine parts.
|
Details
|


|
|
05-20-2013
|
5.50
|
Started adding/replacing engine parts remove for p
|
Details
|


|
|
05-18-2013
|
6.00
|
Final plenum angles riveted.
|
Details
|


|
|
05-17-2013
|
5.00
|
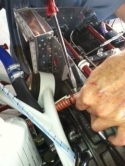
Shortened right air inlet ramp.
|
Details
|
|
|
05-16-2013
|
4.50
|
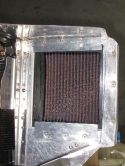
Riveted angle to left side baffle and inlet.
|
Details
|


|
|
05-15-2013
|
5.00
|
Removed conical gusset from right inlet.
|
Details
|


|
|
05-13-2013
|
5.00
|
Riveted last side angles to plenum.
|
Details
|


|
|
05-11-2013
|
8.00
|
Finished most angles for the plenum.
|
Details
|


|
|
05-06-2013
|
5.00
|
Riveted part of the plenum.
|
Details
|


|
|
05-05-2013
|
6.50
|
Wheel pant and plenum work.
|
Details
|


|
|
05-04-2013
|
5.50
|
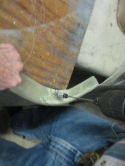
Match drilled plenum angles to the baffles.
|
Details
|


|
|
05-03-2013
|
4.00
|
Plenum angle trimming and fitting.
|
Details
|


|
|
05-01-2013
|
6.00
|
Sanded wheel pants and drilled plenum flange.
|
Details
|


|
|
04-30-2013
|
5.50
|
Last coat of micro beads on fairings.
|
Details
|


|
|
04-29-2013
|
4.00
|
I sanded to smooth the intersection fairings.
|
Details
|


|
|
04-28-2013
|
5.00
|
Spread glass beads onto the intersection fairings.
|
Details
|


|
|
04-27-2013
|
5.00
|
Used flox to cover the fairing juncture gap.
|
Details
|


|
|
04-26-2013
|
4.50
|
Prepped wheel pants for fairing gap filler.
|
Details
|


|
|
04-25-2013
|
5.00
|
More work on the plenum.
|
Details
|


|
|
04-24-2013
|
5.00
|
Glassed the wheel pant intersection f
|
Details
|


 |
|
04-23-2013
|
4.50
|
Trimmed molded plenum.
|
Details
|


|
|
04-21-2013
|
7.00
|
Riveting baffle clips on forward baffles and inlet
|
Details
|


|
|
04-19-2013
|
4.50
|
Sanded on oil filler door install and riveted righ
|
Details
|


|
|
04-18-2013
|
4.50
|
Riveted nutplates to wheel pants.
|
Details
|


|
|
04-17-2013
|
6.00
|
Epoxied interface fairings to main wheel pants.
|
Details
|


|
|
04-16-2013
|
5.00
|
Sanding, drilling, & more work on pants.
|
Details
|


|
|
04-15-2013
|
4.00
|
Finished (maybe) the oil filler door.
|
Details
|


|
|
04-14-2013
|
5.00
|
More intersection fairing work & oil filler door i
|
Details
|


|
|
04-13-2013
|
6.50
|
Worked on leg-to-wheel pant intersection fairings.
|
Details
|


|
|
04-12-2013
|
5.00
|
Worked on main gear leg & interface fairings.
|
Details
|


|
|
04-11-2013
|
4.00
|
Temporarily attached interface fairings.
|
Details
|


|
|
04-10-2013
|
4.00
|
Redrilled and cut on the reinforced wheel pants.
|
Details
|


|
|
04-09-2013
|
6.50
|
Reinforced inside of wheel pants.
|
Details
|


|
|
04-08-2013
|
4.50
|
Corrected wheel pant mistake.
|
Details
|

  |
|
04-07-2013
|
7.00
|
Still working on main wheel pants.
|
Details
|


|
|
04-05-2013
|
4.00
|
Worked on forward baffles.
|
Details
|


 |
|
04-04-2013
|
8.00
|
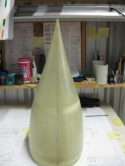
Another day of wheel pant work.
|
Details
|


|
|
04-03-2013
|
6.00
|
More wheel pants work
|
Details
|


|
|
04-02-2013
|
6.00
|
Started work on main gear wheel pants.
|
Details
|


|
|
03-28-2013
|
3.50
|
Rigged floor jack to lift plane off main gear.
|
Details
|


 |
|
03-27-2013
|
5.50
|
More work on nose gear fairings.
|
Details
|


|
|
03-26-2013
|
7.00
|
Installed gear leg fairing hinges.
|
Details
|


|
|
03-23-2013
|
3.00
|
More thinking on gear leg fairings.
|
Details
|

  |
|
03-22-2013
|
5.00
|
Continued gear leg fairing work.
|
Details
|


|
|
03-21-2013
|
4.00
|
Started on main gear leg fairings.
|
Details
|


|
|
03-20-2013
|
5.00
|
Added piano hinge to nose gear leg fairing.
|
Details
|


|
|
03-19-2013
|
6.00
|
Nose wheel pant and leg fairing work.
|
Details
|


|
|
03-17-2013
|
5.50
|
More nose wheel pant work.
|
Details
|


|
|
03-16-2013
|
7.00
|
Nose wheel pant work.
|
Details
|


|
|
03-15-2013
|
3.00
|
Molded an engine plenum out of fiberglass.
|
Details
|


|
|
03-14-2013
|
4.00
|
Instrument panel lighting & nose wheel pant work.
|
Details
|


|
|
03-13-2013
|
3.00
|
Riveted #4 baffle and then went flying.
|
Details
|

  |
|
03-12-2013
|
4.00
|
Started on nose wheel pant.
|
Details
|


|
|
03-08-2013
|
3.50
|
Worked on baggage, panel, and glareshield lights.
|
Details
|


|
|
03-07-2013
|
4.00
|
Nutplate installed on elevator horn inspection hol
|
Details
|


|
|
03-05-2013
|
4.00
|
Sanded fairing & connected elevator push rod.
|
Details
|


|
|
03-04-2013
|
3.50
|
Trimmed off excess glass on empennage fairing.
|
Details
|


|
|
03-03-2013
|
4.50
|
Brake, airblast tube, and empennage work.
|
Details
|


|
|
03-02-2013
|
5.00
|
Made the last (I hope) baffle cuts.
|
Details
|


|
|
03-01-2013
|
4.00
|
More measurements before the cut.
|
Details
|


|
|
02-28-2013
|
4.00
|
First cuts on the baffles.
|
Details
|


|
|
02-27-2013
|
4.00
|
More baffling measurements.
|
Details
|


|
|
02-26-2013
|
4.00
|
Began measuring baffles for trimming.
|
Details
|

  |
|
02-25-2013
|
4.00
|
Riveted rudder cable fairings.
|
Details
|


|
|
02-23-2013
|
4.00
|
Continued empennage work.
|
Details
|


|
|
02-22-2013
|
4.00
|
Trimmed empennage fairing.
|
Details
|


|
|
02-18-2013
|
3.50
|
Removed enclosure for more needed work.
|
Details
|

  |
|
02-17-2013
|
4.00
|
Crimped pins to wires for circular molex connector
|
Details
|


|
|
02-16-2013
|
4.00
|
Match drilled rudder enclosure for pop-rivets.
|
Details
|


 |
|
02-15-2013
|
4.00
|
Final fitting of the bottom rudder enclosure.
|
Details
|


|
|
02-14-2013
|
3.50
|
More trimming on bottom rudder enclosure.
|
Details
|

  |
|
02-13-2013
|
4.00
|
Pulled wires through the aft bulkhead.
|
Details
|


|
|
02-12-2013
|
4.00
|
Started installing rudder bottom enclosure.
|
Details
|


|
|
02-11-2013
|
4.00
|
Fabricated rudder pedal to cable links & installed
|
Details
|


|
|
02-08-2013
|
4.00
|
Pulled rudder cables.
|
Details
|


|
|
02-07-2013
|
4.50
|
Worked on upper & lower horz. fairings.
|
Details
|


|
|
02-06-2013
|
4.00
|
Drilled empennage fairing screw holes.
|
Details
|
   |
|
02-05-2013
|
4.00
|
Installed Vert Stab with AntiSplat mod.
|
Details
|

  |
|
02-04-2013
|
4.00
|
Drilled nutplate holes on vert & horiz. stabs.
|
Details
|
   |
|
02-02-2013
|
4.00
|
Installed Horizontal Stabilizer
|
Details
|
   |
|
01-31-2013
|
20.00
|
Set up shop in the hangar.
|
Details
|


|
|
01-24-2013
|
3.00
|
Moved fuselage to a hangar at KGTU in Georgetown,
|
Details
|


|
|
01-21-2013
|
4.00
|
Air filter bypass door installed on snorkle.
|
Details
|


|
|
12-06-2012
|
4.00
|
Finished attaching the snorkle flanges.
|
Details
|


|
|
11-24-2012
|
4.00
|
Contiuing snorkle madness.
|
Details
|


|
|
11-19-2012
|
2.00
|
Started on snorkle for forward induction.
|
Details
|
   |
|
11-12-2012
|
4.00
|
Finished fitting the cowling.
|
Details
|


|
|
11-11-2012
|
5.00
|
Lower cowl flanges riveted & receptacles installed
|
Details
|


|
|
11-10-2012
|
4.00
|
Lower cowl side flanges installed.
|
Details
|


|
|
11-09-2012
|
7.00
|
Lower cowl installed.
|
Details
|


|
|
11-07-2012
|
6.00
|
Installed Skybolt camlocks on upper cowling.
|
Details
|


|
|
11-05-2012
|
7.00
|
Installed Skybolt flanges to FW.
|
Details
|


|
|
11-03-2012
|
4.00
|
Fabbed 13" disc to help install cowling.
|
Details
|


|
|
11-01-2012
|
4.00
|
Started the install of the cowling.
|
Details
|


 |
|
10-27-2012
|
5.00
|
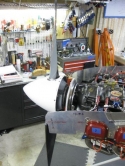
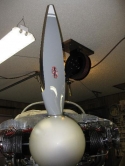
Installed prop to get spinner/cowling gap.
|
Details
|
|
|
10-26-2012
|
5.00
|
EGT & CHT wires routed & Sniffle valve plumbed.
|
Details
|


|
|
10-10-2012
|
4.00
|
Fabricated the P-Mag ignition wires and routed.
|
Details
|


|
|
10-04-2012
|
4.00
|
Cut the baffle holes for the ignition wire seals.
|
Details
|


|
|
10-03-2012
|
4.00
|
Routed magneto ignition wires.
|
Details
|


|
|
09-20-2012
|
8.00
|
Wired magneto & P-Mag electronic ignition.
|
Details
|


|
|
09-12-2012
|
6.00
|
Wired starter and alternator.
|
Details
|


|
|
09-07-2012
|
4.00
|
More wiring and hose installations.
|
Details
|


|
|
08-28-2012
|
4.00
|
Hose and wire routing iterations.
|
Details
|


|
|
08-24-2012
|
4.00
|
Discovered I had the wrong heat muff.
|
Details
|


|
|
08-23-2012
|
6.00
|
Fabricated a throttle cable bracket.
|
Details
|


|
|
08-20-2012
|
4.00
|
Installed sniffle valve.
|
Details
|


 |
|
08-18-2012
|
4.00
|
Started installing parts on the engine.
|
Details
|


|
|
08-17-2012
|
4.00
|
We hung the engine today.
|
Details
|


|
|
08-15-2012
|
3.00
|
Tried fitting oil cooler hoses.
|
Details
|

  |
|
08-13-2012
|
3.00
|
Rearranged garage to hang engine.
|
Details
|


 |
|
08-11-2012
|
4.00
|
Installed #1 baffle & fitted right air ramp.
|
Details
|


 |
|
08-09-2012
|
6.00
|
Started #3 cylinder aft and side baffles.
|
Details
|


 |
|
08-08-2012
|
6.00
|
Installed #3 Aft baffle with mid engine bracket.
|
Details
|


|
|
08-06-2012
|
7.00
|
Riveted oil cooler baffle/doubler & installed.
|
Details
|


|
|
08-05-2012
|
5.00
|
Added angles to oil cooler fabrication.
|
Details
|


 |
|
08-04-2012
|
6.00
|
Cut air hole into the oil cooler baffle/doubler.
|
Details
|


|
|
07-30-2012
|
4.00
|
Started install of baffle kit.
|
Details
|


|
|
07-27-2012
|
2.00
|
Installed Jihostroj govenor.
|
Details
|


 |
|
07-26-2012
|
2.00
|
Sorted out baffle kit.
|
Details
|


 |
|
07-23-2012
|
4.00
|
Installed bracket onto Jihostroj governor.
|
Details
|


|
|
07-20-2012
|
4.00
|
Removed engine from stand to sawhorses.
|
Details
|


|
|
07-18-2012
|
4.00
|
Installed new Matco nose wheel axle.
|
Details
|


|
|
07-07-2012
|
5.00
|
Brake work.
|
Details
|


|
|
06-25-2012
|
5.00
|
Removed Aux Batt Box and then reinstalled.
|
Details
|


|
|
06-23-2012
|
2.00
|
Worked on nose wheel pant brackets.
|
Details
|


 |
|
06-12-2012
|
5.00
|
Updated wiring schematics.
|
Details
|
   |
|
06-11-2012
|
4.00
|
Connected Static, Pitot, & AOA tubing.
|
Details
|


|
|
06-09-2012
|
4.00
|
Visit from AF buddy about electrical system.
|
Details
|


|
|
06-08-2012
|
3.00
|
Installed the Aux Battery box.
|
Details
|

  |
|
06-07-2012
|
4.00
|
Securing and protecting wiring.
|
Details
|


|
|
06-05-2012
|
7.00
|
Removed Airflow pump to add Flaretite seals.
|
Details
|


|
|
06-03-2012
|
4.00
|
Installed main gear legs and wheels.
|
Details
|


|
|
06-01-2012
|
4.00
|
Pulled wires for fuel quantity senders.
|
Details
|


 |
|
05-30-2012
|
3.00
|
Tubes and tires installed to main wheels.
|
Details
|


 |
|
05-29-2012
|
9.00
|
Main landing gear wheels & brakes.
|
Details
|


|
|
05-21-2012
|
12.00
|
Finished right wing and stored in cradle.
|
Details
|


 |
|
05-16-2012
|
2.00
|
Cut and flared fuel tube for left wing.
|
Details
|

  |
|
05-15-2012
|
5.00
|
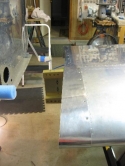
Installed nutplates on wing for the fairing.
|
Details
|


|
|
05-14-2012
|
5.50
|
Installed wing root fairing then removed.
|
Details
|


|
|
05-11-2012
|
4.00
|
Fabricated fuel tank vent tube.
|
Details
|

  |
|
05-07-2012
|
4.00
|
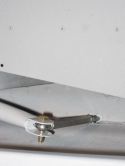
Flap actuating rod installed.
|
Details
|


|
|
05-03-2012
|
4.00
|
Fuel tank attach bracket installed.
|
Details
|

  |
|
05-01-2012
|
7.00
|
Installed right wing and drilled aft spars.
|
Details
|


|
|
04-26-2012
|
4.00
|
Left wing moved to garage & installed.
|
Details
|


|
|
04-19-2012
|
3.00
|
Fabricated drill guides of drilling rear spars.
|
Details
|

  |
|
04-16-2012
|
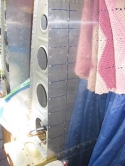
3.50
|
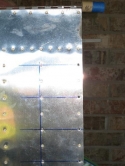
Drilled out QB wing rivets on inboard rib.
|
Details
|

|
|
04-09-2012
|
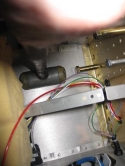
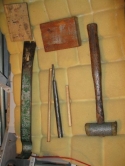
4.00
|
Practiced driving drift pins into carrythru spar.
|
Details
|

|
|
04-06-2012
|
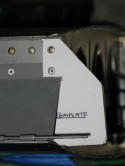
4.00
|
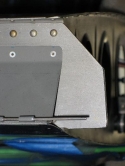
Trimmed wing rear spars.
|
Details
|

|
|
04-04-2012
|
4.00
|
Repositioned fuselage for wing attachment.
|
Details
|


|
|
03-17-2012
|
6.00
|
Installed rudder stops.
|
Details
|


|
|
03-16-2012
|
4.00
|
Installed rudder to vertical stabilzer.
|
Details
|

  |
|
03-15-2012
|
4.00
|
Rewired Aveo 6-in-1 lights.
|
Details
|


|
|
03-14-2012
|
6.00
|
Reinstalled Aveo 6-in-1 wingtip light modules.
|
Details
|


|
|
03-12-2012
|
4.00
|
Riveted attach plate to VS forward spar.
|
Details
|


|
|
03-10-2012
|
4.00
|
Match drilled VS forward spar to attach plate.
|
Details
|


 |
|
03-09-2012
|
6.00
|
Clamped VS to the forward spar attach plate.
|
Details
|

  |
|
03-08-2012
|
3.00
|
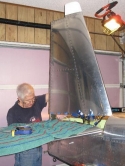
Clamped VS to the HS for measuring.
|
Details
|


|
|
03-07-2012
|
4.00
|
Started installing vertical stabilizer.
|
Details
|


|
|
03-02-2012
|
6.00
|
Elevator deflection angles continued.
|
Details
|


|
|
02-28-2012
|
8.00
|
Installed elevator pushrods to check deflection an
|
Details
|


|
|
02-26-2012
|
5.00
|
Connected elevator trim wiring in aft tailcone.
|
Details
|


|
|
02-24-2012
|
4.00
|
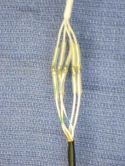
Installed elevator trim servo.
|
Details
|


|
|
02-23-2012
|
5.00
|
Drilled HS forward and aft spars.
|
Details
|


|
|
02-22-2012
|
4.00
|
Started leveling HS on aft deck.
|
Details
|


|
|
02-18-2012
|
2.00
|
Started installing empennage.
|
Details
|


 |
|
02-17-2012
|
4.00
|
Fabricated tail tie down and installed wing tie do
|
Details
|


|
|
02-15-2012
|
2.00
|
Functional test of Aveo 6-in-1 lights.
|
Details
|
   |
|
02-14-2012
|
2.00
|
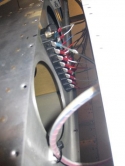
Connected wire bundles to terminal blocks.
|
Details
|


|
|
02-13-2012
|
4.00
|
Made wire bundles for attaching to lights.
|
Details
|


|
|
02-12-2012
|
4.00
|
Wing wires attached to terminal blocks.
|
Details
|

  |
|
02-11-2012
|
4.00
|
Started wiring wingtip lights.
|
Details
|


|
|
02-08-2012
|
3.50
|
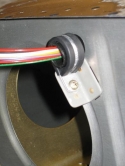
Fabricated right wingtip cutout lens.
|
Details
|


|
|
02-07-2012
|
4.50
|
Cut wingtip lenses and fabbed the left tip lens.
|
Details
|


|
|
02-06-2012
|
3.00
|
Shimed the foam rib on right wingtip.
|
Details
|

  |
|
02-03-2012
|
4.00
|
Cut out foam wingtip ribs and glued.
|
Details
|


|
|
02-02-2012
|
5.50
|
Flap hinge loops cutout for pins insertion.
|
Details
|


|
|
02-01-2012
|
6.00
|
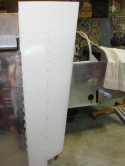
Started designing a foam rib to strengthen fibergl
|
Details
|


|
|
01-29-2012
|
3.00
|
Finished installing nutplates on wingtips.
|
Details
|


|
|
01-27-2012
|
4.00
|
Updated Dynon avionics & installed nuplates on tip
|
Details
|


|
|
01-26-2012
|
4.00
|
Fabbed laning/taxi/strobe light reflector.
|
Details
|


|
|
01-25-2012
|
5.00
|
Riveted nutplates and dimpled wing skins.
|
Details
|


 |
|
01-23-2012
|
4.00
|
Drilled nutplate holes onto wingtips.
|
Details
|


|
|
01-22-2012
|
4.00
|
Matchdrilled strip and wingtip end tip.
|
Details
|


|
|
01-21-2012
|
5.00
|
Added reinforcing srtips to wingtips.
|
Details
|


|
|
01-19-2012
|
4.50
|
Cut left wingtip to aileron gap and matchdrilled.
|
Details
|


|
|
01-18-2012
|
4.00
|
Marked left wingtip for aileron gap.
|
Details
|
   |
|
01-17-2012
|
4.00
|
Prepping wingtip for installation
|
Details
|


 |
|
01-15-2012
|
9.00
|
Finished riveting last skin on the right wing.
|
Details
|


|
|
01-12-2012
|
4.50
|
Finished riveting left wing and installed pitot.
|
Details
|


|
|
01-11-2012
|
4.00
|
More riveting.
|
Details
|

  |
|
01-10-2012
|
5.00
|
More left wing skin riveting.
|
Details
|


 |
|
01-09-2012
|
3.00
|
Started riveting last skin on left wing.
|
Details
|


|
|
01-08-2012
|
3.00
|
Redoing pitot heat wiring and tubing.
|
Details
|


 |
|
01-05-2012
|
6.00
|
Fabricated "aileron stop" bushings.
|
Details
|


|
|
01-03-2012
|
4.00
|
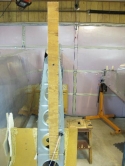
Removed aluminum aileron stops.
|
Details
|


|
|
11-30-2011
|
4.00
|
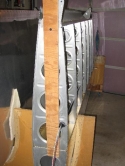
Added wiring conduit clamps
|
Details
|


|
|
11-27-2011
|
1.00
|
Moved wings into garage.
|
Details
|
   |
|
11-17-2011
|
3.50
|
Moved left wing to deck and wired the right wing.
|
Details
|
   |
|
11-16-2011
|
2.00
|
Scarf joint problem solved.
|
Details
|
   |
|
11-14-2011
|
4.50
|
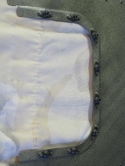
Added nutplates to wing skin access hole.
|
Details
|


|
|
11-12-2011
|
4.00
|
Continuity check of wiring & pitot ops check.
|
Details
|

  |
|
11-11-2011
|
4.00
|
Added wingtip lighting wires.
|
Details
|


|
|
11-08-2011
|
6.00
|
Pitot installation continued.
|
Details
|


|
|
11-04-2011
|
4.00
|
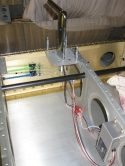
Secured PVC wiring conduit in the wings.
|
Details
|


|
|
11-02-2011
|
4.00
|
Started Dynon pitot/heat installation.
|
Details
|


|
|
09-29-2011
|
4.00
|
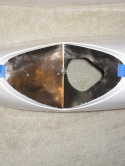
Trial run on wingtip cut-out reflector.
|
Details
|
  |
|
09-27-2011
|
4.00
|
Finished cradles.
|
Details
|


|
|
09-26-2011
|
4.00
|
Floxing the cradle.
|
Details
|


|
|
09-19-2011
|
4.00
|
Cradle building.
|
Details
|


|
|
09-05-2011
|
4.00
|
Continuing building the cradle.
|
Details
|


 |
|
09-01-2011
|
4.00
|
More landing light cradle building.
|
Details
|


|
|
08-23-2011
|
4.00
|
Landing/taxi light cradle development.
|
Details
|


|
|
08-20-2011
|
4.00
|
Set up model on the workbench.
|
Details
|


|
|
08-18-2011
|
5.00
|
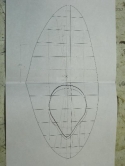
CAD drawing of the tip cut-out grid.
|
Details
|


|
|
08-03-2011
|
2.00
|
Trying to sketch fixture for landing light.
|
Details
|
   |
|
07-09-2011
|
2.50
|
Olive can landing light experiments.
|
Details
|


|
|
07-05-2011
|
3.00
|
Resealed right wing tank.
|
Details
|


|
|
06-25-2011
|
8.00
|
Updated Dynon equipment firmware.
|
Details
|


|
|
06-24-2011
|
4.50
|
Finished the wiring of roll servo.
|
Details
|

  |
|
06-23-2011
|
4.00
|
Wired the AP roll servo to wing connector.
|
Details
|

  |
|
06-22-2011
|
5.50
|
Sevice Bulletin on fuel tube accomplished.
|
Details
|


|
|
06-13-2011
|
3.50
|
Started wiring the right wing.
|
Details
|


|
|
06-12-2011
|
4.00
|
Wiring tidy-up and carried in the right wing.
|
Details
|


|
|
06-11-2011
|
2.50
|
Repaired Forest-of-tabs ground block.
|
Details
|
   |
|
06-10-2011
|
4.00
|
Finished riveting and attaching removed parts.
|
Details
|


|
|
06-09-2011
|
6.00
|
Riveted foil to the FW.
|
Details
|


|
|
06-08-2011
|
5.00
|
Continued with SS foil cutting/drilling.
|
Details
|


|
|
06-07-2011
|
6.00
|
Marking and drilling holes in the foil.
|
Details
|


|
|
06-06-2011
|
6.00
|
Begin FW insulation job.
|
Details
|
   |
|
06-04-2011
|
4.00
|
Removed FW items in prep to insulate.
|
Details
|


 |
|
06-03-2011
|
3.50
|
Installed SafeAir1 FW penetration kit.
|
Details
|
   |
|
06-02-2011
|
3.00
|
Fabricated supports for cables.
|
Details
|
   |
|
06-01-2011
|
4.50
|
Made FW penetration for cabin heat cable.
|
Details
|


|
|
05-31-2011
|
3.50
|
Continued subpanel angle install.
|
Details
|


 |
|
05-30-2011
|
4.00
|
Temporarily installed throttle, prop, mixture, and
|
Details
|


|
|
05-29-2011
|
1.50
|
Com radio testing.
|
Details
|
   |
|
05-27-2011
|
2.00
|
Troubleshot Com radio and intercom.
|
Details
|
   |
|
05-26-2011
|
6.00
|
Made brackets for Safety Trim modules.
|
Details
|


|
|
05-25-2011
|
4.00
|
Tech counselor visit to inspect wiring.
|
Details
|


|
|
05-24-2011
|
2.00
|
Installed the rest of my avionics.
|
Details
|


 |
|
05-23-2011
|
2.00
|
Installed some avionics into panel.
|
Details
|
   |
|
05-22-2011
|
3.00
|
Installed enter/exit rollbar handles.
|
Details
|


|
|
05-21-2011
|
6.00
|
Finished wiring Warning Lights panel.
|
Details
|


|
|
05-19-2011
|
3.00
|
Misc wiring of overlooked items.
|
Details
|
   |
|
05-18-2011
|
5.00
|
Zip tied the wires and static tube to the glue mou
|
Details
|


|
|
05-17-2011
|
6.00
|
Added glued mounts to support adhesive mounts.
|
Details
|


|
|
05-16-2011
|
5.00
|
Continued removing adhesive from mounts.
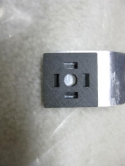
|
Details
|

 |
|
05-13-2011
|
3.00
|
Removed foam adhesive from zip tie mounts.
|
Details
|
   |
|
05-11-2011
|
1.00
|
Gluing zip tie mount experiments.
|
Details
|
   |
|
05-10-2011
|
3.00
|
Experiments with adhesive zip tie mounts.
|
Details
|
   |
|
05-09-2011
|
5.00
|
Wired WigWag switch.
|
Details
|


 |
|
05-07-2011
|
4.00
|
Pulled Pitot Heat wire and wired switch.
|
Details
|

  |
|
05-06-2011
|
5.00
|
Wired Exterior Lights switches.
|
Details
|


|
|
05-05-2011
|
4.00
|
Wired Nav/Pos, Strobes, Landing/Taxi to connectors
|
Details
|


 |
|
04-30-2011
|
6.00
|
Wired fuselage connector for AP roll servo.
|
Details
|

  |
|
04-29-2011
|
2.00
|
Pulled rudder strobe power wire.
|
Details
|


 |
|
04-27-2011
|
4.00
|
Wired connectors and pulled rudder wire.
|
Details
|


 |
|
04-26-2011
|
3.00
|
Pulled wire from left to right side.
|
Details
|
   |
|
04-23-2011
|
3.00
|
More crimping pins for Molex connectors.
|
Details
|


|
|
04-21-2011
|
4.00
|
Pulled more wires for exterior lighting.
|
Details
|
   |
|
04-20-2011
|
4.00
|
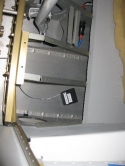
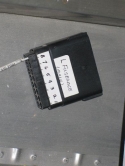
Started wiring wing-fuselage connectors.
|
Details
|

|
|
04-18-2011
|
4.00
|
Pulled some shielded wire.
|
Details
|
   |
|
04-15-2011
|
3.00
|
Ordered my Exterior Lighting.
|
Details
|
   |
|
04-13-2011
|
2.00
|
More research on exterior lighting.
|
Details
|
   |
|
04-11-2011
|
2.50
|
Drawing the Exterior lights schematic.
|
Details
|
   |
|
04-08-2011
|
4.00
|
Wired the cabin lights and tested.
|
Details
|


|
|
04-07-2011
|
4.50
|
Mounted baggage lights.
|
Details
|


 |
|
04-05-2011
|
4.00
|
Pulled wiring for Interior Lighting.
|
Details
|
   |
|
04-04-2011
|
1.00
|
Ordered firewall insulation materials.
|
Details
|
   |
|
03-31-2011
|
4.00
|
Firewall insulation researched.
|
Details
|
   |
|
03-28-2011
|
6.00
|
Rewired the Interior Lights switch.
|
Details
|
   |
|
03-24-2011
|
4.00
|
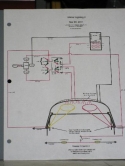
Reworked interior lighting diagram.
|
Details
|

 |
|
03-20-2011
|
6.00
|
Drew schematic of wing to fuselage connections.
|
Details
|

  |
|
03-16-2011
|
3.00
|
Research on wing-fuselage connectors.
|
Details
|


 |
|
03-14-2011
|
6.00
|
Installed ELT remote controls.
|
Details
|


|
|
03-12-2011
|
4.00
|
Installed CP side power port.
|
Details
|


|
|
03-09-2011
|
6.00
|
Continued with ELT antenna.
|
Details
|


|
|
03-07-2011
|
6.00
|
Continued the install of the ELT.
|
Details
|


 |
|
03-02-2011
|
4.00
|
Started install of ELT
|
Details
|
   |
|
02-25-2011
|
7.00
|
Installed coax to VOR antenna.
|
Details
|


|
|
02-24-2011
|
4.00
|
Finished wiring AP74 harness & riveted doubler.
|
Details
|


 |
|
02-22-2011
|
6.50
|
Fabricated VOR antenna doubler.
|
Details
|


|
|
02-21-2011
|
4.00
|
Wired fuse links & sketched doubler.
|
Details
|


|
|
02-18-2011
|
6.00
|
Installed antenna coax cables.
|
Details
|


|
|
02-16-2011
|
2.00
|
Rewired boost pump and fuel flow meter.
|
Details
|


|
|
02-15-2011
|
4.00
|
Started wiring the D180 EMS harness.
|
Details
|
   |
|
02-13-2011
|
4.50
|
Drilled holes and installed zip-tie mounts.
|
Details
|
   |
|
02-12-2011
|
6.00
|
Installed com & xponder antennas.
|
Details
|


|
|
02-10-2011
|
4.00
|
Positioned aileron trim D-sub connectors.
|
Details
|


 |
|
02-08-2011
|
4.00
|
Wired GP circuits for trim & flaps.
|
Details
|

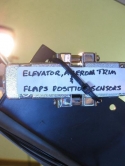

|
|
02-05-2011
|
4.00
|
Prep for wiring EMS GP circuits.
|
Details
|
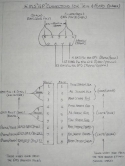

 |
|
02-03-2011
|
4.00
|
Wire grouping and hole drilling.
|
Details
|


|
|
01-31-2011
|
3.00
|
Wired D180 power wire to E-Bus.
|
Details
|
   |
|
01-27-2011
|
3.00
|
Tested GPS pwr/data cable.
|
Details
|
   |
|
01-24-2011
|
6.00
|
Wired the GPS pwr/data cable.
|
Details
|
   |
|
01-20-2011
|
2.00
|
Ops checked the intercom!
|
Details
|


|
|
01-19-2011
|
5.00
|
Wired GPS audio to music jack.
|
Details
|


 |
|
01-17-2011
|
4.00
|
Wire headset jacks.
|
Details
|


 |
|
01-14-2011
|
6.00
|
Wired intercom audio input wires.
|
Details
|


|
|
01-11-2011
|
5.00
|
Wired the 10K pot for HS34 audio.
|
Details
|


|
|
01-05-2011
|
4.00
|
Changed wiring schematicl
|
Details
|


|
|
01-03-2011
|
4.00
|
Wired nav/com power & HS34 ground.
|
Details
|
   |
|
12-23-2010
|
4.00
|
Wrapping and tying off wires and bundles.
|
Details
|


 |
|
12-22-2010
|
4.00
|
HS34 harness wiring.
|
Details
|


 |
|
12-21-2010
|
8.00
|
Wired Dynon Smart Avionic Bus (DSAB).
|
Details
|


|
|
12-20-2010
|
4.00
|
Installed PTT intercom switches.
|
Details
|


 |
|
12-19-2010
|
12.00
|
Intercom wiring diagram and research.
|
Details
|

  |
|
10-19-2010
|
4.00
|
Fabricated an D-sub avionics grounding bus.
|
Details
|


|
|
10-06-2010
|
2.50
|
Wired the flap position sensor.
|
Details
|
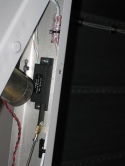
  |
|
10-05-2010
|
4.50
|
Installed flap position sensor.
|
Details
|


|
|
10-04-2010
|
2.50
|
Shopped for parts to install flap position sensor.
|
Details
|
   |
|
10-03-2010
|
3.00
|
Wired the twisted bundle to the pitch servo.
|
Details
|

  |
|
10-01-2010
|
3.00
|
Added wire to AP twisted bundle then pulled to ser
|
Details
|
   |
|
09-29-2010
|
4.00
|
Connected EFIS harnesses to remote compasses.
|
Details
|


|
|
09-28-2010
|
5.00
|
Finished the wiring to the remote compasses.
|
Details
|


|
|
09-27-2010
|
6.00
|
Drilling and wiring to the tailcone.
|
Details
|


|
|
09-26-2010
|
3.00
|
Researched VAF forum about OAT probe location.
|
Details
|
   |
|
09-24-2010
|
4.00
|
Installed PowerSchottky diode for E-Bus.
|
Details
|


|
|
09-23-2010
|
6.50
|
Finished stick grip wiring to terminal blocks.
|
Details
|


|
|
09-21-2010
|
6.00
|
Wired copilot stick grip to terminal blocks.
|
Details
|


|
|
09-19-2010
|
5.50
|
Wired AMP connector/installed crotch strap kits.
|
Details
|


|
|
09-18-2010
|
4.00
|
Wired flap motor and did continuity testing.
|
Details
|


|
|
09-16-2010
|
5.00
|
Pulled wires from/to FW & from/to terminal blocks.
|
Details
|


|
|
09-14-2010
|
5.00
|
Installed terminal blocks and started stick wiring
|
Details
|


|
|
09-12-2010
|
5.00
|
Installed Safety-Trim and Flap Controller harnesse
|
Details
|
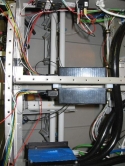


|
|
09-10-2010
|
8.00
|
Drilled holes for connectors and wire passage.
|
Details
|


|
|
09-08-2010
|
5.50
|
The crotch strap kit arrived, started installation
|
Details
|


|
|
09-05-2010
|
5.50
|
Rewired fuel boost pump circuit & potted stick.
|
Details
|


 |
|
09-04-2010
|
6.00
|
Installed copilot's Infinity stick grip.
|
Details
|


 |
|
09-03-2010
|
5.00
|
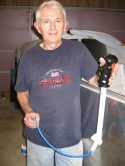
Installed the Infinity grip onto the pilot's stick
|
Details
|
  |
|
09-02-2010
|
4.00
|
Reinstalled Safety-Trim and Flaps Modules.
|
Details
|


|
|
08-30-2010
|
35.00
|
Spent 10 days making schematics for stick wiring.
|
Details
|
   |
|
08-19-2010
|
5.00
|
Added more to the Pitot/Static system.
|
Details
|

  |
|
08-18-2010
|
5.00
|
Added hoses to avionics fan and wired some LEDs.
|
Details
|


 |
|
08-17-2010
|
4.00
|
Installed avionics fan and wired.
|
Details
|

  |
|
08-16-2010
|
7.50
|
Installed the Pitot/Static/AOA to instrument panel
|
Details
|


|
|
08-15-2010
|
6.50
|
Worked on pitot/static/AOA system.
|
Details
|


|
|
08-13-2010
|
5.00
|
Changed dimmer wiring & wired servo pwr switch.
|
Details
|
   |
|
08-12-2010
|
4.00
|
Added LED warning lights and dimmer pot.
|
Details
|

  |
|
08-10-2010
|
5.00
|
Added servo and avionics pwr switches.
|
Details
|


 |
|
08-08-2010
|
5.00
|
Wired pitot heat switch and determined wire gauge.
|
Details
|


 |
|
08-06-2010
|
3.50
|
Wired Nav/Strobe and Taxi/Ldg lights switches.
|
Details
|

  |
|
08-05-2010
|
5.00
|
More switches wired including the fuel boost pump.
|
Details
|


|
|
08-03-2010
|
5.00
|
Updating drawings and riveting tie mounts.
|
Details
|


|
|
07-30-2010
|
4.00
|
Started wiring switches on the switch panel.
|
Details
|


|
|
07-28-2010
|
6.00
|
Installed in-line fuse holders off batteries.
|
Details
|


|
|
07-26-2010
|
4.00
|
Installed subpanel engine controls bracket.
|
Details
|


|
|
07-24-2010
|
3.00
|
Finished wiring the E-bus Alt Feed Relay.
|
Details
|


|
|
07-23-2010
|
7.00
|
Wired E-Bus Alt Feed Relay and switch.
|
Details
|


|
|
07-21-2010
|
2.50
|
Made battery strap for bat removal from battery bo
|
Details
|


 |
|
07-20-2010
|
6.00
|
Fished installing all the battery cables.
|
Details
|


 |
|
07-19-2010
|
6.50
|
Made Aux battery cables to contactor and ground.
|
Details
|


|
|
07-18-2010
|
4.00
|
Made a fat wire support bracket for the Aux batter
|
Details
|
   |
|
07-16-2010
|
3.00
|
Series wiring is "not" parallel wiring!
|
Details
|


|
|
07-15-2010
|
5.00
|
Crimped fat wires for electrical system.
|
Details
|


 |
|
07-14-2010
|
3.50
|
Installed the TWC Safety Trim module.
|
Details
|


 |
|
07-13-2010
|
5.00
|
Bought some parts and installed TWC Flap Module.
|
Details
|


|
|
07-10-2010
|
3.00
|
Ordered PC680 battery and other parts.
|
Details
|
   |
|
07-09-2010
|
4.00
|
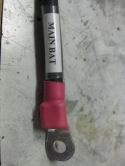
Crimper delivered and I try a fat wire crimp.
|
Details
|


|
|
07-08-2010
|
4.00
|
Wired busses together through the Schottky diode.
|
Details
|


|
|
07-07-2010
|
4.50
|
Fabricated center stack spacer and top cover.
|
Details
|


|
|
07-06-2010
|
8.00
|
Painted instrlument panel and installed switches.
|
Details
|


|
|
07-05-2010
|
5.00
|
Uninstalled instrument panel to prime and paint.
|
Details
|

  |
|
07-03-2010
|
4.00
|
Added intercom to panel before prepping for primer
|
Details
|


 |
|
07-02-2010
|
2.00
|
Second engine preservation and prop arrived.
|
Details
|


|
|
07-01-2010
|
4.00
|
Fabricated some cable supports.
|
Details
|


|
|
06-30-2010
|
6.00
|
Installed Aux battery contactor.
|
Details
|


|
|
06-27-2010
|
3.00
|
Wired diodes to Van's batt and starter contactors.
|
Details
|


|
|
06-26-2010
|
5.00
|
Mounted ammeter shunt and ANL base.
|
Details
|


 |
|
06-25-2010
|
4.00
|
Bought welding cable to make fat wires.
|
Details
|


|
|
06-22-2010
|
8.00
|
Ordered some bolts, nuts, screws, and terminals.
|
Details
|
   |
|
06-17-2010
|
4.50
|
Installed remote compasses & bracket into tailcone
|
Details
|


|
|
06-14-2010
|
7.50
|
Fabricated bracket for Dynon remote compasses.
|
Details
|


|
|
06-09-2010
|
3.00
|
Installed fuse blocks and Schottky diode.
|
Details
|


 |
|
06-08-2010
|
4.00
|
Installed Main battery box & contactors to FW.
|
Details
|


|
|
06-02-2010
|
7.00
|
Dismantling and reengineering the Aux battery box.
|
Details
|


|
|
05-31-2010
|
2.00
|
Researching various throttle cable FW penetrations
|
Details
|
   |
|
05-12-2010
|
1.00
|
Added springs to Matco master brakes.
|
Details
|


 |
|
05-08-2010
|
3.50
|
Riveted the drop down fuse block panel parts.
|
Details
|


|
|
05-07-2010
|
4.00
|
Started drop down fuse block panel.
|
Details
|


|
|
05-04-2010
|
3.00
|
Determining location of fuse blocks.
|
Details
|
   |
|
05-03-2010
|
2.50
|
Need an alternate throttle cable FW penetration.
|
Details
|
   |
|
04-24-2010
|
5.50
|
Added SL-30 tray & Air Gizmo GPS dock.
|
Details
|


|
|
04-23-2010
|
5.50
|
Fabricated brackets for transponder tray.
|
Details
|


|
|
04-22-2010
|
3.50
|
Decided how to support transponder tray.
|
Details
|
   |
|
04-21-2010
|
4.00
|
Finished cuting angles and riveting to subpane.
|
Details
|


|
|
04-20-2010
|
4.50
|
Contiued working on forward subpanel.
|
Details
|


 |
|
04-13-2010
|
4.50
|
Riveted angles to frame and cut hole in the subpan
|
Details
|


|
|
04-12-2010
|
4.50
|
Started fabricating structure for radio stack.
|
Details
|


 |
|
04-10-2010
|
5.50
|
Riveted Dynon trays to panel plates.
|
Details
|


|
|
04-09-2010
|
6.00
|
Finished cutting holes and temporarily monted to p
|
Details
|


|
|
04-08-2010
|
6.00
|
Cut instrument holes into panel plates.
|
Details
|


|
|
04-06-2010
|
4.00
|
Drilled holes in panel plates to cut rectangular h
|
Details
|

  |
|
04-05-2010
|
4.00
|
Finished drilling the switch holes.
|
Details
|


|
|
03-31-2010
|
6.00
|
Drilled toggle switch holes into the subpanel.
|
Details
|


|
|
03-30-2010
|
4.50
|
Riveted the panel frame and subpanel support brack
|
Details
|


|
|
03-29-2010
|
6.50
|
Drilled fuselage skin and support angle brackets.
|
Details
|


|
|
03-28-2010
|
4.50
|
Finished riveting nutplates and connected subpanel
|
Details
|


 |
|
03-27-2010
|
6.00
|
Riveted the nutplates to the frame angle stiffener
|
Details
|


 |
|
03-26-2010
|
6.00
|
Frame stiffener angle drilled and nutplates rivete
|
Details
|

  |
|
03-23-2010
|
4.00
|
Started the subpanel.
|
Details
|

  |
|
03-22-2010
|
4.50
|
Spent time with Dynon D-180 and tray.
|
Details
|
   |
|
03-21-2010
|
4.50
|
Started drawing on TurboCad for panel cuts.
|
Details
|


 |
|
03-20-2010
|
4.00
|
Fabricated angle brackets that connect to fuselage
|
Details
|


|
|
03-18-2010
|
5.00
|
Drilled the vent outlets with the receptacles and
|
Details
|

  |
|
03-17-2010
|
5.00
|
Riveted nutplates to panel frame.
|
Details
|


|
|
03-16-2010
|
4.50
|
Modified F-7103C attach angles.
|
Details
|


|
|
03-15-2010
|
5.00
|
Started installing the modular instrument panel.
|
Details
|
   |
|
03-12-2010
|
6.50
|
Aux battery box nearly finished.
|
Details
|


|
|
03-11-2010
|
5.50
|
Still working on Aux Battery box installation.
|
Details
|


|
|
03-10-2010
|
6.00
|
Continued Aux Battery box construction.
|
Details
|


 |
|
03-09-2010
|
6.00
|
Start construction of Aux Battery enclosure.
|
Details
|


 |
|
03-08-2010
|
4.00
|
Designed and purchased material for Aux Bat Box.
|
Details
|
   |
|
03-07-2010
|
3.00
|
Designed Electrical system and finalized avionics.
|
Details
|
   |
|
10-12-2009
|
3.00
|
Removed plastic protection from canopy.
|
Details
|


|
|
10-01-2009
|
3.00
|
Sanded epoxy to remove bubbles than added another
|
Details
|

  |
|
09-30-2009
|
4.00
|
Sanded, primed, and epoxied the rear skirt.
|
Details
|


|
|
09-29-2009
|
3.00
|
Sanded rear skirt and touch-up pinholes with fille
|
Details
|

  |
|
09-28-2009
|
6.00
|
Finished riveting side skirts and epoxied rear ski
|
Details
|


|
|
09-27-2009
|
6.50
|
Riveted canopy plexiglass to frame.
|
Details
|


|
|
09-26-2009
|
6.00
|
Painted canopy frame and cover strips.
|
Details
|


|
|
09-25-2009
|
7.00
|
Made tool then sanded and primed rear skirt.
|
Details
|


|
|
09-24-2009
|
6.00
|
Finished the canopy latch and drilled rear skirt.
|
Details
|


|
|
09-23-2009
|
4.00
|
More prep work to cover and forward strips.
|
Details
|
   |
|
09-22-2009
|
2.00
|
Prepared canopy for help-opening handle.
|
Details
|
   |
|
09-21-2009
|
8.00
|
Sanded and drilled getting ready for riveting.
|
Details
|


 |
|
09-20-2009
|
6.00
|
Worked on side skirt and drilled out canopy holes.
|
Details
|


|
|
09-19-2009
|
3.00
|
Sanded and added more primer to skirt.
|
Details
|

  |
|
09-18-2009
|
4.00
|
Primed the rear skirt with surface primer.
|
Details
|

  |
|
09-16-2009
|
2.00
|
Rear skirt epoxy filler work
|
Details
|

  |
|
09-08-2009
|
6.00
|
Fabricated adapter for engine stand.
|
Details
|


|
|
09-06-2009
|
4.00
|
Six month represervation of IO-360 engine.
|
Details
|


 |
|
09-05-2009
|
4.00
|
Sanded and drilled rear skirt.
|
Details
|


 |
|
09-03-2009
|
4.00
|
More sanding on aft skirt.
|
Details
|


 |
|
09-02-2009
|
4.00
|
Sanded filler and primed surface.
|
Details
|


|
|
09-01-2009
|
4.00
|
Started adding filler to aft skirt.
|
Details
|


|
|
08-31-2009
|
3.00
|
Removed aft skirt to trim off excess fiberglass.
|
Details
|


|
|
08-30-2009
|
2.00
|
Added three more fiberglass plies to aft skirt.
|
Details
|
   |
|
08-29-2009
|
2.00
|
Saturated 3 plies of fiberglass to make rear skirt
|
Details
|


|
|
08-28-2009
|
7.00
|
Cut fiberglass cloth and taped off work area.
|
Details
|


|
|
08-26-2009
|
6.00
|
Fine tuned latch, installed roller botls & anchor
|
Details
|


|
|
08-25-2009
|
5.00
|
Tried forming (bending) the side skins for better
|
Details
|

  |
|
08-24-2009
|
3.00
|
Trip to Home Depot for tools and stuff.
|
Details
|

  |
|
08-21-2009
|
4.00
|
Tapped rear canopy bow to hold plexiglass.
|
Details
|


 |
|
08-20-2009
|
3.50
|
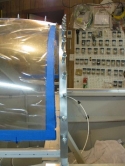
Checked windshield fit after drilling and sanding.
|
Details
|
  |
|
08-19-2009
|
5.50
|
Countersunk windshield and tapped roll bar.
|
Details
|


|
|
08-18-2009
|
6.00
|
Drilled and sanded the windshield.
|
Details
|


|
|
08-17-2009
|
4.00
|
Windshield prepped and rear skirt pattern made.
|
Details
|

  |
|
08-16-2009
|
5.00
|
Installed the rear canopy anchor blocks.
|
Details
|


|
|
08-15-2009
|
3.00
|
Worked on canopy latch.
|
Details
|

  |
|
08-13-2009
|
2.00
|
Practiced drilling plexiglass
|
Details
|
   |
|
08-04-2009
|
4.00
|
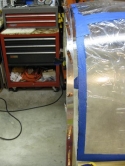
Finished the front edge canopy trim strip.
|
Details
|


|
|
08-03-2009
|
4.00
|
Match drilled to canopy front edge.
|
Details
|
   |
|
08-02-2009
|
4.00
|
Cut new canopy top cover and front strip.
|
Details
|
   |
|
07-30-2009
|
5.00
|
Match drilled canopy braces to side skirts.
|
Details
|

  |
|
07-29-2009
|
6.00
|
Fabricated canopy brace and match drilled.
|
Details
|


|
|
07-28-2009
|
5.00
|
Drilled side skirts to canopy frame.
|
Details
|


|
|
07-27-2009
|
4.00
|
Drilled side skirts.
|
Details
|

  |
|
07-26-2009
|
5.00
|
Canopy trim pattern made.
|
Details
|


 |
|
07-25-2009
|
4.00
|
Permanently installed roller tracks.
|
Details
|


|
|
07-23-2009
|
4.00
|
Sanded the canopy edges.
|
Details
|


 |
|
07-21-2009
|
5.00
|
Checked windshield against canopy.
|
Details
|

  |
|
07-20-2009
|
4.00
|
Drilled canopy to canopy frame.
|
Details
|


|
|
07-16-2009
|
4.00
|
Cut windshield to fit forward fuselage skin.
|
Details
|


|
|
07-15-2009
|
2.00
|
Clecoed on the forward fuselage skin.
|
Details
|

  |
|
07-13-2009
|
4.00
|
Sanded edges of canopy and windshield.
|
Details
|


|
|
07-12-2009
|
6.00
|
Cut windshield and trimmed canopy.
|
Details
|


|
|
07-11-2009
|
3.00
|
Cut latch hole and clamped frame to bubble.
|
Details
|


|
|
07-10-2009
|
5.00
|
Cut the flanges off the canopy bubble.
|
Details
|


|
|
07-09-2009
|
3.00
|
Fitted frame to bubble and marked latch hole.
|
Details
|


 |
|
07-08-2009
|
2.00
|
Finally, the canopy frame is welded.
|
Details
|


|
|
07-07-2009
|
2.00
|
Getting canopy frame welded.
|
Details
|
   |
|
07-05-2009
|
2.00
|
Rearranged the garage and pulled out the canopy.
|
Details
|

  |
|
07-03-2009
|
4.00
|
Adjusted the right side bow before welding the bo
|
Details
|

  |
|
07-01-2009
|
5.00
|
More canopy frame "cutting" and bending.
|
Details
|


|
|
06-29-2009
|
4.00
|
Forward cockpit tunnel area tasks.
|
Details
|


|
|
06-28-2009
|
4.00
|
Fabricated doubler for center tunnel cover.
|
Details
|


|
|
06-25-2009
|
6.00
|
More bending methods.
|
Details
|


|
|
06-24-2009
|
6.00
|
More bending the canopy frame.
|
Details
|


 |
|
06-23-2009
|
6.00
|
Installed cabin heat box/tried bending canopy fram
|
Details
|


|
|
06-20-2009
|
5.00
|
Installed doubler and swivle eyeball pass throughs
|
Details
|


|
|
06-16-2009
|
3.00
|
Avery Tools order again.
|
Details
|
   |
|
06-15-2009
|
5.00
|
Started firewall penetrations.
|
Details
|


 |
|
06-13-2009
|
4.00
|
Constructed engine stand.
|
Details
|


 |
|
06-10-2009
|
6.00
|
Hang engine to verify FW penetration locations.
|
Details
|


|
|
06-09-2009
|
6.50
|
Install engine mount & temporarily hang engine.
|
Details
|


|
|
06-08-2009
|
5.00
|
Marked firewall penetrations.
|
Details
|
   |
|
06-07-2009
|
3.00
|
Riveted doubler for battery & starter relays,
|
Details
|

  |
|
06-05-2009
|
4.00
|
Fabricated doubler for battery & starter relays.
|
Details
|


 |
|
06-04-2009
|
4.00
|
Priming, painting, and mounting battery box.
|
Details
|


|
|
06-03-2009
|
3.00
|
More on the battery box.
|
Details
|


 |
|
06-02-2009
|
4.00
|
Searching for best avionics prices.
|
Details
|
   |
|
06-01-2009
|
3.00
|
Hangar rental
|
Details
|
   |
|
05-31-2009
|
5.00
|
The Odyssey battery box.
|
Details
|


|
|
05-30-2009
|
6.00
|
More canopy bending attempts.
|
Details
|


 |
|
05-29-2009
|
4.00
|
Contiuing the canopy fitting.
|
Details
|

  |
|
05-28-2009
|
4.00
|
Continue working on the canopy fit.
|
Details
|


|
|
05-26-2009
|
4.00
|
Trying to fit canopy frame.
|
Details
|


|
|
05-20-2009
|
4.00
|
Drilled and riveted canopy slider spacer & rail.
|
Details
|


|
|
05-19-2009
|
8.00
|
Finished riveting aft top skin; started canopy.
|
Details
|


|
|
05-18-2009
|
3.00
|
Continued riveting the forward aft top skin.
|
Details
|


 |
|
05-17-2009
|
6.50
|
Started riveting the forward aft top skin.
|
Details
|


|
|
05-16-2009
|
4.00
|
Inventoried FWF Kit
|
Details
|
   |
|
05-14-2009
|
6.00
|
Finished riveting panel, subpanel framework.
|
Details
|


 |
|
05-12-2009
|
4.00
|
Started riveting the panel framework to firewall.
|
Details
|


 |
|
05-08-2009
|
2.00
|
Ordered FWF Kit, Eng Vibration Mounts, & tools.
|
Details
|
   |
|
05-06-2009
|
7.00
|
Riveted brackets and drilled roll bar brace.
|
Details
|


|
|
05-05-2009
|
1.00
|
Drilled holes for canopy deck bracket to hold pane
|
Details
|
   |
|
05-04-2009
|
7.00
|
Finished installing the roll bar.
|
Details
|


|
|
05-03-2009
|
4.50
|
Finished trimming, prepping, & priming forward top
|
Details
|


|
|
05-02-2009
|
7.50
|
Fitting and match drilling top forward fuselage sk
|
Details
|


|
|
05-01-2009
|
4.00
|
Clecoed new skin to forward top fuselage.
|
Details
|

  |
|
04-30-2009
|
6.00
|
Cut and drilled roll bar spacers.
|
Details
|


|
|
04-25-2009
|
6.00
|
Finished static system to panel, accomplished SB.
|
Details
|


|
|
04-21-2009
|
2.00
|
Clecoed top fuselage skin.
|
Details
|

  |
|
04-13-2009
|
3.00
|
Drilled and riveted platenuts to fwd fuselage part
|
Details
|


|
|
04-09-2009
|
3.00
|
More electrical system design and fun.
|
Details
|


 |
|
04-04-2009
|
3.00
|
Electrical system design and planning.
|
Details
|


 |
|
03-23-2009
|
4.00
|
Mattituck TMX IO-360 arrives.
|
Details
|


|
|
03-10-2009
|
3.50
|
Finished parts for fwd upper fuselage.
|
Details
|


|
|
03-09-2009
|
6.00
|
Started fabricating fwd top fuselage parts.
|
Details
|


 |
|
02-23-2009
|
3.00
|
Finished aileron trim installation.
|
Details
|

 |
|
02-17-2009
|
6.00
|
Started installing Aileron electric trim.
|
Details
|

  |
|
02-16-2009
|
6.00
|
Finishing Kit arrived.
|
Details
|


|
|
02-10-2009
|
6.00
|
Installed sticks and drilled elevator horns.
|
Details
|


|
|
02-09-2009
|
4.00
|
Ground down pushrod hole in F-705 bulkhead.
|
Details
|


|
|
02-06-2009
|
5.00
|
Tried to install elevator pushrod.
|
Details
|


|
|
02-04-2009
|
4.00
|
Riveted AP pitch servo bracket to rib.
|
Details
|

  |
|
02-02-2009
|
4.00
|
Begin Dynon AP pitch servo installation.
|
Details
|


 |
|
02-01-2009
|
6.00
|
Installed brake hoses to master cylinders.
|
Details
|


|
|
01-31-2009
|
6.00
|
Bent fuel line tubes from tanks to fuel selector.
|
Details
|


|
|
01-30-2009
|
4.00
|
Finish parking brake & begin fuel tubes.
|
Details
|


 |
|
01-29-2009
|
4.00
|
Complete parking brake install.
|
Details
|


 |
|
01-28-2009
|
4.00
|
Parking brake bracket and placement.
|
Details
|


|
|
01-26-2009
|
6.00
|
Finish tube bending for boost pump kit.
|
Details
|


 |
|
01-25-2009
|
6.00
|
Tube bending started.
|
Details
|


|
|
01-22-2009
|
4.00
|
Riveted pump cover & drilled holes in floor stiffn
|
Details
|


 |
|
01-19-2009
|
4.00
|
Mounted boost pump and filter for trial fitting.
|
Details
|


|
|
01-18-2009
|
3.00
|
Started fabricating for Airflow Boost pump kit.
|
Details
|


|
|
01-03-2009
|
2.00
|
Installed brake reservoir.
|
Details
|


|
|
11-23-2008
|
4.00
|
Installed static ports and tubing.
|
Details
|


|
|
11-10-2008
|
4.00
|
Fabricated fuel vent tubing in fuselage.
|
Details
|


|
|
10-29-2008
|
5.00
|
Installed Dynon AP servo in right wing.
|
Details
|


|
|
10-28-2008
|
5.00
|
Fabricated flap pushrods & primed elev. pushrods.
|
Details
|


|
|
10-26-2008
|
5.00
|
Made elevator push rods & installed stick control
|
Details
|


|
|
10-25-2008
|
3.00
|
Started installing pitot line in left wing.
|
Details
|
   |
|
10-23-2008
|
4.00
|
Installed flap actutating system and AP servo.
|
Details
|


|
|
10-19-2008
|
6.00
|
Finished installing gear mount sockets.
|
Details
|


|
|
10-18-2008
|
5.00
|
Continue install gear mounts.
|
Details
|


 |
|
10-17-2008
|
3.00
|
Started installing the gear mount sockets.
|
Details
|
   |
|
09-30-2008
|
6.00
|
Painted cockpit and baggage area.
|
Details
|


|
|
09-29-2008
|
4.00
|
Painted cockpit and baggage parts & panels.
|
Details
|


 |
|
09-28-2008
|
3.00
|
Match drilled gear sockets to gear legs.
|
Details
|


 |
|
09-27-2008
|
5.00
|
Masked off the fuselage to paint cockpit area.
|
Details
|


|
|
09-25-2008
|
5.00
|
Set up paint booth in garage for cockpit painting.
|
Details
|


|
|
09-19-2008
|
2.50
|
Primed a batch of panels and parts.
|
Details
|


|
|
09-18-2008
|
6.50
|
Riveted steps and baggage floors/ side panels.
|
Details
|


|
|
09-17-2008
|
5.00
|
Finished flap actuator and clecoed step kit.
|
Details
|


|
|
09-16-2008
|
6.00
|
Worked on flap actuator and baggage floor.
|
Details
|


|
|
09-14-2008
|
3.00
|
Working on flap actuator parts.
|
Details
|


|
|
09-13-2008
|
3.00
|
Finished cutting out most parts for flap actuator.
|
Details
|

  |
|
09-12-2008
|
3.00
|
Put in seat cushions to determine rudder placement
|
Details
|


 |
|
09-11-2008
|
2.50
|
Moved wings to garage due to Hurricane Ike.
|
Details
|
   |
|
09-09-2008
|
3.50
|
Started installing flap actuator assembly.
|
Details
|


|
|
09-08-2008
|
3.50
|
Match drilled firewall recess with center cover.
|
Details
|

  |
|
09-07-2008
|
4.00
|
Match drilled center cabin cover.
|
Details
|


|
|
09-06-2008
|
5.00
|
Center Cabin Covers installment.
|
Details
|


 |
|
08-14-2008
|
5.00
|
Riveted rudder assembly brace and firewall recess.
|
Details
|


 |
|
08-13-2008
|
4.00
|
Riveted the seat backs and braces.
|
Details
|


 |
|
08-12-2008
|
2.50
|
Primed seat parts and forward aft top skin.
|
Details
|

  |
|
08-10-2008
|
5.00
|
Removed seat back brace slot angles to fix screw-u
|
Details
|

  |
|
08-09-2008
|
6.00
|
Match drilled the seat backs and hinges using the
|
Details
|


|
|
08-08-2008
|
5.00
|
Marked and drilled holes on the seat support angle
|
Details
|


|
|
08-07-2008
|
4.00
|
Riveted forward tunnel cover and cut angles for se
|
Details
|


 |
|
08-06-2008
|
1.50
|
Primed forward tunnel cover pieces.
|
Details
|
   |
|
08-05-2008
|
5.50
|
Tunnel cover and seat support angles cut.
|
Details
|


|
|
08-04-2008
|
5.00
|
Removed fwd-aft skin for prep & started fabricatin
|
Details
|


|
|
08-03-2008
|
5.00
|
Installed skin stiffener rib and clecoed baggage f
|
Details
|


|
|
08-02-2008
|
5.00
|
Finished elev. bellcrank then clecoed fwd aft top
|
Details
|


|
|
07-25-2008
|
5.00
|
Riveted side rails and prepaired elev. bellcrank.
|
Details
|


 |
|
07-24-2008
|
5.00
|
Fit left gear leg socket and modified side rails.
|
Details
|


|
|
07-23-2008
|
5.00
|
Drilled rudder assembly support brace and more.
|
Details
|


|
|
07-22-2008
|
5.00
|
Temporarily installed rudder pedal assembly.
|
Details
|


|
|
07-20-2008
|
5.00
|
Drill Step Kit plastic blocks to baggage rib, etc.
|
Details
|


|
|
07-19-2008
|
5.00
|
Finish preping rudder/brake pedals.
|
Details
|


|
|
07-18-2008
|
5.00
|
Drilled rudder/brake pedal angles and parts.
|
Details
|


 |
|
07-17-2008
|
5.00
|
Finished Step drilling and drilled gear socket hol
|
Details
|


|
|
07-16-2008
|
5.00
|
Finished fuel tank attach hardware fabrication.
|
Details
|


|
|
07-15-2008
|
5.00
|
Began fabricating fuel tank attach hardware.
|
Details
|


|
|
07-11-2008
|
5.00
|
Finish drilling right step.
|
Details
|


 |
|
07-10-2008
|
6.00
|
Began installing right & left "Step Kits ".
|
Details
|


|
|
07-09-2008
|
4.00
|
Fitted flap end blocks to F-705 assembly.
|
Details
|

  |
|
07-08-2008
|
6.00
|
Finish installing seat adjustment supports.
|
Details
|


|
|
07-06-2008
|
5.50
|
Install control sticks and hardware to fuselage.
|
Details
|


|
|
07-05-2008
|
4.00
|
Worked on QB Firewall.
|
Details
|


|
|
07-02-2008
|
1.00
|
Moved Fuselage to garage/Wings to patio deck.
|
Details
|
   |
|
06-23-2008
|
2.00
|
Finished installing VS tip.
|
Details
|


 |
|
06-20-2008
|
3.00
|
Fabricated HS tip plexiglass enclosure.
|
Details
|

  |
|
06-18-2008
|
3.00
|
Start install of Tip on Vertical Stabilizer.
|
Details
|


|
|
06-17-2008
|
3.00
|
Enclosed HS Tips using Plexiglass & Fiberglass.
|
Details
|


|
|
06-16-2008
|
4.00
|
Started Horizontal Stab Tips Installation.
|
Details
|


 |
|
06-11-2008
|
4.00
|
Installed elevators onto horizontal stabilizer.
|
Details
|


|
|
06-09-2008
|
5.00
|
Finish elevator tips installation.
|
Details
|


|
|
06-07-2008
|
4.00
|
Mounted elevators to HS.
|
Details
|


|
|
06-05-2008
|
3.00
|
Start to install elevator fiberglass tips.
|
Details
|

  |
|
06-04-2008
|
5.00
|
Installed elevator trim servo.
|
Details
|


|
|
06-03-2008
|
4.50
|
Installed elevator rod end hinges & counter weight
|
Details
|


|
|
05-29-2008
|
4.00
|
Installed fuel pickup tubes & quantity sensors.
|
Details
|


|
|
05-03-2008
|
3.00
|
Prepared Fuel Sensors for Wing Fuel Tanks.
|
Details
|


|
|
04-23-2008
|
3.00
|
Mounted Dynon Pitot Heater Control Box
|
Details
|


|
|
04-15-2008
|
3.00
|
Drilled and tapped Dynon pitot.
|
Details
|


 |
|
04-14-2008
|
4.50
|
Cut streamline pitot hole, deburred, dimpled, prim
|
Details
|


|
|
04-13-2008
|
6.00
|
Riveted bracket & preped pitot mounting plates.
|
Details
|


|
|
04-12-2008
|
2.00
|
Dimpled Lower Wing Spars, Ribs, and Skins
|
Details
|


|
|
04-11-2008
|
5.00
|
Back Drilled Lower Outboard Right Wing Skin
|
Details
|
   |
|
04-10-2008
|
5.00
|
Prep to Install Dynon Heated AOA Pitot
|
Details
|


 |
|
09-10-2007
|
3.00
|
Charlotte and I riveted the aileron gap fairings.
|
Details
|


|
|
09-07-2007
|
6.50
|
Prepped and riveted left flap brace and hinge.
|
Details
|


|
|
09-04-2007
|
6.00
|
Prepped and riveted right flap brace & hinge.
|
Details
|


|
|
09-03-2007
|
6.50
|
Riveted outboard aileron hinge brackets.
|
Details
|


|
|
09-01-2007
|
4.50
|
Attached aileron hardware & drilled oversize holes
|
Details
|


|
|
08-31-2007
|
2.50
|
Drilled aileron attach hardware.
|
Details
|

  |
|
08-28-2007
|
6.50
|
Set inbd. aileron brackets and prepped flap brace.
|
Details
|


|
|
08-27-2007
|
5.00
|
Drilled the aileron hinge brackets to rear spar.
|
Details
|
   |
|
08-25-2007
|
6.00
|
Riveted and primed aileron push rods.
|
Details
|


|
|
08-24-2007
|
6.50
|
Drilled Aileron pushrod and rod ends.
|
Details
|


|
|
08-14-2007
|
3.50
|
Finished drilling wing wiring holes and cut ailero
|
Details
|


|
|
08-11-2007
|
4.00
|
Installed aileron bellcranks onto QB wings.
|
Details
|

  |
|
08-10-2007
|
3.00
|
Drilled wiring conduit holes on the right wing.
|
Details
|

  |
|
08-09-2007
|
6.00
|
Started drilling wing wiring conduit holes in the
|
Details
|


|
|
08-08-2007
|
4.00
|
Drilled out and reriveted 3 rivet in aileron hinge
|
Details
|


 |
|
08-07-2007
|
6.00
|
Assembled the aileron hinges.
|
Details
|


 |
|
07-31-2007
|
2.50
|
Moved fuselage from garage to store it on the deck
|
Details
|


|
|
07-26-2007
|
8.00
|
Built my fuselage rotisserie.
|
Details
|


|
|
07-24-2007
|
3.00
|
Analyzed fuselage layout (Dwg 17A) to find axis of
|
Details
|


 |
|
07-23-2007
|
4.00
|
Inventoried parts for QB wings and fuselage.
|
Details
|


|
|
07-16-2007
|
1.50
|
Quick Build Wings and Fuselaged Delivered.
|
Details
|


|
|
07-09-2007
|
4.00
|
Finished building wing cradle.
|
Details
|
   |
|
06-15-2007
|
4.00
|
Started constructing Wing Cradle while waiting for
|
Details
|

  |
|
05-25-2007
|
1.00
|
Drilled out bad rivets and used new Tungsten bucki
|
Details
|


 |
|
05-22-2007
|
2.00
|
Riveted the VS rear spar to the other side of the
|
Details
|


 |
|
05-21-2007
|
2.00
|
Inventoried ordered tools then tried riveting the
|
Details
|


 |
|
05-17-2007
|
3.00
|
Riveted VS skin to the VS frame (ribs and front sp
|
Details
|


|
|
05-16-2007
|
5.00
|
Riveted VS ribs to the front spar with difficulty.
|
Details
|

  |
|
05-15-2007
|
4.00
|
Riveted the rear spar, doubler and hinge brackets.
|
Details
|


 |
|
05-14-2007
|
3.00
|
Set up and primed Vertical Stabilizer Components
|
Details
|


|
|
05-12-2007
|
4.00
|
Tried to set up to prime VS components.
|
Details
|
   |
|
05-11-2007
|
4.50
|
Dimpled spars and ribs and countersunk holes in do
|
Details
|


 |
|
05-10-2007
|
2.00
|
Finished deburring components and dimpled skin.
|
Details
|


|
|
05-09-2007
|
4.00
|
Match drilled VS skin to frame then disassembled a
|
Details
|

  |
|
05-08-2007
|
3.00
|
Assembled and drilled frame then clecoed skin on.
|
Details
|


|
|
03-14-2007
|
0.00
|
Home with the goodies.
|
Details
|


|
|
03-11-2007
|
4.00
|
Finished and installed trim tab.
|
Details
|


|
|
03-10-2007
|
11.50
|
Finish riveting HS skins and elevator skins.
|
Details
|


|
|
03-09-2007
|
11.00
|
Rivet rudder and start riveting HS skins.
|
Details
|


|
|
03-08-2007
|
11.50
|
Start Elevator Prep and riveting HS rear spar.
|
Details
|


|
|
03-07-2007
|
10.75
|
Finished HS Prep and start Rudder Prep
|
Details
|


 |
|
03-06-2007
|
11.50
|
Continued prepping Horizontal Stabilize.
|
Details
|


|
|
03-05-2007
|
10.00
|
Started on the empennage kit by inventoriing.
|
Details
|


|

