Charlotte and I thought it was time to start on the wheel pants. We studied Vans drawing C1 trying to figure out how to install the nose wheel pant. We tried to put the rear part of the pant over the wheel and realized we would have to trim quite a bit before it would go on. We started with a 3/16" cut and then progressed to a 5/8" trim all around the wheel. We finally got it around the brackets and over the wheel on which we taped a 7/8" wooden block to give the proper elevation above the tire.
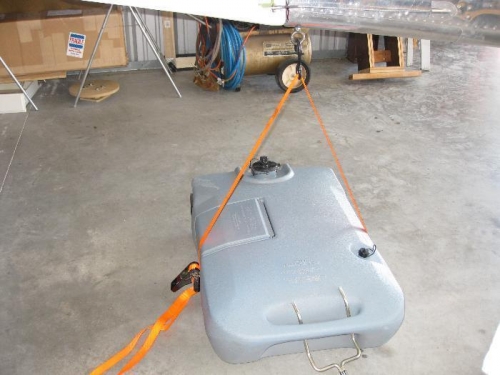
The drawing showed that the dimensions given were for a non-deflected nose tire. To raise the nose I filled a 25 gallon pop-up camper lavatory container with water and rolled it under the tail tiedown ring. I hooked a nylon rachet strap to the tiedown ring and wrapped the strap around the container. I then racheted the tail down so that the nose wheel just touched the hangar floor.
That was enough for the day because my good buddy, John, was flying in from Minden, NV to visit and help me work on the plane. He flys an RV-9A in which he's in a partnership with another pilot. He had sold his SeaRey that he built after flying it for 6 years and fell in love with the fast RV-9A.