Brief Description: Assembly of canopy frame, rails, and slide block
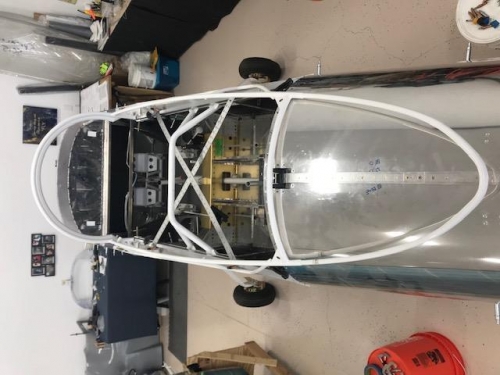
Assembly of the canopy frame.
Connected the rear center rail to the fuselage. Match drilled the rail to the rear turtle back.
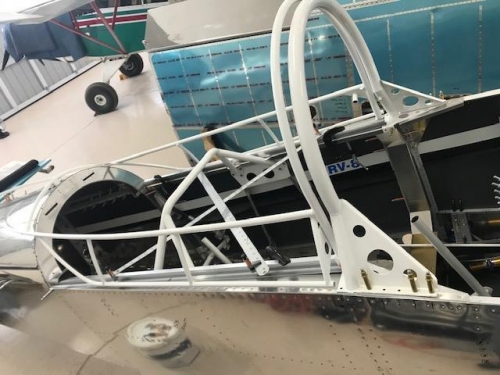
Cut and fit side rails to the fuselage. Angle the rear cut and releaf cut the forward end of the rail where it meets to forward roll bar. Set the width distance. Form the frame width to match the rails. Assemble the forward rollers and torque the roller assembly.
Pin the slide block for the rear rail. Set the distance for the rear pin/needle. (This was simply dumb luck. I thought the clearance was for the weldament to the plastic block so I mcro. the distance thinking it was the correct distance. It turned out that the rear pin ended up the 1/32" clearance of the pin from the rear slide rail top hat. Probably too close and will need to be replaced? My hope it this will help someone from the same mistake) Completed the final drilling from the pined plastic slide block to the canopy frame pin. I used the head of the drumel to hog out the boar drill section for cleavis pin on both sides for the cotter pin.
Set measure and clamp on the test metal sections for canopy distance to the fuselage. Once I was satisfied that it was centered and had formed the width of the rail. Drilled the side rails to the fuselage and bolted the rails into place.
Rear top hat slide rail
Canopy connection to forward roll bar
Slide block with tight clearance. Probably eill need to be replaced