Brief Description: Left Wing Conduit and Bellcrank Install
Moved the wing cradle to the middle garage bay and cleaned up the wing. They have been sitting there for over a year without any work being done as I focused on the fuselage. It is really nice to do the wings at this point because the work to be completed is simple and easy to understand, or so I thought, read on....
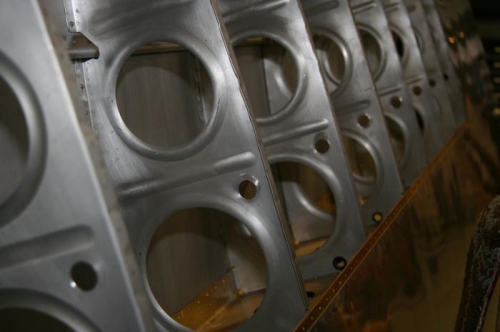
Finished drilling 3/4" wing conduit holes. Deburred and slit plastic conduit and pulled through the left wing. Seems that the second time around took about half of the time. Tim, If you read this builder log, I won't need the 24" 1/8" drill bit. Figured out a way to finish with just the 12" bit.
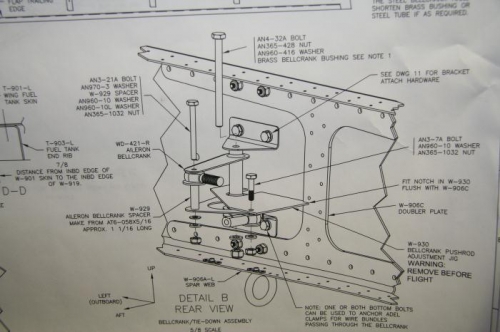
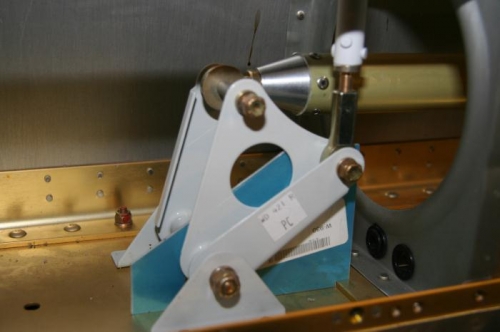
Reviewed the plans for the wing bellcrank. Reamed holes and made spacers for the assembly. Had to take out the bolts to the bellcrank bracket because there is not enough clearance to get the bolt through the bracket. Checked the plans and luckily they are held with platenuts. Imagei if you had to reach around to losten a bolt. Nice Design.
Far from perfect, Van's must have their parts reversed as the right wing bellcrank is really for the left wing. Took me about 10 minutes to remember this as I was sure that the plans were correct, foolish me. WD 421R is actually for the left wing. Steve K, I know we both determined this about two weeks ago when you were up at DYL.