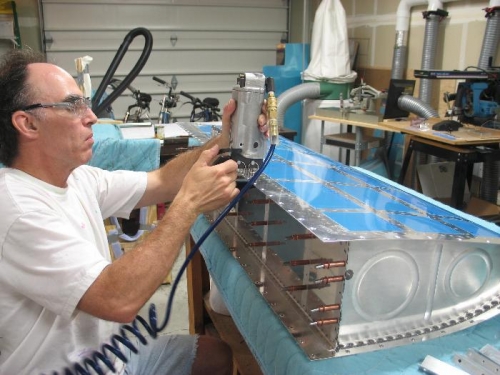
Very important. It's easy to cleco the baffle in place and have a slight off set left/right or up/down. Meaning the holes in the baffle will not be perfectly aligned with the holes in the skin. You must use a pointy thing to push through the holes to get the baffle lined up so that the rivets will sit flush in the counter sink. If you skip this step you will have a whole row of proud rivets. Before I inserted clecos I tested the alignment with a rivet. Put it in the hole and check that it fits flush. Then put in the cleco. I did this for about 8 locations down the rivet line on both sides. Once you have perfect alignment with about 8 rivets each side, then just blindly insert the rest of the clecoes in every hole.
Get the baffle clecoed to the skins before you cleco the baffle to the ribs. If you do the ribs first then it's hard to get the baffle lined up to the skin.
On the second tank I didn't cleco the baffle to the ribs at all until after the baffle was riveted to the skin. The rib flanges will flex and align them selves later when you insert a pointy thing or rivet.
The images show how riveted the baffle to skin. Doing it this way allowes you to apply los of downward pressure on the manufactured head along with the weight of the squeezer. I found this to be important. With out lots of pressure the rivet would stand proud.
If you insert a rivet and see its not totally flush before you squeeze, you can make a few turns with a counter sink inserted on you debur tool.
All my heads are flush. Lots of builders report proud rivets here.
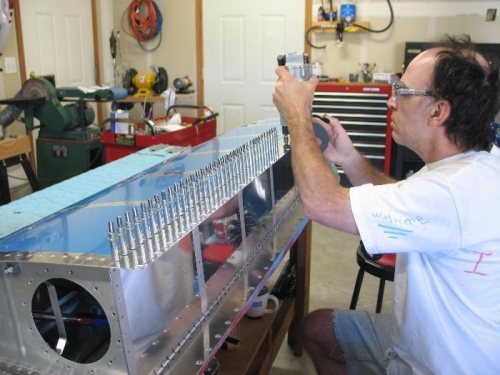
Image 3 shows a Z Bracket and how I sealed it. I put a thin layer of sealent under the bracket first. Then a bead on top of each pulled rivet. Also a small bead around all sides of the bracket.