So, the instructions say to put a 3/16" bead of sealant on the skin, just forward of the baffle rivet line. Then the baffle acts as a squegie to put a nice bead between the skin and baffle interior to the tank. The problem I saw was that there is space between the skin and baffle flange that will prevent the baffle from acting as a squegie. So, this what I did.
1.) Layed the tank flat on the bench and applied the bead of sealant along the rivet line. Turn it over and do the other side.
2.) Set the tank back up right and apply a thin layer of sealant on the flanges of the ribs where the Z brackets will attach.
3.) Apply large bead of sealent of the end rib flange. Mostly interior to the rivet line. I left a 2" gap where you can see a small piece of wood holding up the baffle. I'll put sealant in that spot in a few minutes.
4.) Put the baffle in place held up off the bead of sealant on the skin and ribs.
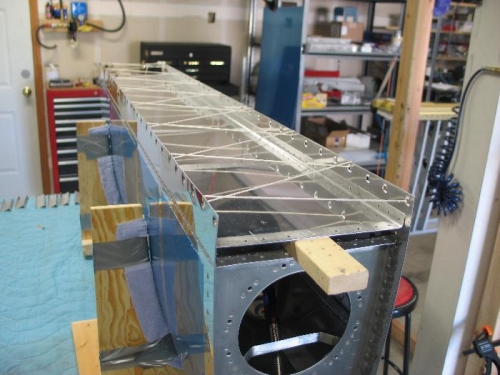
5.) I strung a string back and fourth every other hole and tightened it up to pull together the skin and baffle flange. This will assure the baffle will act as a squegie as the baffle is lowered.
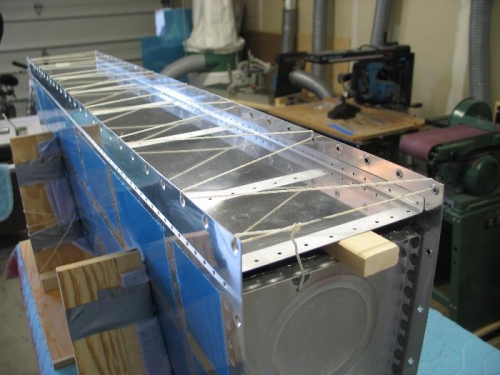
6.) Pull the wood spacer out each end. The baffle stays in place held by the pressure between the skin and baffle flange created by the tension the string makes.
7. Add sealant on the end rib flange where the wood block spacers were.
8.) You can now slowly push the baffle down into place. All bead of sealant on the skin will now be pushed foward.
Now, these tanks have not been seal tested so maybe this procedure is not a good idea. We'll see.