
|

|
|
|
Eddie's Zodiac XL Project
|
Date: 2-14-2007
|
Number of Hours: 1.50
|
Manual Reference:
|
Brief Description: Started installation fo top cowling
|
|
Ugh, I am feeling really tired at the moment and did not feel like venturing into the garage, but again a little progress is better than none. To install the cowl, you start by fitting a wooden doughnut to the spinner hub and then use this to clamp and position the cowling. The instructions from Jabiru say to start with the bottom cowling first and then fit the top, which makes no sense to me, since you'd have to know the exact height to position the bottom cowl to get a good fit for the top. So I am doing it my way, which to me makes more sense, it also follows what the RV guys do with their cowling installations. Having said that, I drilled the doughnut, cut it in half, and bolted it to the spinner hub. I then made a cut-out in the front face of the cowl so that it would fit over the spinner, with this done I then marked the cowl centre line and positioned it on the fuselage. Again according to Jabiru, the cowl should line up with the top horizontal former of the fuse, this bit made sense and that’s what I ended up doing, its not exact, but I used this to make both sides equal. Next step is to re-install the ram air ducts and check for clearance etc. You'll notice in the image 1, the cowl is just a little high at the top, I am hoping that once the ram air ducts are installed I'll be able to drop it down just a little without the cowl and ducts touching.
|
|
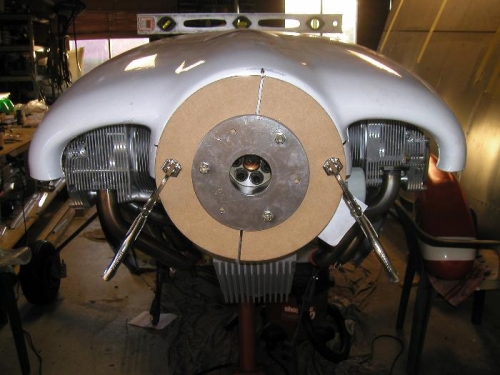
Cowl clamped in place for trial fitting
|
|
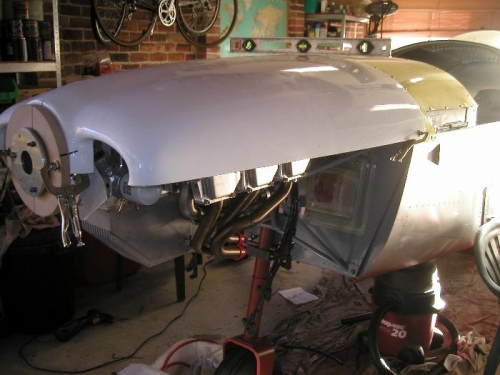
Right side view
|
|
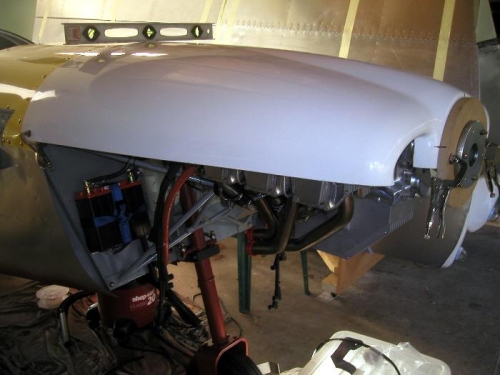
Left side view
|
|
|
|
|
|
|
|
|
Copyright © 2001-2024 Matronics. All Rights Reserved.
|