
|

|
|
|
Wendells RV-6A
|
Date: 1-30-2012
|
Number of Hours: 8.00
|
Manual Reference: Control Sticks
|
Brief Description: Prepare Control Sticks
|
|
I installed the control tube after mounting the control tube brackets to the main spar. To keep the control sticks snug without slack, you need to prepare exact washer spacers to eliminate side to side movement at the mounting bracket bearings. I super glued correct washers to the control tube. However, two of the four got knocked off so I tried using a fishing line. Strung the line through the washers, through the bracket bearing, taped one end to any convenient place and pulled the line tight as I positioned the whole thing. Washers snapped right into proper position so when I fed the bolt through, the washers did not require extensive handling to get into position. As the bolt fed through, it eventually cut the fishing line. Later, I removed and reamed the 2.32 inch long brass bushings with a .249 reamer. You then need three measurements to proceed. Measure the WD611 and WD612 Clevis inner width. Pilot clevis was 2.27 inches so I sanded down the bushing to 2.27 and sanded down the stick to 2.22 (.05 inches narrower than the bushing). That allowed the bushing to be bolted up tight inside the clevis area, and the stick would have .05 freedom to move around the brass bushing without binding on the steel clevis. The Copilot clevis was 2.23 inches, so the brass insert was reduced to 2.23 inches and the control stick was reduced to 2.18. The control stick rotates around the outer surface of the brass bushing and it cannot be rubbing steel to steel on the inside of the clevis. The circular sanding disc on the belt sander was perfect for making the reductions and I re-measured often. Lastly, the plans do not show any spacers between the heim M3414M bearings and side walls of a 2nd attach clevis for the 17.125 inch hexagonal spacer bar that mounts below the control tube. I guessed that you need 5702-75-60 washers, one on each side of the bearing race to remove the slack between the bearing and the hex rod. Check that the bearing is not binding while the control stick is moved to all extreme corner positi
|
|
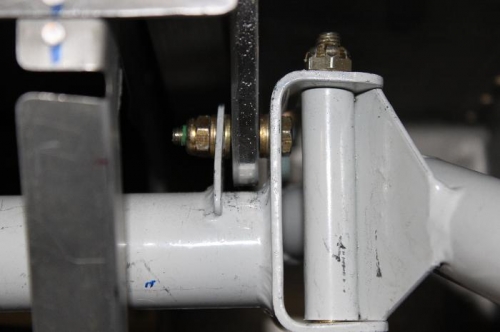
Shimmed the spar attach bearing.
|
|
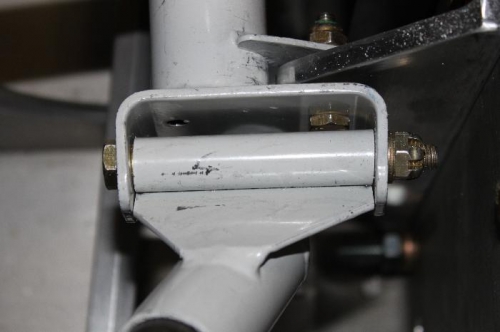
Notice the slight (1/32-1/16) undersize of the white control stick vs the brass bearing.
|
|
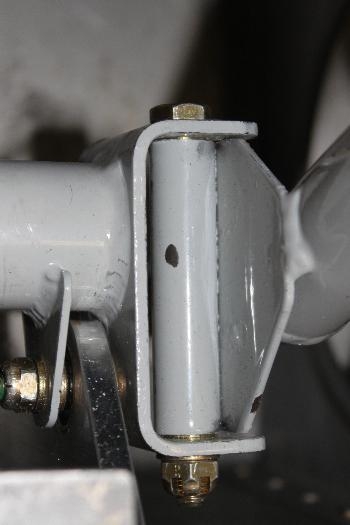
Pilot stick same slight undersize of the white stick vs the brass bearing.
|
|
|
|
|
|
|
|
|
Copyright © 2001-2024 Matronics. All Rights Reserved.
|