Brief Description: Canopy Frame 15- Finish Drilling the Glare Shield
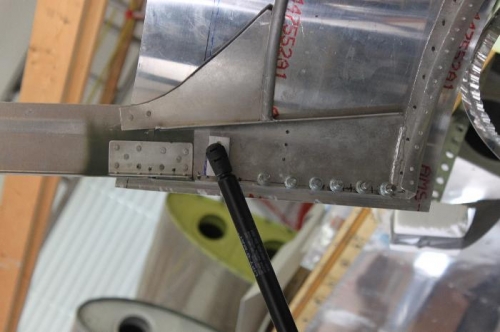
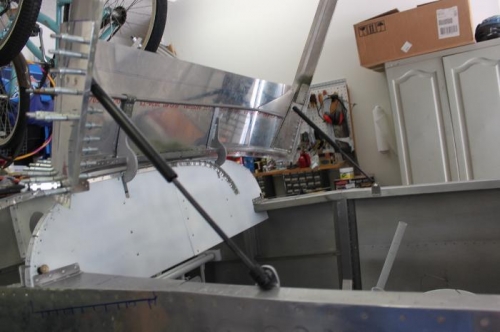
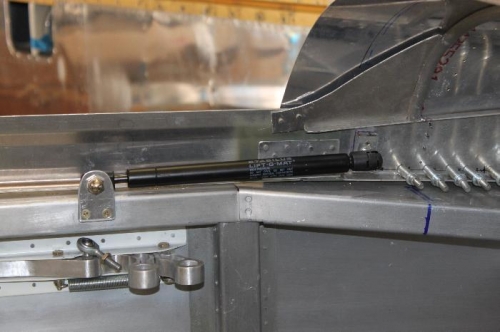
Removed the canopy again along with the forward fuselage skin. Trimmed a little more off the forward edge of the canopy skin as it was binding a little when I went to open it. .035 gap was not enough. Might end up with double that before its over. Drilled the glare shield skin to the lower sides of the canopy frame. Enlarged the tube/skin holes for CS4-4 pop rivets to #30 and countersank the skin with the 120 degree countersink. Dimpled the frame and the skin for #10 screws to secure the gas struts. I was concerned it would be hard to dimple the 063 frame. No problem whatever. Mounted the gas struts to check their action. Closing the canopy as it stands right now turned out to be a two person job. It flexes too much for me to do it alone and be at ease. I will remove it again, take the skin off, cut the glare shield overhang to 2 inches aft of the mounting tube and blend the curve into the side. That removes about 2 inches of the aft edge of the skin.
I tested the weatherstrip mounting angle in place. Needs slight trimming at hinges to clear.
Getting to look more and more like an airplane.
Mounting brackets spaced at 10 inches on center worked out nicely.