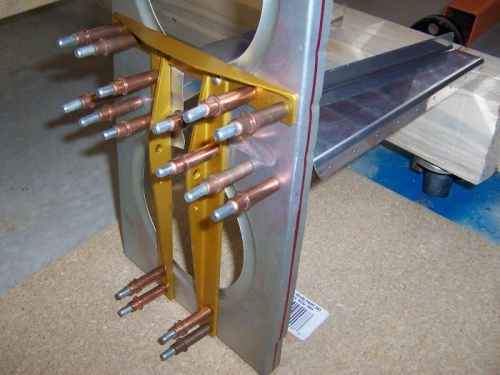
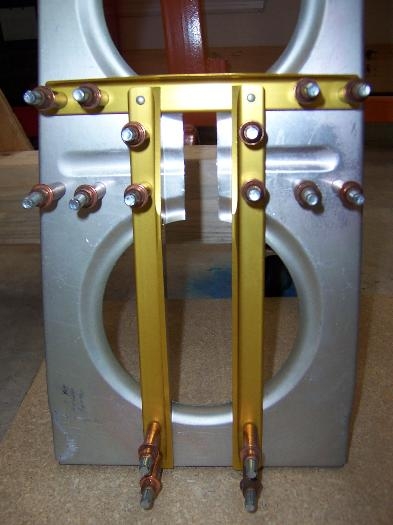
Brief Description: make attachments to Rib #9 for aileron bell crank
This rib gets considerable work to prepare for mounting the stick-to-aileron bell crank later. Mark and drill 16 holes through rib and angles with #30 drill. On W425Right and W425 Left, drill 9 holes each with #40, spaced 1 1/16 inch apart and always paying attention to proper end clearances for the first and last hole. Those two ribs go horizontal and add strength to the bell crank assembly by attaching to rib 10 eventually. Those holes will be back drilled through the wing skin after mounting the rib. EAA had a cool tip about how to mark the center line on rib flanges so you can use the line while looking through pre driled holes of skins to properly line up each rib. No special rulers. Just using two fingers to grasp the sharpie and the middle and ring finger to push against the web of the spar, you can make a perfect line everytime. Worked great. When I was done drilling W425L and R I washed all the red off with a paper towel in acetone. as well as all the red markings from when i positioned the gold bell crank angles.
Make and double check several measurements before drilling #30 holes