Brief Description: LE/tank skin mis alaignment Fix.
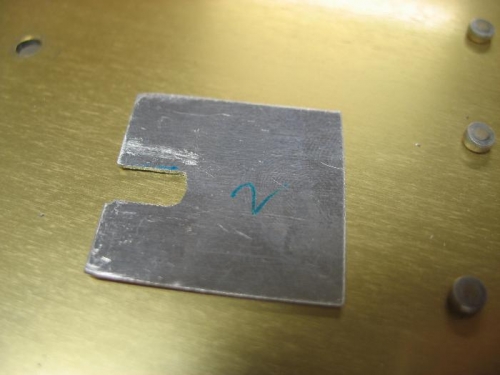
So, The fuel tank puckered inbetween the tank screws next to the leading edge skin. It puckered in 4 spots. I also had an anti pucker between the most trailing tank screw. The 4 pucker spots were located at leading edge rivet locations 1, 3, 5 and 7. I drilled out 8 leading edge rivets and fabricated 4 shims for leading edge rivet locations 1, 3, 5 and 7 like in image 1. The notch goes around the rivet. I put the shim between the rib and joiunt plate on the leading edge. This brings the joint plate out at these rivet locations. It work great. I have good leading edge/ fuel tank skin alaignment. But now both the LE and tank skin are slightly indented at rivet locations that I did not add a shim. It is slight and in only 2 spots. I'm going to call it good.
I still need to address the most traing edge anti pucker.