Brief Description: Elevator trim cable. Inspect and disassemble.
Next we get to install the elevator manual trim cable. Did you say manual trim? Not electric like most others are installing? Yep, manual all the way baby. Light, simple, reliable and in my mind looks cooler too. I’ll have manual aileron trill as well.
The trim cable comes with a bolt and washer at the knob end that isn’t used. Just through them in the bucket.
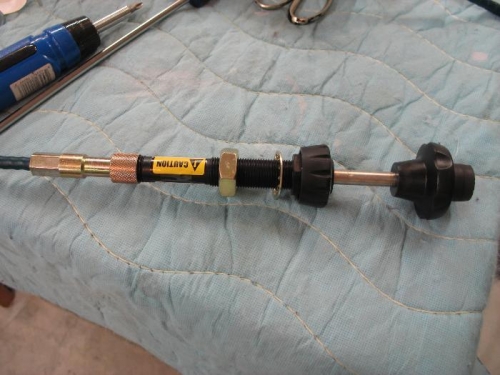
How the heck do you get this bolt and washer off. This cable comes without any directions or diagrams and the plans didn’t help. I finally found the secret.
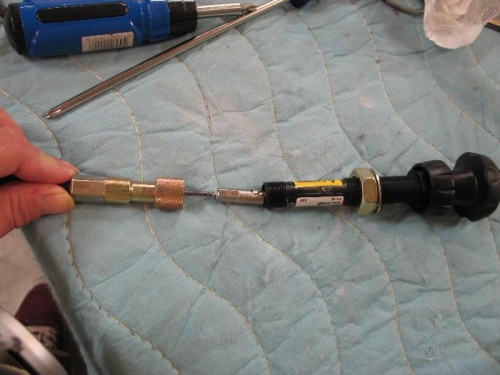
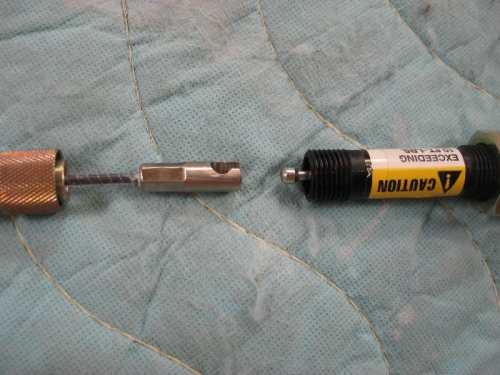
Image 1 - The cable from the factory. Image 2 - Unscrew the cable from the black knob shaft and push the knob all the way in. Pushing the knob all the way in reveals the detachable connection between the cable and the black knob. What do you know. Image 3 - Simply detach after exposing this connection.
The other end also has a nut that need s to be removed and thrown in the bucket. This end is easier to figure out. Just remove the plastic red thread saver, brown plastic boot and larger black rubber boot. Then the nut can slide off.
The cable is ready to pull through the fuselage. At least I thought it was.