Brief Description: Finished the canopy latch and drilled rear skirt.
I had partially put the canopy latch together and held it in hole in the canopy with a vise grip. I decided to finish the latch while waiting for the longer blind rivets that I ordered for the thicker fiberglass rear skirt. I had to cut 3/16" off the the latch handle tube to get just the right length for the top opening/closing handle. The handle had to be matchdrilled through the tube by using a pilot hole bit that was enlarged to a #18 hole to accept the hold-on screw. After doing this on the drill press, I tapped the rear part of the hole for the flush 8-32 screw. This wasn't too difficult but was tedious and time consuming. One mistake and you order new latch parts.
While I was drilling Charlotte scuffed up the side skirts and components on the inside side for priming.
I then drilled out the holes on the fiberglass rear skirt by drilling through the clecoed on skirt, plexiglass (already at 1/8"), and rear bow to their 1/8" size to accept the rivets. The plexiglass will be drilled out later to 3/16" so that the rivets won't touch the sides of the holes. I'm going to use countersunk Tinnerman washers to hold the rivets on the fiberglass due to vibration. I'm trying to come up with a tool to recess the washers so that I can cover them with epoxy filler and sand everything smooth. That's enough for today.
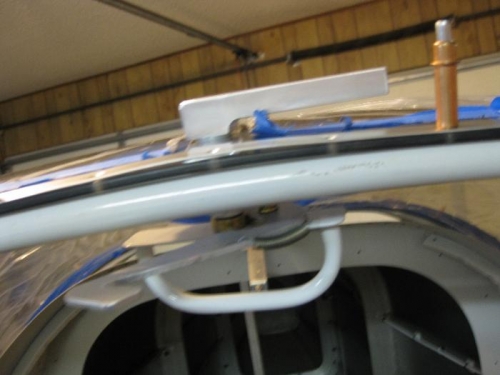
View of latch in the open position.
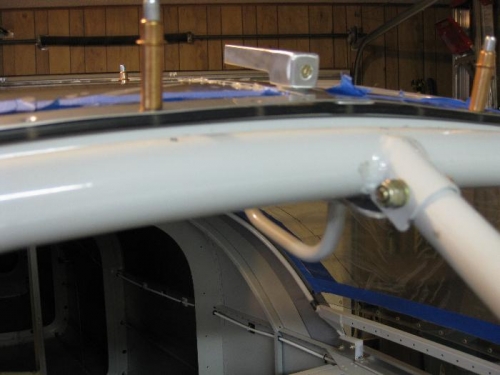
Latch in the closed position.
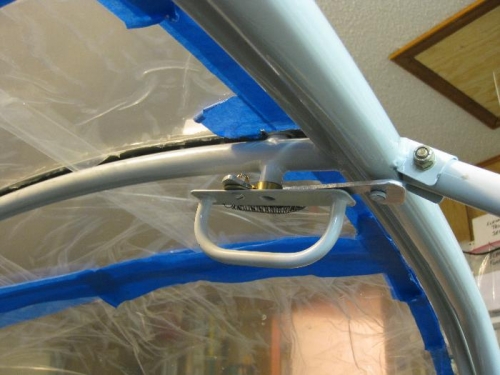
Looking up you can see the spring that pulls the latch while in the open position.