Brief Description: Countersunk windshield and tapped roll bar.
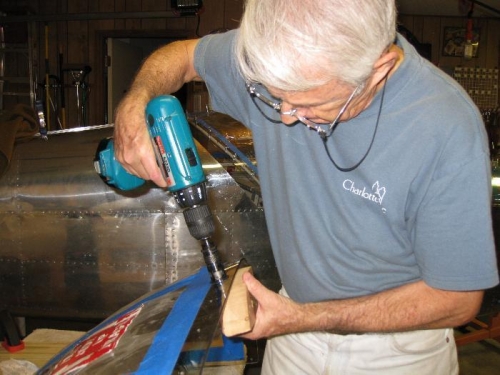
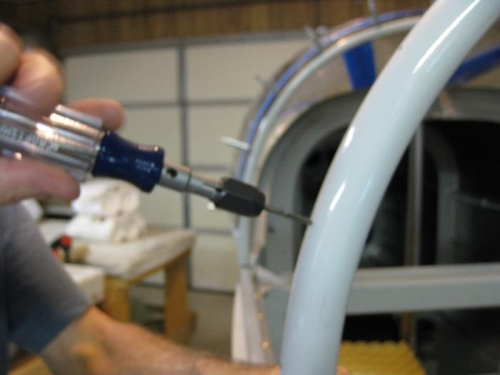
We unclecoed the windshield and removed it to countersink the holes for the #6 screws. To use the machine countersink I had to enlarge the holes to #30 which was accomplished by using a wooden block to back up the penetration of a normal drill bit. I had learned that if I drilled very slowly I could eliminate the chipping on the back side of the hole. I then used the countersink while drilling very slowly. I might possibly have a crack on one of the holes so I glued it with Weld-On and will let it cure for at least 24 hours before enlarging the hole with the 5/32" plexiglass drill bit. I enlarged the other 16 holes with the plexiglass drill bit with no problems.
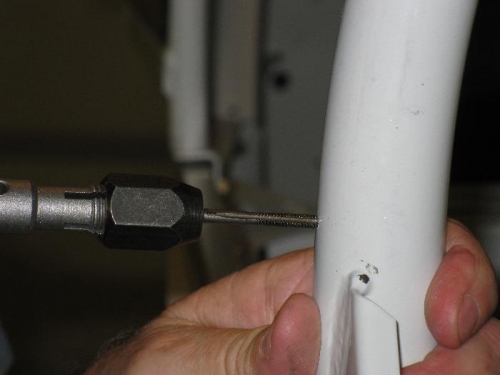
I enlarged the holes in the roll bar using a #36 drill bit and then tapped them for the #6 screws using a 6-32 tap. I used my new Craftsman tap driver and found that it took quite a lot of twisting to tap the holes. Even though I used some oil on the tap, by the time I had tapped 13 holes my right hand and arm was getting sore. The last 4 holes were accomplished with a cheater pin through the hole in the tap driver. I had some trouble going to sleep that night from an aching arm and hand. Only one more hole to enlarge on the windshield and then we"ll set it aside to be installed after we rivet the forward top fuselage skin. That won't happen until most of the wiring for the instrument panel and the firewall forward stuff is completed. Next is laying up fiberglass for the rear canopy skirts. Just waiting for the Aircraft Spruce order to come in.