Brief Description: Riveted brackets and drilled roll bar brace.
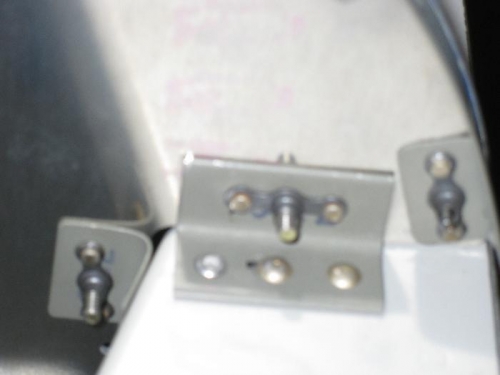
We riveted the panel brackets to the canopy decks and they all lined up correctly. Riveting around the canopy deck flange was a bitch. We managed to rivet all the holes except the ones right above the lower deck flange using the hand squeezer with the channel C yoke. We pop-riveted those two holes.
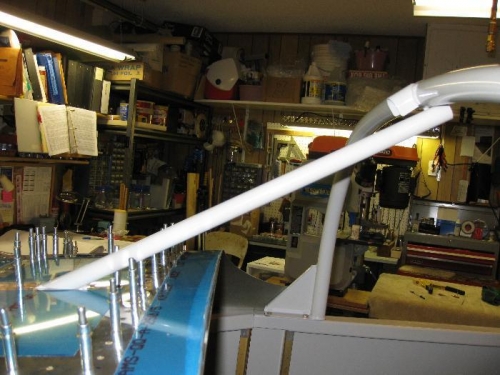
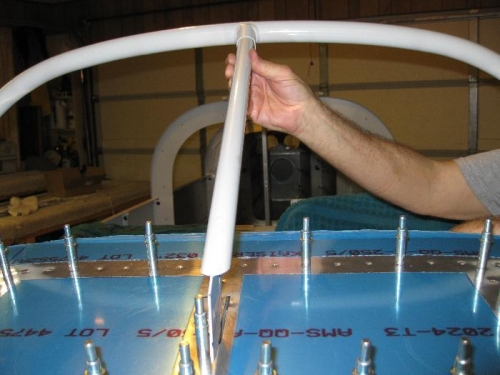
To drill and cut the roll bar brace to its correct length, one must recleco the forward top fuselage skin on again. The brace goes through a slot in the skin with a tab that slides between the center rib and the aluminum angle brace that is riveted to it. A shim was riveted in between the rib and angle at the top end to give clearance for the brace tab. It was a tight fit to slide the brace tab into the slot. Then one must mark the top of the brace at the roll bar to cut it to length to fit in the socket. I then marked the two lower tab holes, using a #12 drill bit, in the rib/angle lying on my back under the panel . I removed the brace then cut and drilled. After deburring and reinserting the tab, I match drilled the top of the brace into the roll bar socket. Nothing really that difficult but tedious and time consuming, as always. At least the brace is now ready to install once the skin has been riveted to the forward fuselage framework and firewall. Hopefully not in the too distant future.
The panel brackets riveted to canopy deck. Brackets reflecting on back of panel. Note the pop-rivet.
Roll bar brace before cutting to length.
Brace after cutting and fitting into roll bar socket.