Brief Description: Began installing right & left "Step Kits ".
Having removed the baggage floor panels yesterday, I realized I had to remove the baggage side panels to use solid rivets instead of blind rivets. To cut the 1.5" holes without a hole cutter, I tried an adjustable fly cutter used in wood to start the hole. I worked to scribe the hole diameter, but that was all. I then used the tin snips to try to take out some material. Finally, I used my Dremel with a fluted cutter to finish making the holes for the right side step. Way to much work! Charlotte put in an Avery Tool order for the Rotacut hole cutters, angle drill bits, and some die grinder burrs before I try the left side.
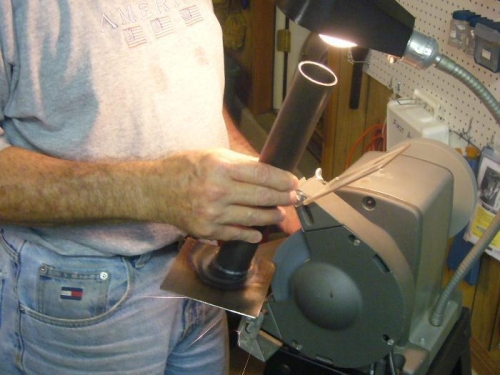
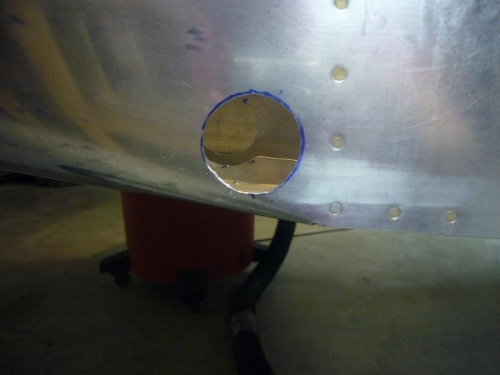
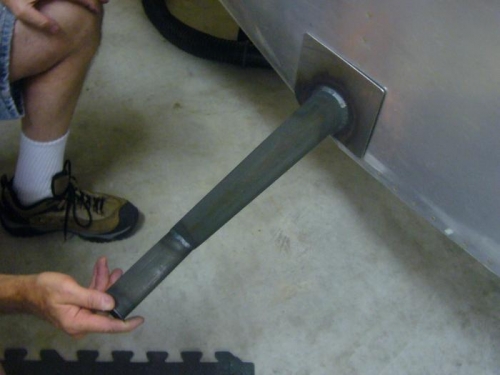
The step tube that goes into the baggage area had to be cut off because it was too long. I used the grinder to deburr the step's sharp steel edges and to cut down the lower aft corner to match the fuselage better.This allowed the plate to flush up to the fuselage skin. I marked some blue lines on the outside of the fuselage skin to parallel the step plate with the F-724 frame after drilling out a rivet on the QB to cleco the step to the frame. I made a template for the rivet pattern on the step plate and then drilled the pattern on the drill press. Will match drill fuselage skin tommorrow.