Brief Description: Canopy 3 Try Air Grinder Cutoff Wheel.
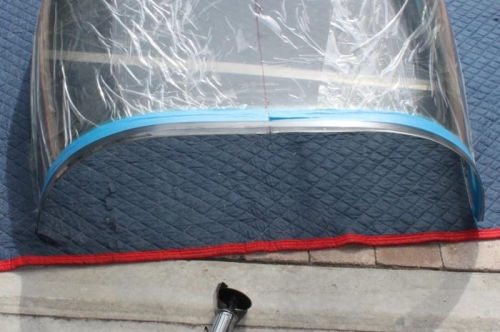
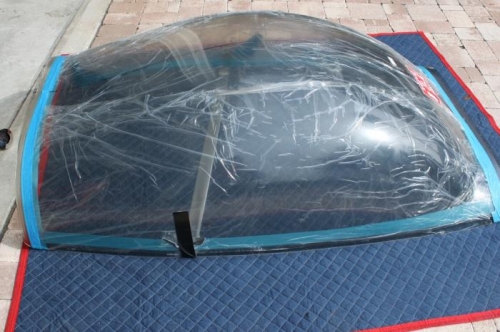
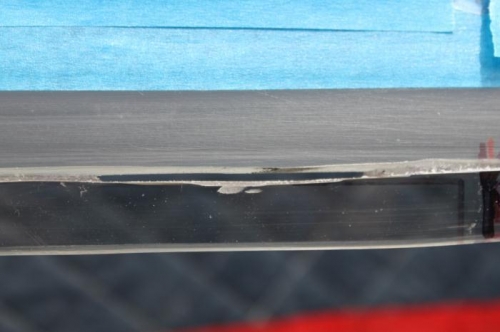
Today I experimented with the 3 inch cutoff wheel in the air grinder and removed 1/2 inch of material from rear end. Plenty left for the real cut. I ran low on air many times and waited for the tank to refill. Maybe I should try an electric high speed drill with the cutoff wheel. We'll see. Anyways, this method I liked better than the vibrating cutter. The mess is at least 10 times greater this way. I started in the middle top with a somewhat wider entry cut but the forward line was the cut line so it was all good. I could easily use this method as my choice. Couple things I must remember. Pay particular attention to keeping the wheel square. ANY wobbling results in an uneven line, hard to sand out. While that might be ok for all edges that get covered with fiberglass, or side skins or under the rear top skin, it won't cut it (ha ha) for the cut line between front and rear canopy. So, take time to be sure not to wander off straight line. That means slower movement. Canopy was tested for temperature and today it was 90 on the digital reader. Air was only 80 so I'm guessing reflected heat from the sun warming the canopy even more than air temperature.
Air compressor doesn't have the guts for sustained grinding. Try electric drill.
Tape on top of plastic doesn't stick well. I'll strip the plastic and tape the canopy itself.