Brief Description: Including Electric Trim in the build
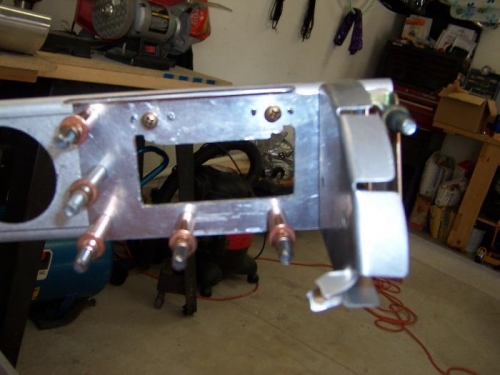
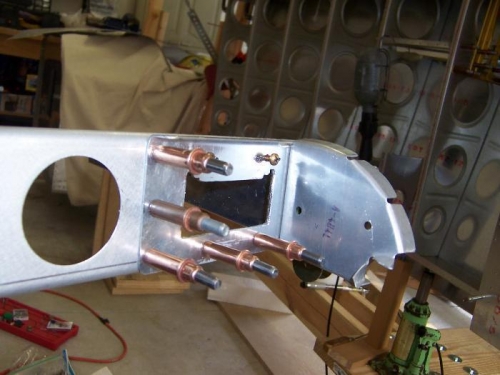
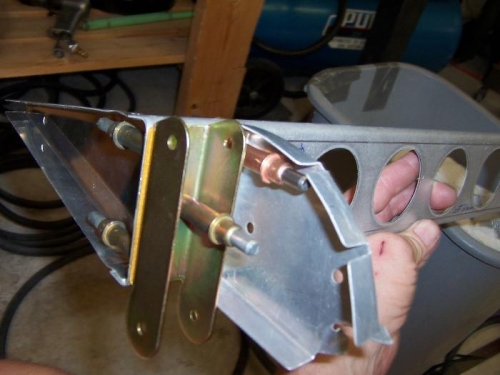
Adding the electric trim mounting is much easier when you are building the aileron than if you added it to an already built one. Photo 1 is the outboard end of the aileron looking at the front of the spar. If you didn't use electric trim you wouldn't see all the extra aluminum clecoed to the spar. There would be a smaller doubler plate for the outward 2 inches or so. To house the rectangular trim servo you need a longer doubler so you can see it here. You have to cut a rectangular hole in the new doubler plate and the spar itself to fit the servo into. I used a dremel cutoff wheel for the long cuts and a series of #40 drill holes down the short sides which I then filed flat and smooth. A couple of notches in the top portion allow the screws holding the servo to go through the spar as you mount the servo and the tray that holds the servo in that hole. You can also see two nutplates clecoed from behind and also holding a temp screw in them. These are located on top of the cutout hole and will be what holds the tray secure to the spar eventually. About 1/3 of the tray and servo slide through that cutout when mounting. There's a bunch more cutting to do to the curved front of the aileron skin, and an exit hold through the bottom aileron skin for the connecting rod. A stiffener with nutplates will hold the new cover in place on the curved part of the aileron skin. I will wait till I make the aileron before cutting out the skins. Photo 2 is another shot of the outboard end. Photo 3 is the opposite (inboard) end of the aileron showing what gets mounted after drilling through the spar, another doubler plate and the tip rib.
This 6 inch doubler plate replaces the normal 2 ish inch one. You make all the cuts and holes.
Dremel cutoff wheel at 30000 rpm worked great. The short sidewall cuts needed drill holes and filing.
2 flush 3/32 rivets hold the rear end rib to the spar whch is then covered by this hardware