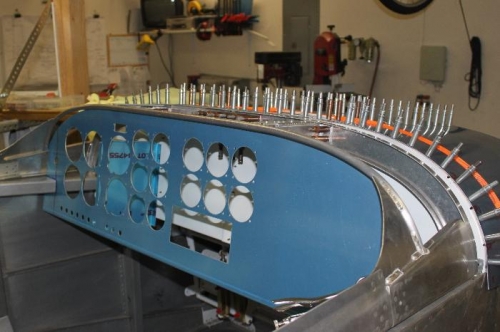
Drew lots of lines today. Drew one at 3/16 forward across the sub panel top flange to denote where the canopy skin and the forward top skin will meet with the canopy closed. Drew a line 3/16 from the edge of the top skin to denote the drill line for rivets. It is very exacting to be able to locate the rivet holes in the sub panel top flange and have correct edge distances (3/16). You run out of sub panel flange real quick. Also added a shim roughly between the two canopy hinge locations along the sub panel flange to take care of the slightest dip in the sub panel through that area. I marked for the shim rivet holes to avoid the top skin rivet holes when they get drilled. Used the rivet spreader to mark 1 1/4 inch rivet locations along the top skin side to side and along the forward ribs. Another case where you reach under with a marker and trace the rib flanges onto the top skin, take it off, lay out the patters and drill pilot holes in the skin. Put it back on, and starting in the middle, match drill to the sub panel and ribs. Then strap the skin down and match drill backwards through the fuselage longerons into the top skin for all available holes. Some holes have pop rivets holding the side skin on and you can do those later after you remove the pop rivets. Once mounted, the whole canopy frame starts to settle down and you can make your last pilot holes that attach the hinge arms to the canopy frame. Voila. Next will be finish riveting the canopy frame joining strips to the frame, rivet the hinge arms to the frame and then start to mark and drill the instrument panel/canopy frame top skin to the canopy frame.
Only 5 or 6 fuselage longeron holes to match drill before trimming thie forward skin
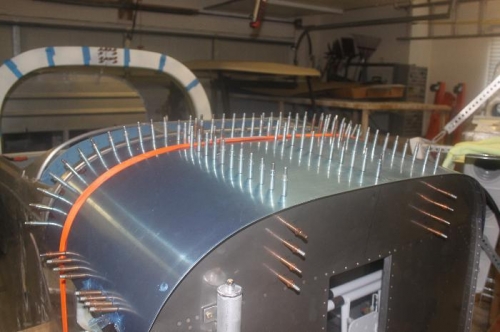
See the copper #30 clecoes in the two short ribs on top? My bad. Wrong pilot bit used. Its OK to go.