Brief Description: Choosing This Layout to Proceed
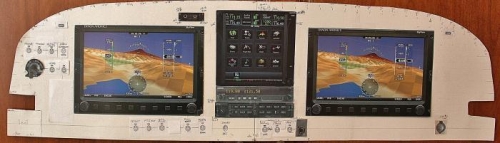
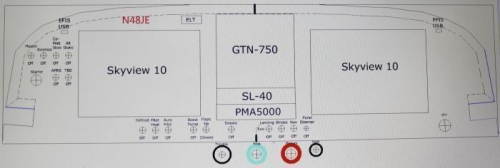
A friend of mine suggested not to use TurboCad as it was not user friendly. Ha!! Me being a first time user didn't know friendly from unfriendly. Got it going and can make it work for me. This panel layout serves my purposes the best so far. The middle stack cannot have a tray higher than 1.5 inches from the top. The canopy frame, the middle top skin rib and the canopy stiffeners block it. Putting the GTN750 on top works because the tray is not as tall as the full screen. Top of tray is about 2.5 inches below of top of screen,so problem solved. I sat in the cockpit and pretended to fly and the layout works. I will make a plywood panel and assemble everything to satisfy myself before I cut the real panel. I outlined where the 3/4 angle stiffener is attached to the back of the panel to look for any interference. Looks ok. Switches on upper left are related to one time decisions when I fly. Flip the Master on? Turn on APRS?. Power the Co Pilot Stick?, Turn on Avionics? Choose Alternate Static?, and saving one slot for something else. Below the center stack is Smoke switch, and to the right are the lighting switches. If necessary, I can move the lighting switches to the left under the Skyview and move the smoke switch down between the throttle and prop levers. Flaps and Boost pump are to the left of the throttle location up on the panel. Left of the boost pump I have Auto pilot, Pitot Heat, and Defrost. Using the VPX Electonics Distribution so no need for breakers. All switches carry no power and only complete a ground to VPX when activated.
This solves my concerns.
Haven't figured out how to get clarity from Turbocad for posting pix.