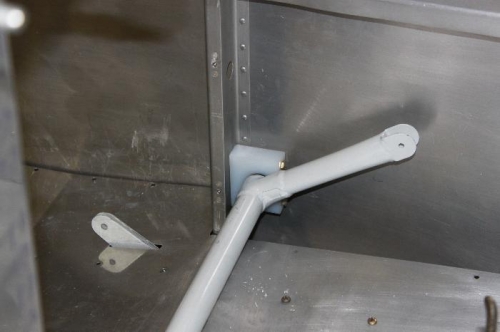
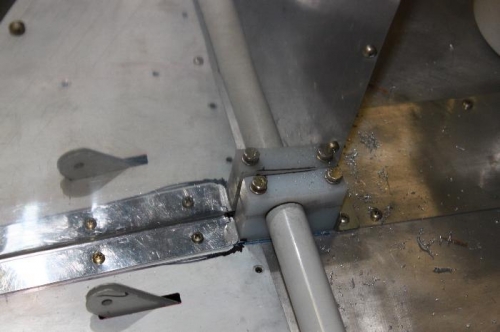
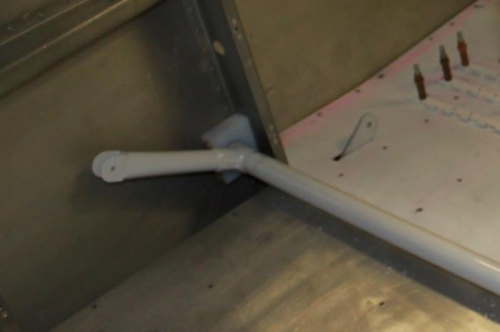
These floor pans have been on and off at least 3 times. Now they are off to drill the nutplates for the baggage floor. I lubed up the UHMW blocks, drilled the mounting holes in three passes. First used #30, then #19, then .187 and finally reamed with .189. Set the middle UIHMW block in place with the floors back on for proper height. Drilled that block to the floor rib and F605 flange. I tipped the weldment all the way down on one side and measured the height above the floor on the other side. It was .738. Divided it by two and used wood wedge shims measuring .369 inches. Placed one taped up shim under each side to achieve uniform balance. Then, using a 3/16 bushing with #30 inner diameter, I drilled #30 through the UHMW and through the F605. Enlarged those to #19, then .187 then reamed to .189. Repeated that on the opposite side and bolted the weldment in place, temporarily. Marked and cut the mouse hole in the side covers that straddles the flap weldment tube when installed. Hand movement of the weldment was accomplished with a small resistance. Very small and will be acceptable.
Copilot side .369 inches clearance between baggage floor and bottom of flap weldment.