
|

|
|
|
Wendells RV-6A
|
Date: 5-23-2011
|
Number of Hours: 1.00
|
Manual Reference: New Conduit
|
Brief Description: Installed larger electrical conduit
|
|
So I pulled out the old 1/2 inch conduit and enlarged all holes to 3/4. The black corrugated conduit from Vans is .810 outer width and closer to .75 inch wide inside the corrugations. I put a 12 inch drilll extension on the drill and started at the inboard end and widened the 1st four ribs. Lacking a 2nd extension, I used a small pistol electric bit driver and reached in from the open skin and enlarged the next two holes. Then, back to using the 12 inch extension along the open skin area. This kept the drill chuck from grinding on the wing ribs as I drilled each one larger. I enlarged many holes with a round file to oversize them a little. I kept the inner and outer holes 3/4 to hold the conduit securely when I was finished. Threaded a strong nylon builder's string through all the holes and punched a small hole two inches back from the end of the new conduit. Threaded the string through and tied several wrapping knots in that same general area. Scrunched the 2 inch end down into a sort of cone and wrapped that cone and the line tight a couple wraps with duct tape. Wiped the conduit with WD40 and began to thread and pull like hel$. You hear a machine gun ratatat then it gets impossible to pull. You go to the feeding end and hand push a little more conduit into the inner rib, go back and pull like hel$ again. Finally, you are able to reach in the open skin area and grab and pull. Continue the feed, pull, feed, pul and eventually you get it through. Disregard the loud machine gun noise. It would have been so much easier with the skin off, but this wing is years old and only recently did I decide to put a larger conduit through. Done.
Next up, heated pitot hardware, then put on rear outer skin. Then flap hinge. Then landing light #2 in this right wing.
|
|
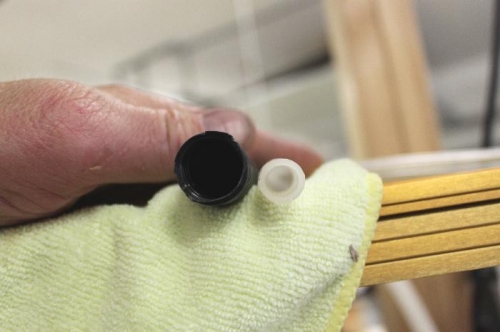
The difference in .50 vs .810 conduit
|
|
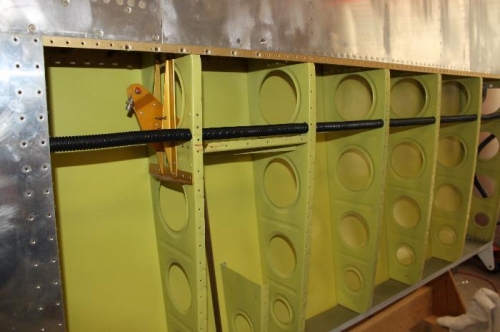
There she is.... Almost done.
|
|

Puucker back the conduit to puff it back out to original size.
|
|
|
|
|
|
|
|
|
Copyright © 2001-2024 Matronics. All Rights Reserved.
|