Brief Description: Finish Right Aileron Replacement
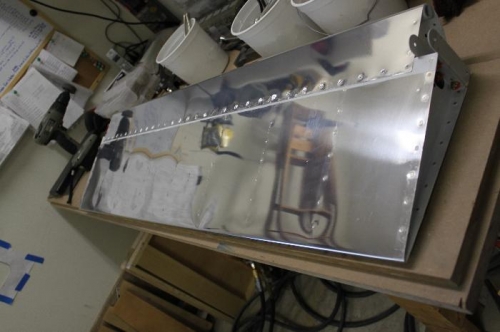
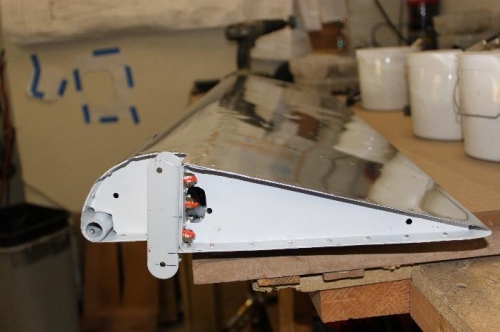
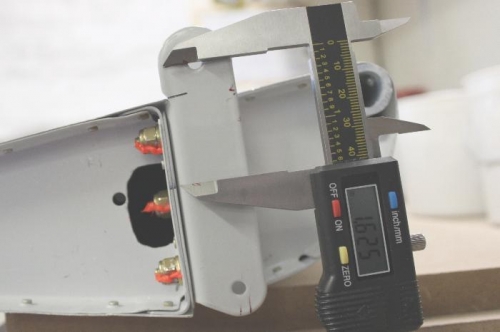
Still waiting for the outer attachment bracket but I finished riveting up the replacement aileron and torqued the inboard bracket nuts to 30 inch lbs. Double checked the measurement from the tooling hole centerline to the 3/16 attach hole centerline (upside down in image #3.). 1 5/8 inches exactly, right on plan. Then, I installed remainder of electric aileron trim cover nut plates on the left aileron and finished installing the cover over the servo opening. I need to make 5 wire connections to the servo and shrink seal them before running the wiring under the outer aileron bracket and then up tight to the outer end rib. I will put a connector in place there and route the wiring into the conduit. Haven't decided on what type of electrical connection to make at the wing root/fuselage connection yet. I am leaning towards permanent splices with extra wiring looped and secured in the event I ever need to take the wing off after done. One experienced builder I respect says make permanent splices and forget about trying to make nice connectors. Leave enough looped wire to cut and resplice if ever needed. We'll see.
Very pleased with this aileron and workmanship.
Torqued AN3 nuts to 30in lbs. (25 in lbs plus 5 in lb nylock resistance).
1.625 inched centerline of tooling holes to centerline lower attach hole per plans.