Brief Description: Crotch strap - Locate and drill aft bracket.
I have learned since I installed my crotch bracket that many builders are using a 5 point seatbelt system from Hooker. The Hooker seatbelt requires a different installation of the crotch bracket. You will need a larger space between the two brackets and the hole holding the seatbelt needs to be lowered. I guess I’ll be using the 5 point system from Vans. That’s ok with me. The Hooker system looked nice and really expensive.
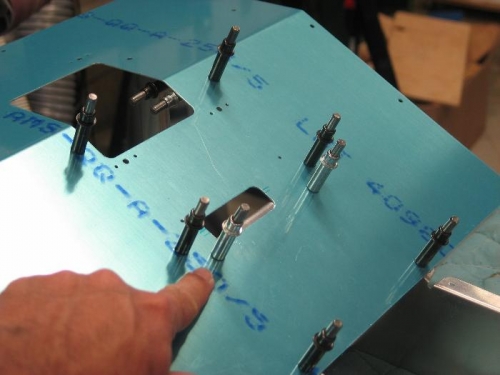
My pictures of how I located and drilled the rear crotch bracket are not totally representative how I did it. The plans call for drilling he side holes first. I drilled the top holes first. I didn’t follow the plans. I actually think my way is better. The whole procedure of locating and drilling both brackets are done with the seat ribs removed from the bottom skin and clecoed to the seat skin.
1.) Draw a center line, 0.3” from flange edge, on the bracket top flange. 2.) Clamp the bracket between the ribs clamping on the side flanges near the top of the bracket to center the line on the top flange in the center of the pre drilled holes in the seat skin. Don’t worry about the angle of the bracket. You’ll see why in a moment. 3.) Match drill the bracket top flange through the seat skin and cleco. 4.) ---- Important ---- remove the bracket and debur. You’ll see lots of shavings between the skin and bracket that must be removed before the bracket side flanges are drilled. 5.) Re-cloco the bracket in place using the 2 holes through the skin and top flange. At this point, with out and other clamps, you’ll notice the top flange sits nice and flush against the seat skin. These 2 clecoes are basically locating the angle of the bracket. No need to make sure bracket is square. All you care about is that the top flange is flush with the skin. 6.) Now clamp the sides of the bracket to the rib web at the bottom of the bracket. One clamp each side is all you need. You bracket is not located. 7.) Match drill the rib through the bracket side flange bottom hole. Your bracket is now totally locat