The new rails came in the mail today so it is time to start building. There are other things I could have done the last few days but the jet lag is hitting me harder than normal.
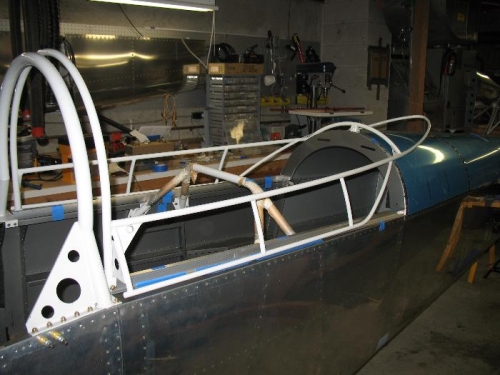
I cut the rails from the correct end this time and then trimmed the front part of the rail to fit over the foot of the roll bar. I taped the rails to the fuselage using the starter dimension given in the plans. I used the scrap rail to clamp the forward and aft rails so they stayed parallel.
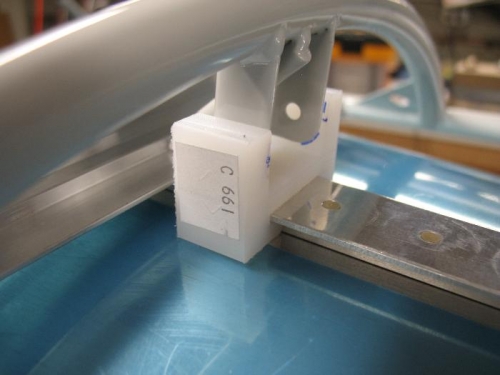
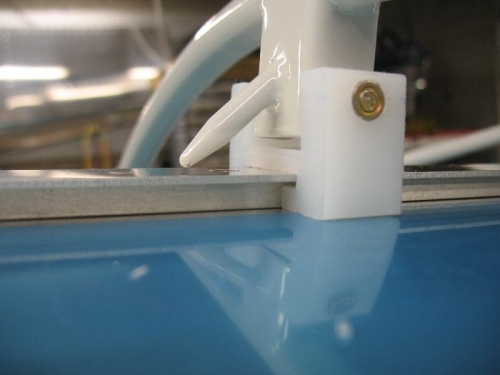
I next had to drill the hole for the slide block that runs on the rear track. You have to cut his hole so that the anchor pin has clearance from the track. The plans give no dimensions for this hole location and the drawing makes it look like it is centered. I learned from other builders that it is not centered; in fact it sits fairly high up on the slide block. What I did was use the scrap section of rail (.063) to sit the anchor pin on and then marked where the holes needed to go. This worked our great; there is plenty of clearance between the pin and the track.
After adjusting and tweaking the canopy frame to shape I drilled the rails to #40 and clecoed them in place. I then drilled the aft holes. The farthest aft hole is tough to get to since the angle of the bulkhead gets in the way. I used my angle drill with a short bit to make the initial hole (#40). I then opened up an access hole in the top of the rail and drilled the hole to size for the #8 screw. I still need to do the other side but I ran out of time. The fitting of the frame and rails took a long time since there is a lot of repetitive fit and adjust work. My frame had to be tweaked in just a bit to get the best fit on the sides so my rails are about 1/8” narrower than what the plans called out.