Brief Description: Part 1: Fiished riveting rear seatback, clecoed fl
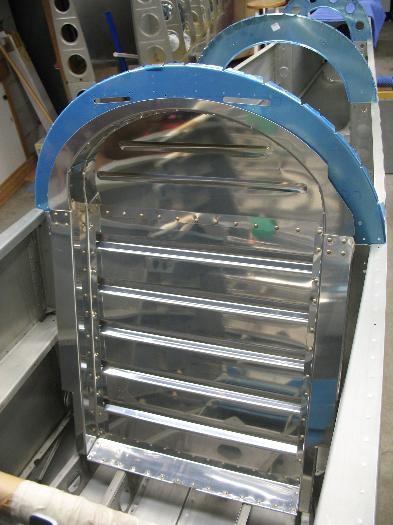
Another long day ok only 5.5 hours but hey it has been so long it seems like a lot. I finished up the rear seatback, as you can see from the photo they came out nice. Of course I am the worst critic. Many of the holes I had to rivet with the rivet gun. The best choice would be to use a “C” frame and a back rivet set (according to the plans) but I never bought one since I spent the big bucks on the DRD2 dimplier. Up to now I have not needed the “C” frame. It took a bit to get the hang of working with the bucking bar and gun. The metals are on the thin side and if you push too hard with the gun or bar it distorts the metal a little. My learning curve was steep and for the most part it looks great, I don’t know why I care the seat cushion will cover all of the rivets.
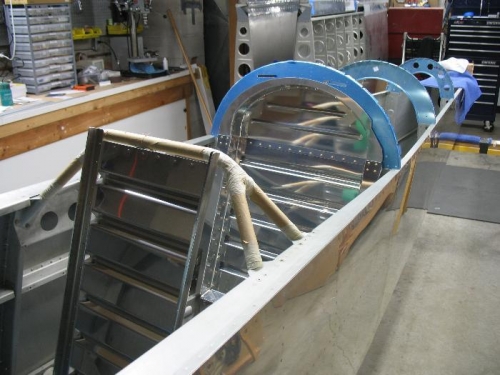
Then next thing I tackled was the floor panels. The plans call for you to cleco in all of the panels except the front panel and foot wells. You can seem them in place in the photo. I first inserted the right side and I was amazed that every hole lined up perfectly. I thought to myself this matched hole stuff is great and those guys in the Philippines do good work. Then it was time for the left side. It just would not fit; I looked around and saw that the aft portion was interfering with the lower part of the aft bulkhead (F807). On closer inspection I realized that there is a buckle in the bulkhead, something I did not notice before, and I guess nether did Van’s. It appears it was riveted together this way and was not damage after the fact. If it were there would be a wrinkle in the skin which there is not. More on this with the next log entry, today will take two entries.