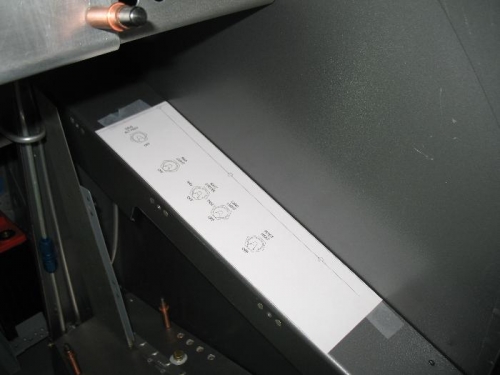
After the breaker panel was done and I gave it a test fit I turned to the right console switch panel. I messed with Turbo CAD and made a template that I could use for labels and switch positions. I used the holes that attach the console to the side as my anchor points for the template. It took a while to get the holes lined up just right. The wire kit from Van’s comes with an aluminum pre-drilled template that lines up the holes in the center of the console, at 1 inch spacing. Since it too uses the same attach holes I lined up my switches at the same 1 inch spacing skipping a hole where I wanted more space between switches.
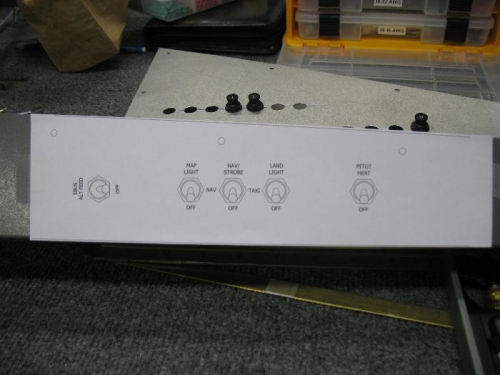
Hopefully you can see in the picture that my “E-Bus Alternate Feed” switch is at the top ot the console oriented with the top forward. This switch will have a red guard over it. The other switches are oriented with the top outboard, which makes off inboard. The group of three is lighting and the single is my pitot heat switch. I plan to use LED strips for interior flood lighting. All of my radios and instruments have self contained lighting so no need for any more lighting than this. I will have a dimmer switch below the pitot heat but I still need to get the LED lights and dimmer so I know what I am working with. I would also like to tie in the radios on a common dimmer but I still need to figure that out.