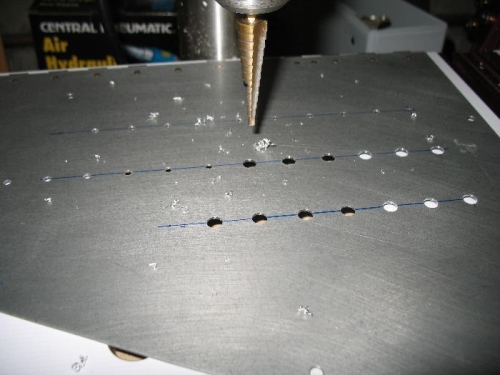
More hands on work today, it goes fast once you decide where things should go. I drilled the circuit breaker for all of the breakers. I first drew the lines for the center of each row, there is 1 ½” between rows and ¾” between each breaker. Along time ago I took a tip from one of the EAA videos and bought a cheap aluminum yard stick and drilled holes at 1” and ¾” spacing. I laid this on the lines and clamped it in place and drilled the holes with a #40 bit. I used such a small bit because that is the size hole in the yard stick guide. I then drilled the holes on the drill press up to #30 which is the starting size of my step drill bit. I used the step drill on the drill press to step the holes up to 7/16”.
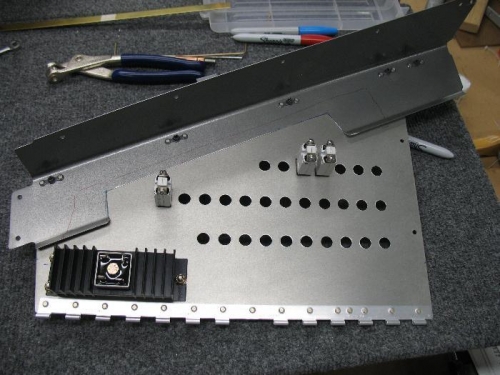
After I had the holes done, I installed a couple of circuit breakers where I thought they might interfere with the right sloped console. I also test fit the diode with it’s heat sink. I had to cut just a bit more out of the console but the door opens with no interference. I also made sure to make the opening big enough to clear the bus bar that will be attached to the circuit breakers.
Unibit for the final size
I cut away part of right console to clear the breakers.