Brief Description: Installed flap position sensor.
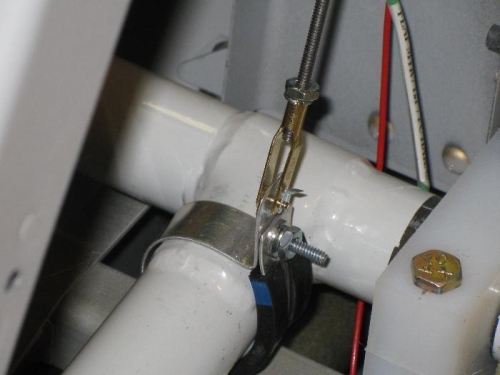
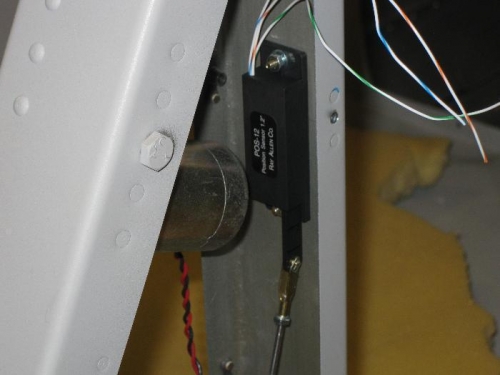
I finally got around to installing the flap position sensor today. The small hardware are hard to handle and I used my telescoping magnetic pickup quite a few times. The position sensor was installed with two #4 screws, flat washers, lock washers, and nuts. The clamp around the drive tube was made from some scrap .032 aluminum sheet with a small Adel clamp cushion to keep it from slipping on the smooth paint. #4 hardware was used on it to connect it to the tube. I used the magnet to fish the nuts and washers out of the tunnel about a dozen times even with a towel across the tunnel.
The positioner has a 1.2" movement but with the clamp location I only get a 0.75" movement. I hope the variable resistor gives enough voltage differential to make a good calibration on the EMS. I plan to calibrate three positions for the flaps (every 15 degrees) and will call them Flaps 1, Flaps 2. and Flaps 3. The three wires you see in the picture will run to the D180 EMS and ground for connections.
I made the 1" ID clamp and used some cushion off an Adel clamp.
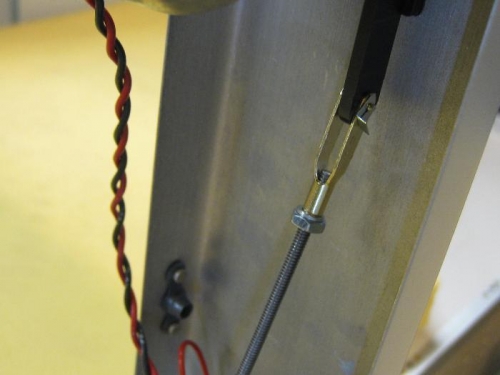
The clevis is tiny and is held in place on the rod with a #4 lock washer and nut.
The position sensor was placed 11" above the top of the tunnel.