Brief Description: Cut fiberglass cloth and taped off work area.
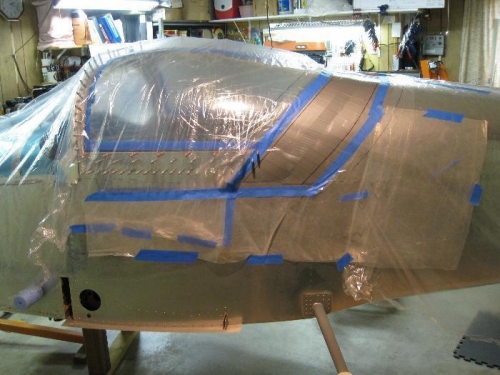
With all our ordered materials in place, we started the fiberglass rear skirt project today. While Charlotte was cutting plies of fiberglass with her pattern that she had made, I was covering the fuselage and canopy and taping the rear skirt area. I used duct tape to bridge the gap between the canopy and turtledeck skin and then marked lines for the approximate area to glass. After making the skirt, we'll remove it and figure out the exact cut line. I had bought some release wax from AC Spruce, but after a few swabs of wax I realized that it would shrink and wrinkle the duct tape. Instead of waxing the duct tape I put clear packing tape over the duct tape. It is slick and should release the formed skirt easily. Every little decision one make affects something else later!
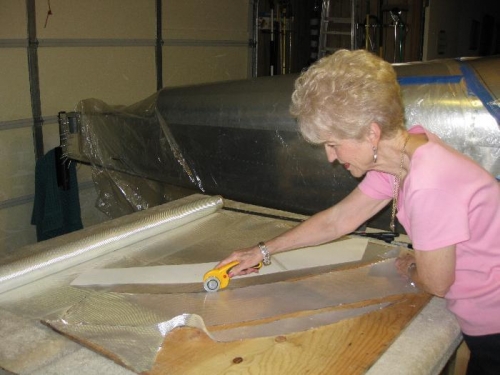
Charlotte cut six plies per side so we hope that will be enough to give the skirt some stiffness without being too heavy. Charlotte found that using the roller cutter was much easier than using scissors. After adding the filler and fairing, I'm hoping it weighs no more than about three pounds. We'll see. Tomorrow we'll mix up the resin and hardner and try our hands at making epoxy fiberglass.
Rear skirt area taped off and airplane covered.
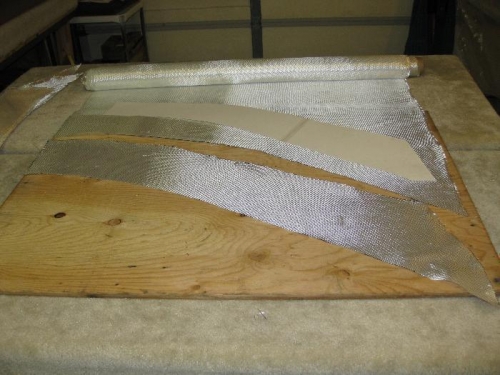
One ply cut using posterboard pattern.
Charlotte cutting fiberglass cloth using roller razor blade cutter.