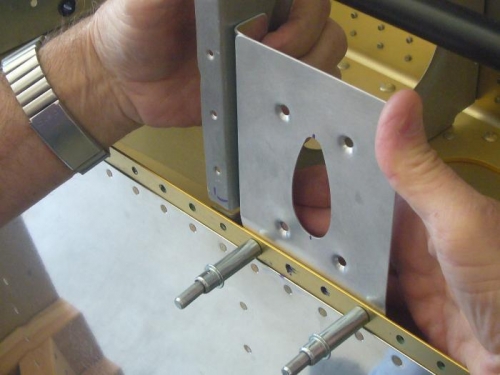
I had to make a new angle bracket because one flange was too wide and interfered with the washer plate. I riveted the angle to the outboard rib in the bay outboard of the inspection bay. I back drilled the pitot backing plate through the joggle after marking two holes thru the main spar. The other two holes were drilled with the plate clecoed to the spar. We then marked holes using the Gretz template on the backing plate. We drilled these holes and then clecoed the plate to the wing skin at the predrilled skin/spar holes. I then back drilled the skin through the clecoed backing plate. (The instructions said to do it with the wing skin and plates clecoed to the wing, but you would have to back drill the skin from inside the wing where you can't see.) We then clecoed the backing plate and skin to the wing. I then back drilled through the predrilled skin and backing plate to drill the angle bracket holes. All very confusing and easy to make a mistake. Yes I made mistakes!
Riveted angle bracket to rib. Clecoed and back drilled backing plate through main spar. Marked backing plate using Gretz template for placing wing skin holes then drilled. Clecoed backing plate to skin at joggle holes (holes that will be riveted at the main spar). Back drilled skin thru the backing plate and marked streamline hole for the pitot mount. Clecoed skin and backing plate to the wing and then back drilled to angle bracket.