Brief Description: Prep to Install Dynon Heated AOA Pitot
After a seven month stoppage of working on the project due to deaths in the family, holiday trips, illness, and an out-of-country trip to Australia and New Zealand, Charlotte and I got back to work!
Not all that time was without any productivity. I decided on a Dynon EFIS panel and ordered the FlightDeck-180 and D-100 EFIS' with the heated AOA pitot and other options. (I also ordered the Gretz Aero chrome plated pitot mount kit.) The decision was agonizing since there were so many choices. I ultimately went with a company that's been around for awhile and has a great reputation. My buddy John had about 700 hours on the Dynon EFIS D10 in his Searey with absolutely no problems. That also helped with my decision. We're still researching the other avioncs for our VFR/IFR cockpit. We won't be flying hard IFR, but I want to be able to shoot an approach if necessary.
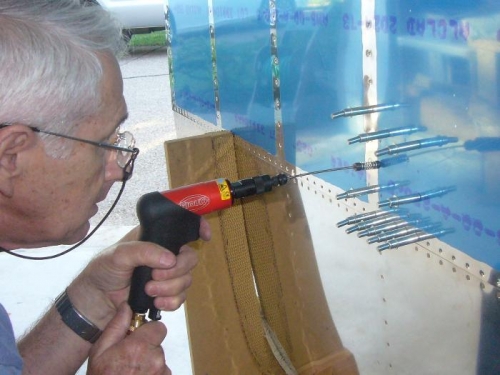
We started our preparation for adding the pitot by clecoing the bottom outboard wing skin to our left quickbuild wing in our roll-around cradle. We started slowly to get our minds back into reading plans and visualizing again. It felt good to handle the tools again.
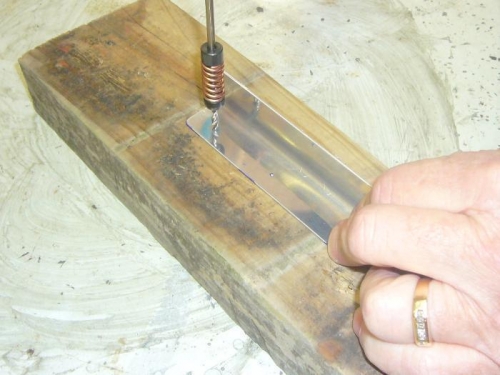
Match drilled the skin with the ribs and spars. Deburred the holes on the ribs, spars, and skin. Bent a piece of .040 Al to make a 3/4" angle x 4" long and drilled 3 #30 holes for a mounting bracket. Deburred and scuffed bracket for priming.