
|

|
|
|
KENNETH T.'S WEB SITE
|
Date: 5-1-2012
|
Number of Hours: 7.00
|
Manual Reference: Vans
|
Brief Description: Installed right wing and drilled aft spars.
|
|
My brother arrived just at sunrise (6:47AM) and we installed the right wing without too many problems. I proceeded to mark the wing with a Sharpie for leveling at the front and rear spar to get the 1 degree incidence. By using a 7" digital level on top of a 48" spirit level with a 3" piece of aluminum angle clamped to it at the rear spar, we leveled at the wing root, half wing, and the tip. After several iterations of moving the left wing rear spar up and down trying for perfection, we gave up and accepted the root at 0.0 degrees, the half wing at 0.1 degrees as well as the tip. Must be a very slight twist in the wing. We got the same on the right wing.
A breeze came up and caused the plumb bobs to move around slightly but the triangulation was pretty much right on, give or take 0.1". We might have a slight foreward sweep, but both wings were within 1/16" (left, 1/8" aft of string and right, 3/16" aft of string) of each other at the roots with the plumb bobs right on the string line at the wing tips.
Clark held a plastic clamp tight at the top of the drill guides as I drilled the aft spar and fuselage fork with a 1/8" pilot hole, a 9/32" undersize hole, and then reamed to the final 5/16" size bolt hole. Both aft spars and forks had holes within the 5/8" edge distance and the bolts fit perfectly without any play at all. The drill guides and slow cautionary drilling gave perfectly perpendicular holes.
We removed the right wing and closed the garage door. Enough for one day!
|
|
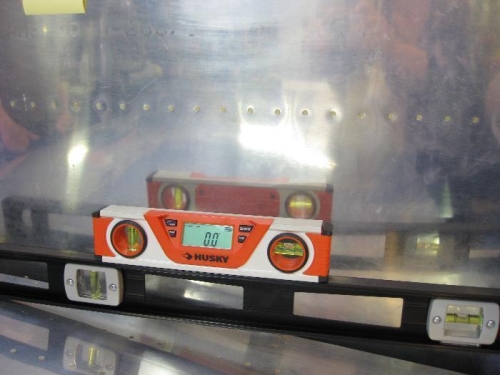
Fore to aft spar with the 3" spacer, level at the root.
|
|
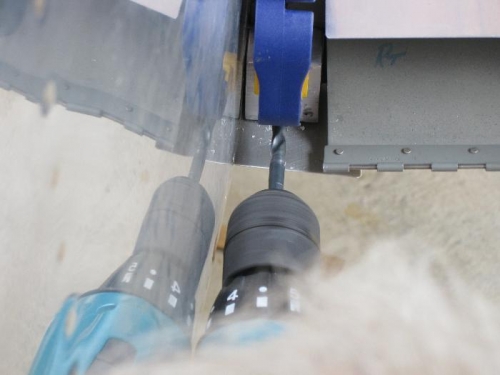
Drilling with a clamped drill guide.
|
|
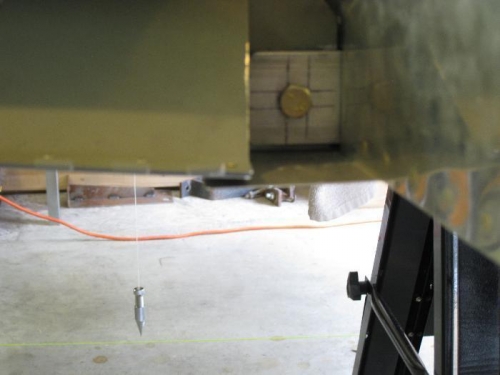
Bolt inserted with good edge distance.
|
|
|
|
|
|
|
|
|
Copyright © 2001-2024 Matronics. All Rights Reserved.
|