Brief Description: Left wing bell crank and aileron assembly
1. Tried again today to get smooth swivel action on this bell crank but every time it was torqued down it would bind up in the swivel. I ended up putting a washer between the brass bushing and the bottom hold down and that solved the problem. Torqued the 4 hold down AN3 bolts to 25 inch pounds and the long AN4 bolt to 55 inch pounds.
2. I rivited the top traing edge skin to aileron gap seal. I will need to remove the right aileron since I forgot to do that side.
3. Attached the left aileron to he wing attach points with reqired hardware.
4. Attached center line template jig to last outboard rib. Attached the neutral position jig to the bellcrank. Attached the small diameter pushrod to bellcrank and jig and to the aileron. Lined up the trailing aileron edge to centerline jig and then adjusted the end bearings until centered. Locked the jam nuts in place. Attached the large diameter pushrod to bellcrank.
5. Marked the pushrods for left and right wings.
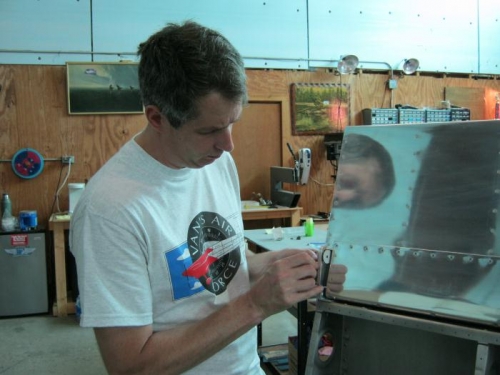
Attaching the left aileron hardware
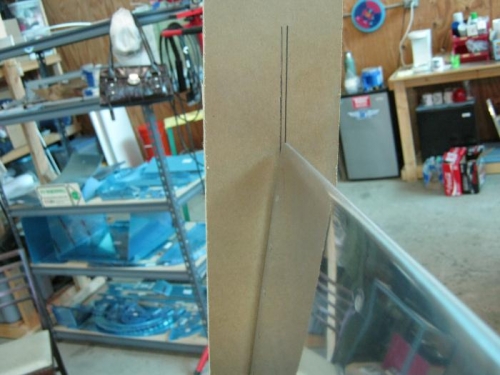
aileron trailing edge centered in centerline jig.
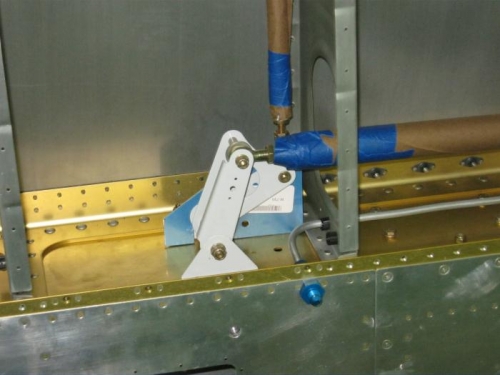
belcrank assembly and pushrods installed and adjusted. See the blue jig?