
|

|
|
|
Jims RV-8
|
Date: 4-24-2013
|
Number of Hours: 3.00
|
Manual Reference: 6-13
|
Brief Description: miscellaneous finalization of elevator stuff >200
|
|
Tonight I drilled the elevator control horn (both of them). Like many things in the amateur building world, this is one of those steps, at least for me, that causes anxiety and apprehension in the lead up time to doing it, and then ends up being kinda’ no big deal. Take your time, double check each step, use the right tools and all will be fine! So the steps went something like this : Attach the elevators to the horizontal stabilizer and check that the elevators have full travel with no binding. Also need to make sure that the elevators are on parallel to the HS – by checking the gap distance on the counterweight rib section of the elevator and the HS. I went ahead and installed the nut/washer/bolt on each of the elevator hinges so that the fit would be “true”. Then I clamped the left elevators “in trail”, removed the right elevator to be able to get the drill in, inserted the drill bushing to protect the bearing and then drilled the pilot hole in the elevator control horn. WHEW! One down, one to go… I did/undid the same steps on the right elevator and soon had two pilot drilled holes in two control horns. Then I chucked the ¼” bit in the drill and final drilled both holes. Success! I made sure at this point to tighten up the nuts on the elevator rod ends so those don’t move out of their final adjustment location. It wasn’t conducive to using a torque wrench, but I used my muscle memory to get a good tightness.
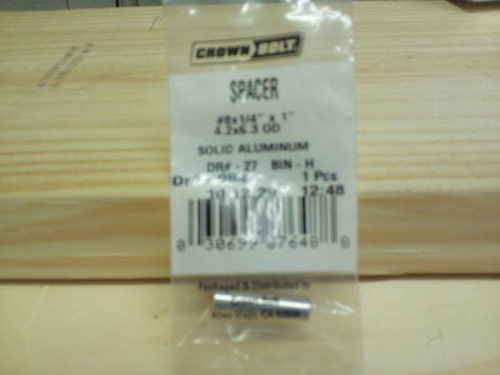
Next I re-assembled both of the elevators back on to the HS so that I could install the ¼” bolt/spacers/spacers/washer/nut and let me tell you – that took some time!!! That took probably more than ½ of my 3 hour session tonight! I dropped more than a few spacers and had to start over a few times. But – I finally figured out that if I taped the spacers/washers together from the top (because you cannot tape on the side) then I could put a longer piece of tape on top tape and lower the whole spacer assembly down together and stab the bolt thru (also using a flat head screwdriver to guide the
|
|
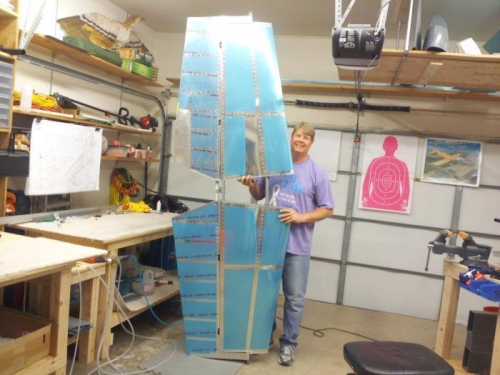
HS is done!
|
|
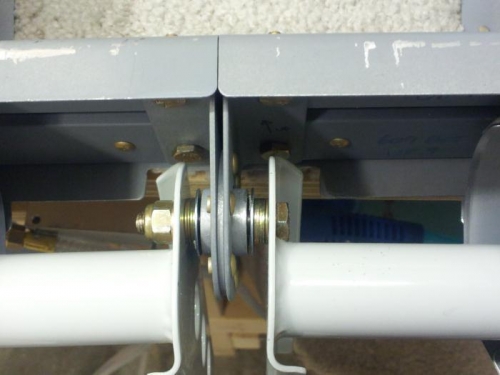
bolt, spacers, washer, bearing, washer, spacers, nut
|
|
bearing bushing
|
|
|
|
|
|
|
|
|
Copyright © 2001-2024 Matronics. All Rights Reserved.
|