This was done over many days with many steps. The attachments had AN3 size bolts so that had to be carefully drilled out to AN4. I then reinstall with AN4s and all was good.
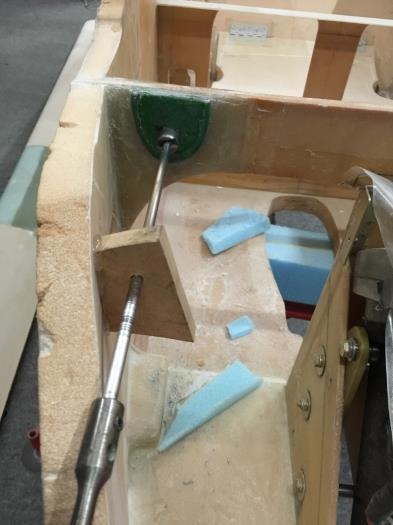
Then the canard comes off and the holes in F22 have to be drilled out for the CN1 bushings. You can see in Pic one I've made up a simple jig using hot glue and a long drill with extension. Plans have you doing this before the nose guts go on so of course there is an issue with drilling. I used the 'spot face' from the wing install. It worked nicely.
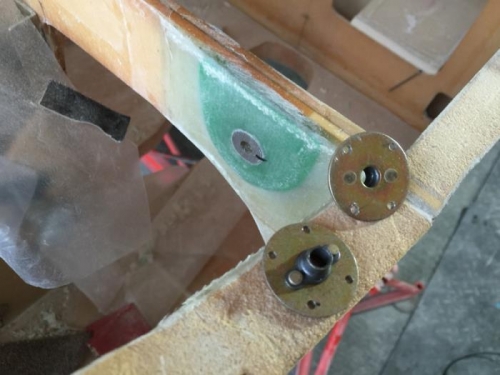
Then comes fitting the inserts as they are oversized. Thats a lot of careful grinding. You can see in pic 2 one of them in place. I marked with texta to ensure they went back as they came out each time. One side needed a slight slant.
Next up was glassing over the front of the inserts which I did with the canard on and clamped in place. Then the hole gets opened out. Yep another cure cycle.
I made up nut plates on the AN970-4 washers as you can see in Pic 2 and added four holes for 'flox fingers'. Its a bit hard to find this step in the plans. Its actually on the A7 sheet rather than in writing. The specified nutplate ears on the K1000-4 were too near the edges of the big washer so I used MK1000-4 instead.
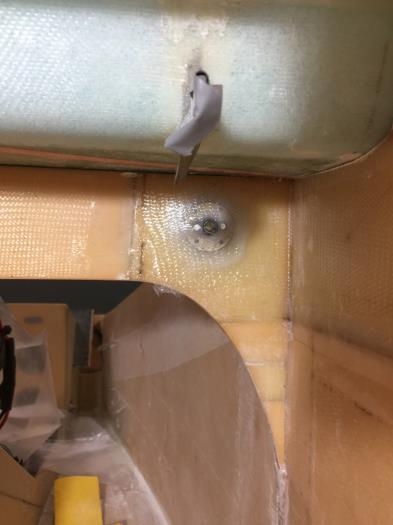
Pic 3 shows that I've put glass over the nut plates as well as flox. I used two ply of glass instead of one per plans. There is a lot of turning force on the tight nuts so my call to add a little here. It is rock solid.