VHF Antenna time. One in each winglet and I spent most of a day maybe laying out where these will go. There is a pic in the Cozy Plans and the High performance rudder long-ez plans too. I placed mine is a slightly different position accounting for the rudder spring at the lower tip. I didn't want that lump of metal near the tips as the plans show. I also know after retro fitting a second VHF to my flying plane that they work fine near metal hinges so maybe I was overly fussy...again....
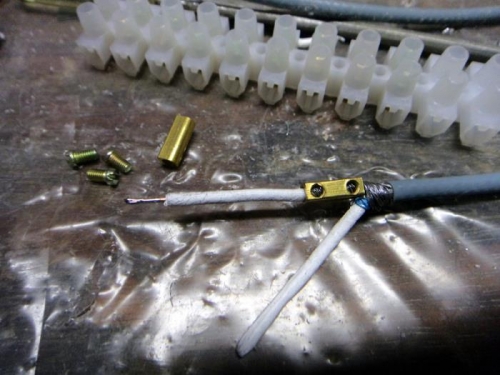
I'm using special lightweigh cable that has an aluminium outer shield. Forget about soldering that stuff. It can be done with a special solder but the join would be weak and the dissimilar metal issue comes into play. I went for a mechanical solution. For less than $2 I got a plastic brass block joiner with brass inserts as in pic1. I just removed the insert as you see that shot and then added a piece of wire to the join. The metals are still dissimilar but a clamp and glue might win the day.
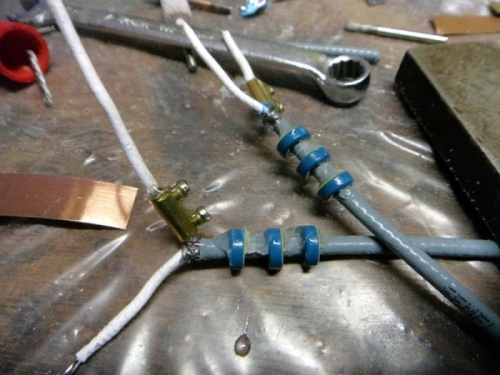
I then added the block screws and really did them up tightly. Next it was lots of epoxy to keep things there. While the 5mt glue was out I positioned the ferrite toroid beads per Bob Nuckols instructions. His articles explain all this and the 20.3" lengths for the copper dipole antenna. The Cozy plans say 20.25" take your pick.
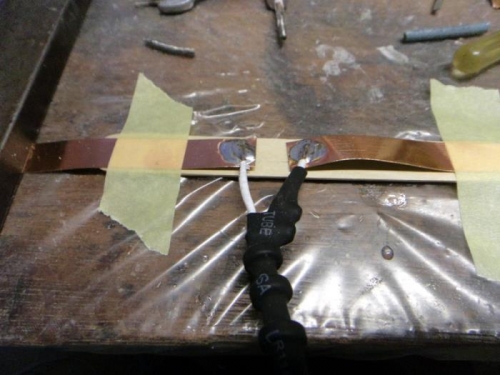
In the end I went for the simple tapes that came with the torroids. I had some thicker brass but decided on what everyone else uses on our canards and there are no issues with these I'm aware of. Finally I soldred them in place as in pic 3 after some nice heat shrink work to keep everything where it needs to be.