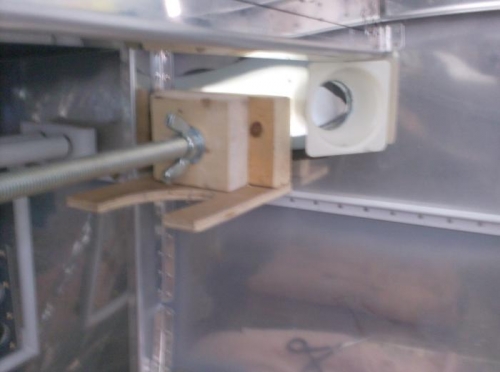
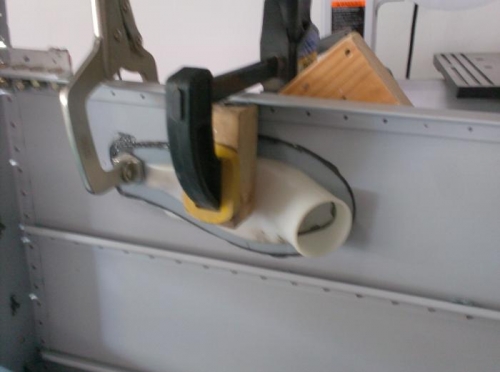
Finally got around to installing the NACA vents (the two ones in the plans and the 3rd one I added as a mod to supply air to the OH console). My plan was to “glue them in-place using Proseal, but as I had already installed the upper forward fuse, there was no easy way to clamp them to the side skins while the Proseal set. My solution was to make an expansion clamp out some ¾” threaded rod, wing nut, washer and 2X4s. I measured the approximate width of the fuse accounting for the size of the vents and cut the 2X4s to such a size that by making one end a non-movable base and the other “floating”, I could get it into the fuse then expand it to the exact size needed to hold the vents in-place. I did this by drilling a ¾” hole about 3 inches deep into the “base” 2X4 to accept the rod. I then drilled a ¾” hole all the way through the 2nd 2X4 so that this piece could be adjusted by sliding up and down the rod. So the process went like this. 1. I glued the vents into place (the 3rd vent was reachable by convention clamps BTW) 2. Inserted the rod into the base and threaded on the wingnut and washer, followed by sliding on the “floating” end 2X4. 3. Moved the clamp into position and then turned the wingnut so that the 2X4s moved away from one another until they contacted the vents on either end. After I got them in position, I had to monkey around with the positioning of the clamp as the vents keep sliding around on the Proseal as the shape of the vents aren’t square so the force applied by the weight of the clamps wasn’t perpendicular to the vent meaning the clamps themselves were moving the vents around. I finally got it dialed in helped mostly my propping the clamp up in the center to eliminate the weight issue, but it was more painful than I had anticipated. In the end it worked and all three vents are now permanently attached.