Brief Description: P-leads installed. Servo to pump line final instal
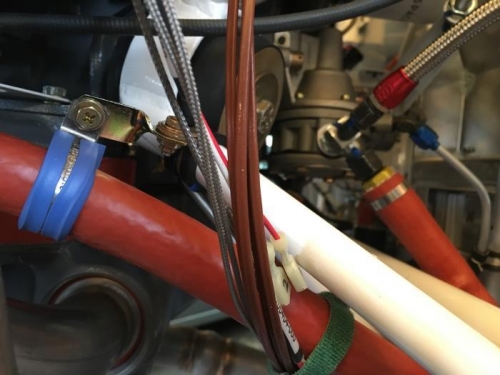
P-leads installed. The pics do show how I supported the P-lead. I never did this in the past in former builds and never had a problem, but it is better practice to do this, so I did. Others have used the ground wire screw for both that ground wire and an adel, but that is very tight and I thought using the screw for the vent cap is a better idea. I made sure the adel did not put any weird pressure on the vent cap. It seems to not really vent here in this application as it is generally used for pressurized aircraft, but I made sure the adel was angled outwards and not putting any downward pressure on the vent cap just to be sure. I seem to recall some use this as an RPM pick up for special sensors. From my research I don't think it is being used as a vent at all in the M-1B application.
Pics do not show that I later removed the P-leads and installed protecrtive boots. This is to prevent accidental grounding of any kind.
Servo to pump line final installed. A lot of iterative trial and error on best adel clampery. Found a really good compromise to keep it flexible enough for engine vibration, but keep it as far away from the exhaust as possible - and away from the EZ Heater sump heater. The aft adels are in place. Note the blue flourosilicone clamps on the hose side. I am doing this on the entire front adels, but am awaiting another large one to go around the forward intake manifold pipe for cylinder #2. So for now it is only clecoed in place for a test fit. I used a 90 degree official Lycoming stand-off up front. Works great for this purpose. The hose was final installed and torqued.