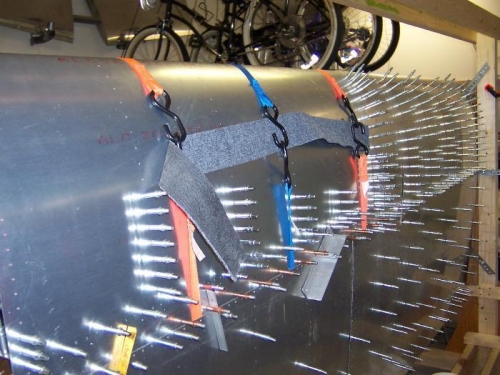
Great way to start is to cut 8 spacers from wood. 15/16 high is the correct measurement to cut the spacers. Place them on the main spar before you set the rear baffle and tank rib assembly onto the spar. Be sure your spacers are not sitting on top of any existing rivet heads in the spar. That screws up the placement. Place the tank skin tight against the existing topside skins. It should fit nice and flush against the topside skins. Cleco some aluminum angle across the two skins to keep them flush for starters. After strapping the skin, check for alignment real close. Once you start drilling into the main spar flange, you have committed the positioning. All the silver clecoes (3/32) you see do not secure the tank onto the spar. You will do that by drilling #30 for two rows of holes on the top and bottomsides where you will eventually install nutplates to screw the tank onto the main spar. #30 lets you clecoe nutplates to the spar so you can mark and drill the two nutplate mounting holes for each nutplate. You would then enlarge those #30 holes to #19 before installing the nutplates so the screws wll fit properly. The tank was taken off several times and taken apart to remove al the plastic, debur and dimple the ribs, I discovered that all the ribs had primer applied to them, perhaps at the factory. I can only guess that it was for preservation. I used a lot of acetone and time to remove ALL primer on the ribs inside the tank. That was a slow process, but eventually you get to the final rib and you're done. I can't imagine why anyone would prime the tank ribs, only to have you remove all the primer. It was a clear, very slightly greenish color. What you wind up with is a bunch of shiny aluminum tank ribs. I imagine ProSeal will work fine on these cleaned up ribs. We'll see. Proseal comes after I take the tank apart again, and add the numerous reinforcing angles to the tank skin next.
Start on the top side and work up.
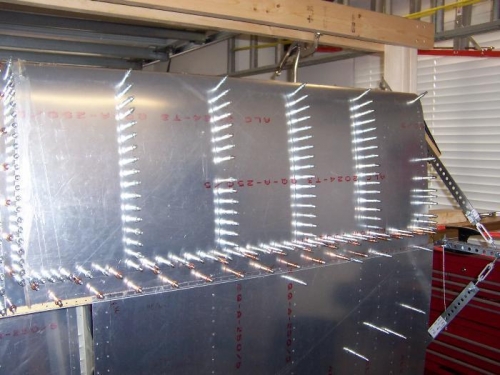
Finished drilling ribs and spar.
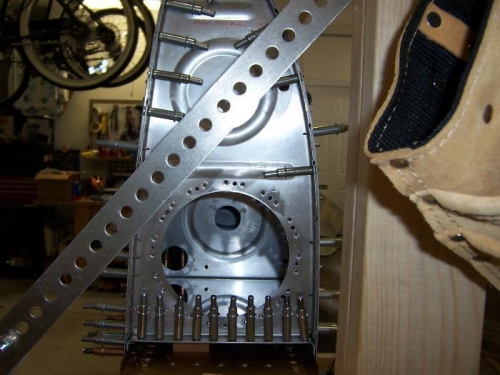
Fuel sender gets mounted here. You can see the other holes for proper fuel flow in the tank.