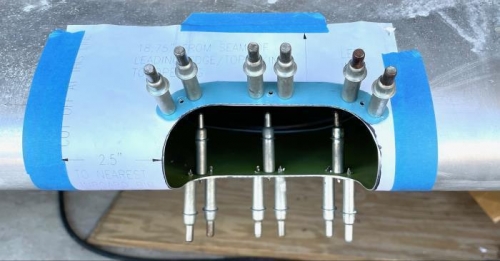
Draw a lens cut line onto the wing 3/4 inch from opening except for the 2 sides which is 5/8 inch. (Thats the instructions). I don't think it really matters for the sides, but I did it. Tape the lens onto the wing and then trace that black line onto the lens to give you the ultimate cut line. I will cut it slightly larger to sand/file it to the line, removing any stress marks. So, I share a dumb mistake I made pilot drilling the blue colored lens attach strips. They eventually get double sided cushioned tape attached to the lens 3 screws in each one snug the lens cover to the wing. I've been building for years now, and I know you drill anchor nut attach holes to the structure that holds the anchor nuts. Why did I pilot drill the anchor nut holes to the wing skin? Its embarrasing. I know better. I cannot answer why. So, the remedy is to use oops rivets (small flush head) and make a 2nd small countersink on the back side of each hole. I practiced half dozen on the scrap from the wing hole cutout. It worked perfectly. Wire cutting pliers snipped the excess length off the flush oops rivets leaving just enough length to be squeezed flush on the back side. All the excess holes were filled. Paint will eventually lessen the pain...
So mad at myself. I woke up at 1AM knowing the mistake I made. Double flush rivets tomorrow.