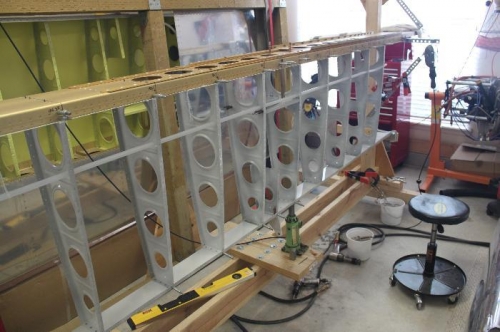
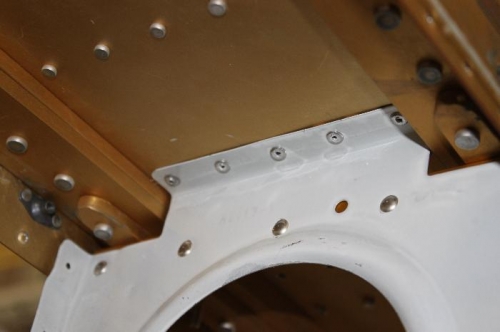
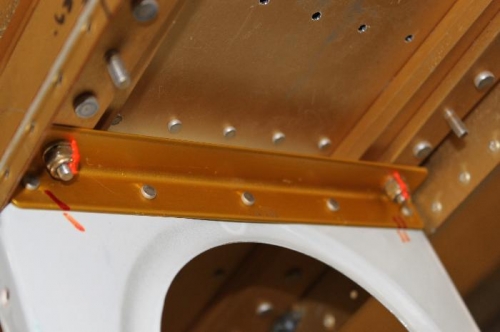
It is just a great feeling to be done preparing something and finally get to put it together for the last time. Here goes the wing together for the last time. I drilled the ribs for the electrical conduit run. Riveted all the angles to the proper ribs while off the jig. Re-leveled the spars and began inserting the ribs for riveting. Having forgot to dimple the rear spar flanges, I did that first while on the jig. Easy to do. I did not dimple the rear spar holes under the wing walk doubler. The wing walk reinforcement sheet (doubler) is countersunk and the wing skin which goes on top of the doubler is dimpled. The rest of the rear spar got dimpled. Where angles were called for, I installed the bolts, torque seal , and LP4-3 pop rivets to the main spar. Lot of confusion in the Vans Airforce site about proper torque for Nylock nuts on AN3 bolts. Standard torques from the AC43 state 20-25 inch lbs. But, the discussion is all about friction caused by the nylon locknuts themselves. Do you measure that and add it to the wrench torque setting or not? Answer is yes. The torque required to overcome the nylock tension was about 5-7 inch lbs. So, I set my torque wrench at 30 inch lbs and tightened and marked the nuts. You also see random line markings on the rib extending onto the angles. Those were done so after I disassembled everything for priming and deburring, I knew I had the right position of the two parts when I put them back together.