
|

|
|
|
Tims Web Site
|
Date: 8-22-2016
|
Number of Hours: 12.00
|
Manual Reference:
|
Brief Description: Process of sealing the Left wing tank, ( duplicate
|
|
Left wing tank assembly with sealant was a little faster. I had began to have a good grasp of the process of assembly with the sealant and the bucking process. Like everthing in life, things always seem to go together better the second time on. 1st picture is after the stiffiners, ribs, vent lines, fuel cap, etc. 2nd picture is of the vent line and fitting, the Flop tube for the left tank, the anti hang up bracket installed for the flop tube. 3rd pic is of the tank pretty much finished up to the point of the rear baffle installatioin. The rear baffle installation will be a little different than the right tank, the sender is in the rear baffle instead of the end rib. This is because of the flop tube being used in the end rib. The baffle is already fly cut and ready to accept the sending unit, the same as the right tank. FYI, there is no anti rotation bracket on the flop tube fitting to hold from unscrewing, however there is a safety wire hole on the fitting, This is where I safety wire tied the flop tube nut to the 90 degree installation fitting. I also, saftey wired the safety wire. Put sealant on all exposed fitting 2nd time to tank rib.
|
|
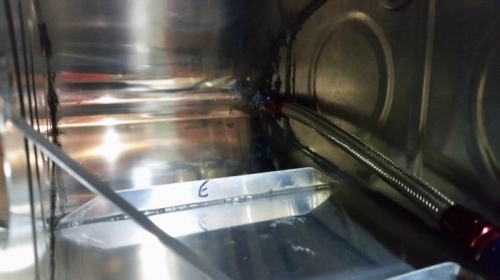
Flop tube and anti hangup bracket
|
|
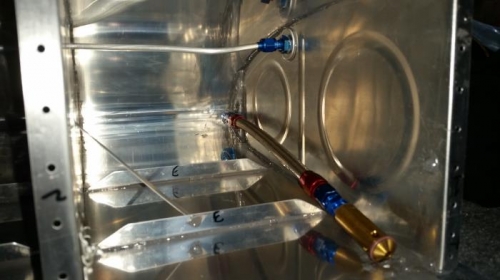
Better picture of flop tube, and vent line installation.
|
|
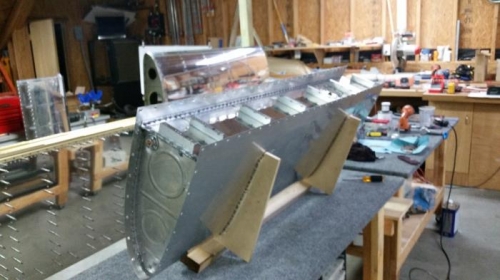
Left Tank ready for rear baffle installation
|
|
|
|
|
|
|
|
|
Copyright © 2001-2024 Matronics. All Rights Reserved.
|