Date
|
Hours
|
Work Log Summary

|
Details

|
10-03-2016
|
4.50
|
Finishing the Flaps
|
Details
|


|
|
10-02-2016
|
4.50
|
Atart assembly of Flap parts
|
Details
|


|
|
10-01-2016
|
2.50
|
All Flap internal parts Alodined
|
Details
|


 |
|
09-30-2016
|
5.00
|
Flaps attachment rib bracket
|
Details
|


|
|
09-20-2016
|
4.50
|
Test fit all parts for both Flaps
|
Details
|


|
|
09-19-2016
|
4.50
|
Finished riveting Ailerons
|
Details
|


|
|
09-18-2016
|
6.00
|
Ailerons continued
|
Details
|


|
|
09-18-2016
|
6.00
|
Aileron counterweight installation
|
Details
|


|
|
09-17-2016
|
6.50
|
Preassembly of Aileron parts
|
Details
|


|
|
09-16-2016
|
7.50
|
Prefit all aileron parts/ preped for primer
|
Details
|


|
|
09-11-2016
|
4.00
|
preparing the ailerons
|
Details
|


|
|
09-05-2016
|
8.00
|
Decided to install the Pitot tube mounting bracket
|
Details
|


|
|
09-01-2016
|
4.00
|
Riveted both the Aileron an Flap braces on the rea
|
Details
|


 |
|
08-31-2016
|
5.00
|
Deburred and primed the aileron and flap braces
|
Details
|


 |
|
08-31-2016
|
6.50
|
Aileron hinge bracket installation both wings
|
Details
|


|
|
08-30-2016
|
3.00
|
Temporarily installed, match drilled, deburred Hin
|
Details
|


|
|
08-30-2016
|
7.00
|
Removed right wing from wing stand onto work bench
|
Details
|


|
|
08-29-2016
|
4.00
|
riveted the top skins on the Left wing
|
Details
|

  |
|
08-27-2016
|
5.50
|
Finished Riveting the Right wing top skins
|
Details
|


 |
|
08-26-2016
|
3.50
|
Start of riveting the top skins on Right wing
|
Details
|


 |
|
08-25-2016
|
6.50
|
Leak test Left tank, Install access panels an nutp
|
Details
|


|
|
08-24-2016
|
1.50
|
2nd attempt to leak test tanks
|
Details
|

  |
|
08-23-2016
|
2.00
|
First attempt to leak test Right wing tank
|
Details
|

  |
|
08-22-2016
|
12.00
|
Process of sealing the Left wing tank, ( duplicate
|
Details
|


|
|
08-22-2016
|
8.00
|
Final assembly of left wing tank
|
Details
|


|
|
08-21-2016
|
6.00
|
Final installation of right tank parts
|
Details
|


|
|
08-21-2016
|
8.00
|
Closing up right wing tank with baffle
|
Details
|


|
|
08-20-2016
|
8.00
|
Cont' build on right wing tank
|
Details
|


|
|
08-19-2016
|
6.00
|
Started the rib installation on right fuel tank
|
Details
|

  |
|
08-18-2016
|
6.00
|
Start of wing tank sealant
|
Details
|


|
|
08-18-2016
|
4.00
|
Installing stiffners with sealant right fuel tank
|
Details
|


 |
|
08-17-2016
|
7.00
|
Riveting leading edge ribs to main spar/ row of ri
|
Details
|


|
|
08-16-2016
|
6.00
|
Finished riveting Right wing leading edge
|
Details
|


|
|
08-15-2016
|
8.00
|
Final assembly of the left wing leading edge
|
Details
|


|
|
08-14-2016
|
4.00
|
Dimpling the skins and clecoing in place on wing f
|
Details
|


|
|
08-14-2016
|
4.00
|
Dimpled the top skins for the Left wing
|
Details
|


 |
|
08-13-2016
|
9.00
|
Preparing the top and bottom skins for Wash Coat p
|
Details
|


|
|
08-11-2016
|
6.00
|
Temporarily assembled both leading edges.
|
Details
|


 |
|
08-11-2016
|
6.00
|
Riveted the Right wing ribs to main spar an rear s
|
Details
|
 

|
|
08-07-2016
|
5.00
|
Start of Wing assembly of ribs and rear spar to ma
|
Details
|


|
|
08-06-2016
|
5.50
|
Start of wash coat primer on wing parts
|
Details
|


|
|
08-06-2016
|
4.00
|
Final steps of Wash Coat primer on wing parts
|
Details
|


|
|
07-30-2016
|
6.50
|
Finished the access opening on the left wing/ adde
|
Details
|


|
|
07-26-2016
|
6.00
|
Final prep of wing ribs before primer
|
Details
|


 |
|
07-24-2016
|
5.50
|
Prep for primer wing ribs and rear spar
|
Details
|

  |
|
07-23-2016
|
6.00
|
Finished pre assembly of fuel tanks
|
Details
|


 |
|
07-23-2016
|
8.00
|
Final prep of both wing tanks
|
Details
|


|
|
07-22-2016
|
4.50
|
Dimpled for fuel caps, test fit flop tube in tank
|
Details
|


|
|
07-22-2016
|
6.50
|
bent and prefit vent tube for left wing tank, alon
|
Details
|


|
|
07-21-2016
|
2.00
|
Test fit the usher tank cap right wing tank, drill
|
Details
|


 |
|
07-21-2016
|
7.50
|
Fly cut rear baffle for left tank, dibpled skin, p
|
Details
|


|
|
07-21-2016
|
1.50
|
Drilled the attachment angle Left wing tank for fl
|
Details
|


 |
|
07-20-2016
|
6.50
|
Attaching the attachment ring to right wing tank r
|
Details
|


|
|
07-19-2016
|
7.50
|
Making attachment angles and checking for vent tub
|
Details
|


|
|
07-19-2016
|
4.50
|
Fly cutting access for Right wing tank sender and
|
Details
|


|
|
07-17-2016
|
8.00
|
Made the tank splice plates for both tanks an asse
|
Details
|


 |
|
07-15-2016
|
8.50
|
First assembly of Right wing tank stiffners and ri
|
Details
|


|
|
07-11-2016
|
4.00
|
Same procedure as Left leading edge on Right wing
|
Details
|


 |
|
07-10-2016
|
6.50
|
Temporarily installed left leading edge to match d
|
Details
|


|
|
07-10-2016
|
4.50
|
Preparing the left wing leading edge
|
Details
|


|
|
07-10-2016
|
4.50
|
Made jig for the leading edge and tank constructio
|
Details
|

  |
|
07-09-2016
|
8.50
|
Clecoed the top and bottom wing skins on the wing
|
Details
|


|
|
07-08-2016
|
3.50
|
Setting up Wing jig with spars and ribs checking f
|
Details
|


 |
|
07-06-2016
|
4.00
|
Drilled angle for wing jigs, attached and placed l
|
Details
|


|
|
07-04-2016
|
3.00
|
Preassembled wing spars and ribs left wing
|
Details
|


|
|
07-03-2016
|
3.50
|
Seperated, straightened all wing ribs
|
Details
|


|
|
07-03-2016
|
2.50
|
Finish right rear wing spar parts and scotch brite
|
Details
|


 |
|
07-02-2016
|
3.50
|
Getting wing rear spar parts together
|
Details
|


|
|
07-02-2016
|
3.50
|
Finish the deburing and prefit of rear wing spar c
|
Details
|


|
|
07-01-2016
|
6.50
|
Fabricated Tie down attachment brackets and spacer
|
Details
|


|
|
06-30-2016
|
1.50
|
Final installation of main wing spar nutplates
|
Details
|


 |
|
06-29-2016
|
5.50
|
Installation of nutplates on main wing spar
|
Details
|


|
|
06-27-2016
|
3.00
|
Drilled, deburred, countersink #8 screw holes
|
Details
|

  |
|
06-25-2016
|
3.00
|
Made wing spar support blocks for work table
|
Details
|


|
|
06-24-2016
|
3.50
|
Installed 4x4 posts floor to ceiling for wing buil
|
Details
|


|
|
06-22-2016
|
3.50
|
added stainless steel to floor area for wear plate
|
Details
|


|
|
06-21-2016
|
3.50
|
Temporarily installed front skin and baggage door
|
Details
|


|
|
06-19-2016
|
3.50
|
Assembly of the forward baggage door
|
Details
|


|
|
06-18-2016
|
1.50
|
Com antenna and transponder antenna doubler plates
|
Details
|

  |
|
06-17-2016
|
3.50
|
counter sink all doubler plates and fuselage for a
|
Details
|


|
|
06-11-2016
|
2.50
|
Doubler plates for Com antenna and Transponder Ant
|
Details
|


 |
|
06-06-2016
|
2.50
|
Finished riveting Turtle deck
|
Details
|


|
|
06-04-2016
|
1.00
|
View from the left side of the turtle deck. Bulkhe
|
Details
|


 |
|
06-04-2016
|
5.00
|
Start of riveting on the Turtle deck
|
Details
|


|
|
06-03-2016
|
2.00
|
Used pro seal to attach the items listed in the pi
|
Details
|


|
|
06-03-2016
|
2.50
|
Temporarily installed the rear turtle deck
|
Details
|


|
|
06-03-2016
|
3.00
|
Placed moving blankets inside the floor area to be
|
Details
|


|
|
06-03-2016
|
3.50
|
Fabricated avionics shelf behind panel
|
Details
|


|
|
06-03-2016
|
2.50
|
Drilled and installed the rudder cable fairings
|
Details
|


|
|
05-30-2016
|
2.50
|
Finish paint on Forward baggage, and rear skin
|
Details
|


|
|
05-29-2016
|
2.50
|
Primmed rear skin, step and front skin parts
|
Details
|


|
|
05-29-2016
|
2.50
|
Primmed panel, forward skin, baggage parts and rea
|
Details
|


|
|
05-28-2016
|
2.50
|
Assemble mounting rings and brackets on panel
|
Details
|


|
|
05-27-2016
|
2.50
|
Received the mounting kit for the Garmin G3X scree
|
Details
|


 |
|
05-19-2016
|
3.50
|
Installation of front throttle quadrant and tempor
|
Details
|


|
|
05-18-2016
|
2.50
|
Received the Panel from Stein Air
|
Details
|


 |
|
05-15-2016
|
1.50
|
Installed rear throttle quadrant
|
Details
|

  |
|
05-14-2016
|
3.50
|
Drilled all floor holes to install nut plates
|
Details
|


|
|
05-07-2016
|
2.00
|
Alodine GMU and Elt mounts
|
Details
|


 |
|
05-05-2016
|
3.50
|
Magnotometer and Elt antenna mount
|
Details
|


|
|
05-02-2016
|
2.50
|
Sent panel off to Stein Air
|
Details
|
   |
|
05-01-2016
|
3.00
|
Fit forward baggage door and instrument panel
|
Details
|


|
|
04-30-2016
|
3.50
|
Final installation of landing gear weldment screws
|
Details
|


|
|
04-23-2016
|
2.00
|
Terminal at firewall and firewall pass thru
|
Details
|


 |
|
04-22-2016
|
2.50
|
Installed master contactor and firewall pass thru
|
Details
|


 |
|
04-21-2016
|
2.50
|
run battery cable from aft battery location to fir
|
Details
|


|
|
04-20-2016
|
2.00
|
Forward skin roll edge and dimple
|
Details
|

  |
|
04-19-2016
|
3.50
|
Prep forward baggage door
|
Details
|


|
|
04-18-2016
|
4.00
|
prepped front skin for attachment
|
Details
|


|
|
04-17-2016
|
4.50
|
Install forward wind screen roll bar
|
Details
|


|
|
04-16-2016
|
3.50
|
Panel clecoed, then riveted
|
Details
|


|
|
04-15-2016
|
5.50
|
Prep parts for instrument panel
|
Details
|


|
|
04-10-2016
|
3.50
|
Front wind screen roll bar fit and drilling
|
Details
|


|
|
04-08-2016
|
4.50
|
Prepare turtle deck skin
|
Details
|


|
|
04-07-2016
|
2.50
|
Static line install
|
Details
|


|
|
04-04-2016
|
2.50
|
Rear seat back bulkhead storage bracket gussets
|
Details
|


 |
|
04-03-2016
|
4.00
|
Parking brake process #2
|
Details
|


|
|
04-02-2016
|
2.00
|
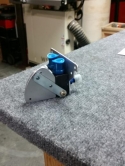
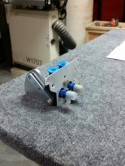
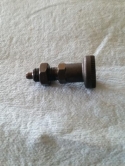
Parking brake installation ( Grove valve)
|
Details
|
|
|
03-31-2016
|
6.50
|
Rear bulkhead prep for paint and installation
|
Details
|


|
|
03-30-2016
|
3.50
|
Brake lines to landing gear fabrication
|
Details
|


 |
|
03-29-2016
|
1.00
|
fuel selector cover plate and valve handle
|
Details
|


 |
|
03-29-2016
|
3.50
|
Fuel pump installation with fuel filter
|
Details
|


|
|
03-29-2016
|
3.00
|
Final fuel line installation in Fuselage
|
Details
|


|
|
03-28-2016
|
6.50
|
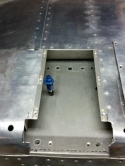
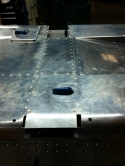
Tank Vent lines installation with vent farings
|
Details
|

|
|
03-27-2016
|
3.00
|
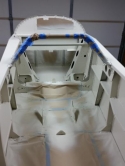
Prep for top coat interior fuselage
|
Details
|


|
|
03-26-2016
|
3.50
|
Applied Polyurethane primer to fuselage interior
|
Details
|


|
|
03-25-2016
|
4.50
|
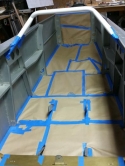
Prep for paint interior fuselage
|
Details
|


|
|
03-23-2016
|
1.50
|
temporarily installed rear bulkheads and turtle de
|
Details
|


|
|
03-21-2016
|
3.25
|
Test step and hardware for fit
|
Details
|


 |
|
03-20-2016
|
2.00
|
Final installation requirements for rear throttle
|
Details
|


|
|
03-19-2016
|
3.00
|
Rear throttle quadrant pushrod and mounting plate
|
Details
|


|
|
03-18-2016
|
3.50
|
Rear seat throttle quadrant install
|
Details
|


|
|
03-18-2016
|
3.50
|
Another modification/ Map pocket
|
Details
|



|
|
03-17-2016
|
2.00
|
Fuel Gauge housing test fit, First time in Fuselag
|
Details
|


|
|
03-16-2016
|
4.50
|
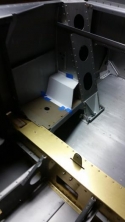
Mechanical fuel gauges modification
|
Details
|


|
|
03-04-2016
|
2.50
|
Painted front baggage floor, repainted seat back
|
Details
|


|
|
03-03-2016
|
3.50
|
Front baggage floor modification for master cylind
|
Details
|


|
|
03-02-2016
|
2.50
|
More parts of fuselage painting
|
Details
|


|
|
03-01-2016
|
2.50
|
Type of paint used and first parts painted
|
Details
|


|
|
02-29-2016
|
6.50
|
Battery tray modification for transponder/ELT
|
Details
|


|
|
02-28-2016
|
2.50
|
Installed and riveted Panel access door
|
Details
|


|
|
02-27-2016
|
5.50
|
Cont' panel access door
|
Details
|


|
|
02-26-2016
|
4.50
|
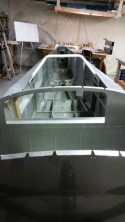
Rear panel access door
|
Details
|


|
|
02-25-2016
|
2.50
|
Map, or what ever pocket under switch tray
|
Details
|


 |
|
02-23-2016
|
5.00
|
Baggage door battery access
|
Details
|


|
|
02-22-2016
|
5.50
|
Baggage door battery access modification
|
Details
|


|
|
02-19-2016
|
2.50
|
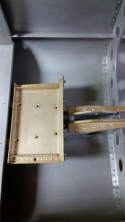
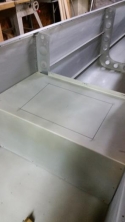
Battery tray assembly/ Marked shelf for access
|
Details
|
 |
|
02-18-2016
|
3.00
|
Alieron trim servo brackets/ battery tray
|
Details
|


|
|
02-17-2016
|
4.00
|
Drill, install garmin pitch servo brackets
|
Details
|


 |
|
02-11-2016
|
3.50
|
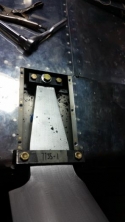
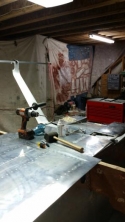
Final drilling of grove gear legs
|
Details
|

|
|
02-10-2016
|
2.50
|
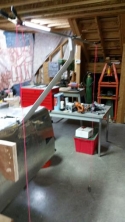
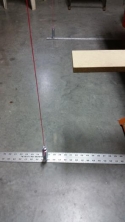
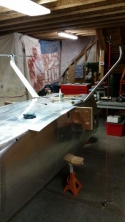
Final check gear measurements/ Drilled one side
|
Details
|
|
|
02-09-2016
|
1.50
|
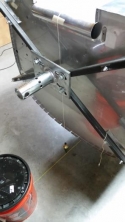
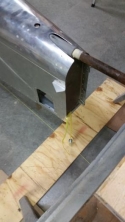
Plumb bob locations
|
Details
|

|
|
02-08-2016
|
3.50
|
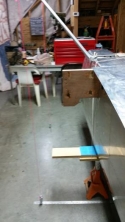
Leveled Fuselage, Prep for gear attachment
|
Details
|


|
|
02-07-2016
|
2.00
|
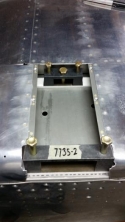
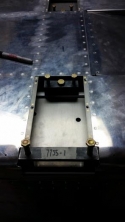
Outboard brackets trim adjustments
|
Details
|

|
|
02-06-2016
|
1.50
|
Installed gear legs for setup
|
Details
|


|
|
01-31-2016
|
2.00
|
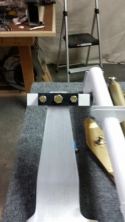
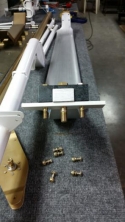
Grove gear mounting brackets set up
|
Details
|

|
|
12-14-2015
|
3.00
|
Disassembly of interior parts to allow for paint
|
Details
|
   |
|
12-13-2015
|
2.00
|
Final adjustment of Elevator travel. ( no pics)
|
Details
|
   |
|
12-12-2015
|
4.00
|
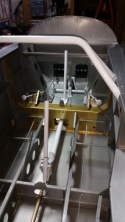
Installed rudder cables/rear seat pedal assembly
|
Details
|


|
|
12-11-2015
|
2.00
|
Pedal assembly slide lock
|
Details
|


 |
|
12-06-2015
|
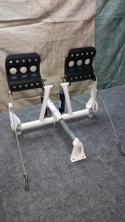
1.50
|
Master cylinder installation
|
Details
|

 |
|
12-05-2015
|
4.50
|
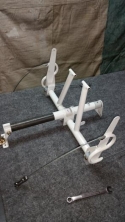
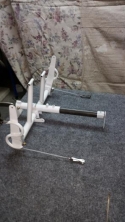
Rudder/brake pedals
|
Details
|

|
|
12-04-2015
|
2.50
|
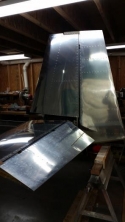
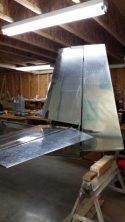
Rudder installation and tavel set
|
Details
|
 |
|
12-02-2015
|
1.00
|
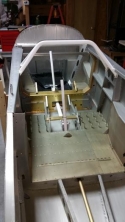
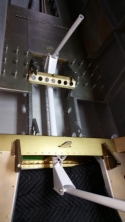
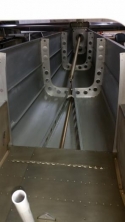
Additional views of control sticks, pushrods
|
Details
|
|
|
12-01-2015
|
6.00
|
Finished vertical forward mount/ forward controls
|
Details
|


 |
|
11-30-2015
|
3.00
|
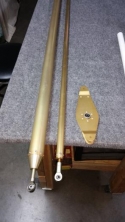
finished riveting elevator pushrods/bell crank
|
Details
|
  |
|
11-29-2015
|
4.00
|
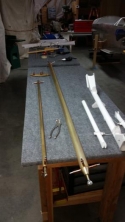
Seperated control lever parts
|
Details
|


|
|
11-28-2015
|
5.50
|
Set height for front vertical stabilizer. Drilled
|
Details
|


|
|
11-26-2015
|
3.50
|
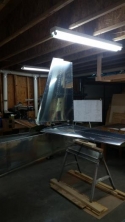
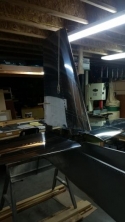
setup of vertical stabilizer
|
Details
|

|
|
11-25-2015
|
1.00
|
Finished attaching horizontal to aft deck
|
Details
|

  |
|
11-19-2015
|
3.00
|
Leveled fuselage, prepped for empennage install
|
Details
|


|
|
11-18-2015
|
3.00
|
Installation of remaining forward nut plates
|
Details
|


|
|
11-16-2015
|
4.00
|
Rear baggage shelf, forward bulkhead parts
|
Details
|


|
|
11-15-2015
|
5.00
|
Throttle cable ahchor/ front bulkhead covers
|
Details
|


|
|
11-12-2015
|
4.00
|
Mounting bracket for Andair Fuel Valve
|
Details
|


 |
|
11-09-2015
|
4.00
|
Made troughs for alumi-prep/alodine
|
Details
|


 |
|
11-08-2015
|
3.50
|
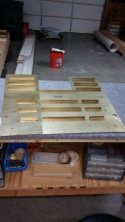
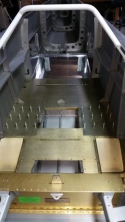
Stiffiners to flooring/ floor panels to fuselage
|
Details
|

|
|
11-07-2015
|
3.00
|
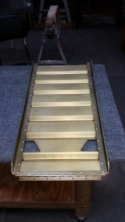
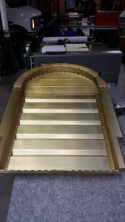
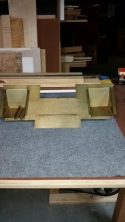
Front, rear seatback. Foot well final assembly
|
Details
|
|
|
11-06-2015
|
2.00
|
Primed all seat back/floor parts
|
Details
|


|
|
11-05-2015
|
1.50
|
Alumi-prep/alodine, seat/floor parts
|
Details
|


 |
|
11-04-2015
|
2.00
|
Scotch brite all seat parts an flooring parts
|
Details
|
   |
|
11-01-2015
|
7.00
|
Main floor stiffners/ foot well parts assembly
|
Details
|


|
|
10-31-2015
|
8.00
|
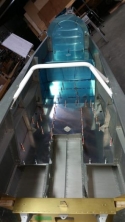
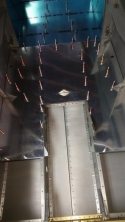
floor parts installed temporarily
|
Details
|
 |
|
10-30-2015
|
6.50
|
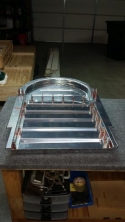
Seperated front and rear seat back parts.
|
Details
|


|
|
10-26-2015
|
6.50
|
Verifying quick build assembly from factory
|
Details
|
   |
|
10-24-2015
|
1.00
|
Fuselage rolled 180 degrees, shop setup for assem
|
Details
|


 |
|
10-23-2015
|
3.50
|
Checked off pic ticket for the fuselage
|
Details
|

  |
|
10-23-2015
|
7.50
|
Built mounting arms for engine stand to attach to
|
Details
|


|
|
10-22-2015
|
3.00
|
Checked off pic ticked of wing kit
|
Details
|

  |
|
10-21-2015
|
2.50
|
Fuselage in shop
|
Details
|


|
|
10-21-2015
|
1.00
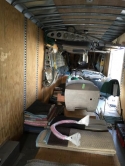
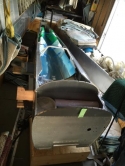
|
Fuselage arrives.
|
Details
|

|
|
10-16-2015
|
4.50
|
Added lights to shop/new roll around mobile cart
|
Details
|


|
|
08-03-2015
|
1.00
|
Additional items along with purchase from Seattle.
|
Details
|
   |
|
08-01-2015
|
1.00
|
Found Quick Build Fuselage In Seattle.
|
Details
|
   |
|
03-02-2015
|
3.50
|
Installation of elevator trim tab servo
|
Details
|


|
|
03-02-2015
|
1.00
|
Finished the empennage, wrapped with clear plasti
|
Details
|
   |
|
03-01-2015
|
6.00
|
Temporarily installed both elevators on horizontal
|
Details
|


|
|
02-28-2015
|
2.50
|
Rolling leading edge of right elevator
|
Details
|


|
|
02-28-2015
|
2.00
|
Rolled edge of Left elevator leading edge
|
Details
|


 |
|
02-27-2015
|
2.50
|
Trim tab assembly and riveting
|
Details
|


|
|
02-27-2015
|
3.00
|
Insallation of rear spar on Horizontal, with inbou
|
Details
|


|
|
02-26-2015
|
1.50
|
Scuffed with scotch brite ready for pre treatment
|
Details
|
   |
|
02-26-2015
|
6.00
|
Attaching skin on Horizontal stabilizer
|
Details
|


|
|
02-25-2015
|
2.50
|
Fit hinge to elevator trim tab, trim tab to elevat
|
Details
|


|
|
02-24-2015
|
2.50
|
Finished riveting skin on Left elevator
|
Details
|


|
|
02-23-2015
|
3.50
|
Left elevator assembled to frame
|
Details
|


|
|
02-23-2015
|
2.00
|
Finished Main skin riveting right elevator
|
Details
|


 |
|
02-22-2015
|
8.50
|
Riveted Horizontal stabilizer frame with replaceme
|
Details
|


|
|
02-22-2015
|
3.50
|
Right elevator frame/stiffiners on skin
|
Details
|


|
|
02-22-2015
|
1.50
|
Attached skin to right elevator/ bent with 2 x 8 t
|
Details
|


|
|
02-21-2015
|
4.00
|
Left Elevator frame with SB Parts
|
Details
|


|
|
02-19-2015
|
1.00
|
Finished thru Primer elevator skins
|
Details
|


 |
|
02-17-2015
|
4.50
|
Alumi-prep, alodine, prime P60-G2
|
Details
|


|
|
01-18-2015
|
2.50
|
Edge bending frame for trailing edges of elevators
|
Details
|
   |
|
01-11-2015
|
2.50
|
Elevator trim tab
|
Details
|


 |
|
01-10-2015
|
6.50
|
Left elevator trim tab assembly
|
Details
|


 |
|
01-10-2015
|
2.50
|
Dissasembled Horizontal for replacement front spar
|
Details
|


|
|
01-09-2015
|
1.50
|
left elevator counter weight assembly
|
Details
|
   |
|
01-05-2015
|
1.50
|
Deburred remaining left elevator parts
|
Details
|
   |
|
01-04-2015
|
5.50
|
final prep elevators before alumi-prep thru primer
|
Details
|


|
|
01-01-2015
|
8.50
|
Elevator parts before corrosion protection
|
Details
|


|
|
12-30-2014
|
5.00
|
Temporarily assemblied elevator frames
|
Details
|


|
|
12-13-2014
|
6.50
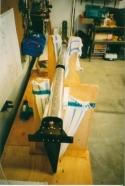
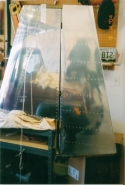
|
Skin to rudder
|
Details
|

|
|
12-12-2014
|
5.00
|
Rudder frame assembly
|
Details
|
   |
|
12-11-2014
|
6.00
|
Rudder
|
Details
|
   |
|
12-10-2014
|
10.00
|
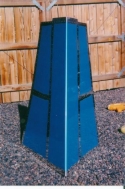
Rudder
|
Details
|


|
|
12-09-2014
|
7.00
|
Assembly of verical stabilizer
|
Details
|


|
|
12-08-2014
|
8.00
|
Back to vertical stabiizer
|
Details
|
   |
|
12-06-2014
|
6.50
|
Replacement parts an primer received
|
Details
|
   |
|
12-04-2014
|
9.00
|
horizontal stabilizer
|
Details
|
   |
|
12-03-2014
|
8.00
|
continued with horizontal stab
|
Details
|


|
|
12-01-2014
|
8.50
|
vertical stabalizer
|
Details
|


|
|
11-24-2014
|
2.00
|
Carpet an filler on work tables
|
Details
|

  |
|
11-23-2014
|
4.00
|
Work table
|
Details
|


|

